Navigation
SEARCH
This form does not yet contain any fields.

    Entries in Australia (55)

    Friday
    Oct072011

    Mum's Vanilla Slices

    Even though I call these "Mum's Vanilla Slices"; Mum never made them. My mum loved to clip or copy out recipes by hand, then over coffee she would  *hint *hint "oh, if only someone would make that"... and of course I always would  :) 

    Many countries have versions of a puff pastry with custard cake, in Australia it's the 'Vanilla Slice' that rules. Puff pastry base, covered in creamy custard and topped with more pastry and then iced or perhaps just a dusting of icing sugar. The vanilla slice is so popular thousands compete each year in the 'Great Australian Vanilla Slice Triumph". With categories for professionals, amateurs and juniors, the baking competition attracts the best of best in classic vanilla slices in the country.

    You're thinking I'm going to segue into the best of the best classic recipe now don't you?? Wrong... my family and friends do love this thoroughly nice recipe, but Mum's handed down recipe is an odd version of a vanilla slice in that it is egg free, the custard is made up wholly of custard powder (sorry to all MasterChef purists) and uses gelatine as a setting agent. 

    *custard powder; is a sweetened flavoured cornflour product that when milk is added and heated to correct temperature it becomes a custard sauce. Also used in baking, particularly shortbread type biscuits (cookies).

    I suspect many years ago Mum must have acquired the recipe from a brand name product as she names all the brands on the hand written scrap... wish she was still here to tell me about it, but I can still share the recipe for "Mum's Vanilla Slices" :)

    Mum's Vanilla Slices

    Makes 12

    23 cm square cake tin (9x9 inch) sides and base lined with foil or baking paper

    I haven't "poshed up" this recipe at all and it is as it was written, albeit minus the brand names of the products. The completed slice needs to be refrigerated overnight for ease of slicing.

    Ingredients

    2 sheets of ready rolled puff pastry

    *5 tablespoons of custard powder

    1/2 cup caster sugar (superfine)

    600ml of milk (20 fluid ounces)

    1 tablespoon plus 1 teaspoon of powdered gelatine

    1/3 cup hot water

    250ml of cream

    2 tablespoons of sour cream

    1 tsp pure vanilla essence/extract

    Icing

    1 1/2 cups of pure icing sugar (confectioners sugar)

    1 1/2 tablespoons of water

    1 tsp pure vanilla essence/extract

     Method

    Preheat oven to 230C (450F)

    1. Place pastry sheets on greased baking trays and prick well with a fork. Bake for 6 to 12 minutes or until golden brown. Remove from oven. Whilst still warm and using the base of your tin as a template trim the pastry to the size of the tin. 

    2. In a saucepan blend the custard and powder and sugar with sufficient milk to make a smooth paste. Add remaining milk. Cook over a low heat, stirring constantly until milk boils and becomes thick. Cook 1 minute before removing from heat.

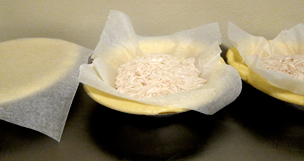
    3. Sprinkle the gelatine onto hot water and stir until thoroughly dissolved. Stir into custard and place a piece of wetted paper on top to prevent a skin forming. Allow to cool.

    placing wetted paper on top of custard will prevent a skin forming

    4. Place both creams, vanilla and custard in a mixer bowl of an electric mixer fitted with a paddle attachment. Beat on high speed until well blended. 

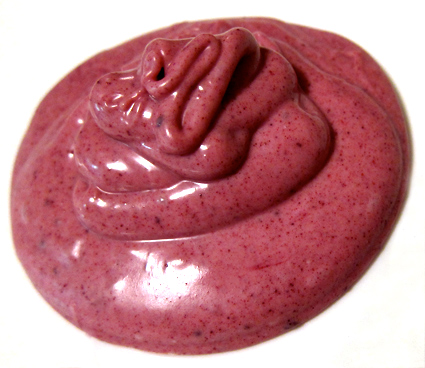
    beat together creams, vanilla and prepared custard

    Place a prepared pastry sheet in the bottom of your prepared tin, pour over custard and top with remaining pastry. Press down firmly with your hand. Set to one side.

    Icing

    Place icing sugar and water in a saucepan and warm over a low heat, stirring constantly until a good spreading consistency is reached. Add vanilla. Pour over pastry. Allow to cool. Cover and refrigerate overnight. Cut into 12 squares and serve.

    Happy Baking :)

    You might also like Vanilla extracts, essences, pods and pastes

    Friday
    Sep092011

    Double Pig and Prawn Money Bag Dumplings

                Double Pig and Prawn Money Bag Dumplings

    Join me on Facebook

    Shhhhh! I'll let you in on a secret, if I'm posting pictures of dinner you know something has gone awry. 

    My sweet, cute pug puppy has another side… a touch of demon dog that rears it's head every time I pick up a piping bag!! From biting our girl pug to chewing the power cords, baby Barry is certainly rambunctious! New plan, the puppy babysitters (namely my husband and step son) will mind the puppy on the weekend when I will whipping up amazing cupcakes; or something like that ;) But for today it's double pig and prawn dumplings.

    These are versatile little Chinese style dumplings, you can pop them into a soup broth, deep fry them, turn them into mini pot stickers or steam them like I have today… don't forget the sweet chilli sauce to dip them in! 

    Double Pig and Prawn Dumplings

    Ingredients

    30 to 35 wonton wrappers 7.5cm (3 inch) square

    125g (4oz) finely chopped bacon

    125g (4oz) finely diced raw prawn meat (raw shrimp)

    185g (6oz) minced pork (ground pork)

    *1/3 cup finely chopped spring onions

    *1/4 cup finely diced water chestnuts

    1 tbs finely chopped chives

    1 tbs corn flour (corn starch)

    1 tsp salt

    1/4 tsp ground black pepper

    1 tsp crushed garlic

    1 tsp grated fresh ginger

    sweet chilli sauce (to serve)

    Method

    Place all ingredients in a bowl, mix together with a wooden spoon then knead until smooth. Chill for 25 minutes.

    Open your packet of wonton wrappers. Working with about four at time (keep the others covered with a clean damp cloth to prevent them drying out) lay them out and place a small ball of filling in the centre of each wrapper.

     Brush a little water around the edges and draw up the sides to form a "money bag". Pinch firmly to seal and place on a tray lined with non stick paper, cover with damp clean cloth to prevent drying out and continue to make more dumplings.

     Steam in an oiled steam basket or on a oiled plate within a bamboo steamer for 15 - 20 minutes. 

    Serve with sweet chilli sauce for dipping. 

    *water chestnuts can be replaced with the white part of celery if desired.

    *this is what we call a spring onion in Melbourne Australia.... you may know it by a different name.

    Saturday
    Jan292011

    Eric the Valentine Emu Cupcake

                                 Eric the Valentine Emu cupcake

    Emu; second largest bird in the world by height, native to Australia. Covered with soft brown feathers, the emu male can reach up to a height of six foot six (201 cm) and has knife like nails. Emu's are curious and nosy animals.

    Valentines Day in Australia is different than in the US, we don't buy make or buy Valentines for all our friends and family. Valentines Day here it's all about your boyfriend/girlfriend, husband/wife, lover or significant other; it's a time when men book "that" romantic restaurant, shop for lingerie, chocolates and red roses.

    But I digress, it wouldn't be an "Australian animal" if I hadn't had at least one run in with one, so here goes...

    The picnic grounds were crowded, the giant bird waited until the chubby little blonde girl was about to take the first bite of her Vegemite sandwich before confronting her.

    The emu can't fly but the little girl had the "fight or flight instinct" and she ran. Her Mum was first one to yell "drop the sandwich", followed by a chorus of voices "drop the sandwich!", "drop the sandwich!" Try as she might the little girl couldn't drop the Vegemite sandwich that was now squashed between her clenched fist, she was too busy running. But eventually her legs tired and she stopped, dropped her sandwich that was quickly gulped down by the emu. 

    What followed was reminiscent of a 'Law and Order' episode, you know the bit where they throw in a funny one liner over the corpse of the just murdered body; the chubby little girls parents, Ranger Tom and the Emu stood there laughing (well, the emu wasn't laughing but he might as well have been). Ranger Tom quipped "You're a lucky little girl the emu loves you, they can rip out your guts with those claws"... everyone laughed... it wasn't funny!!! 

    Before you dismiss "emu love", take into account that after the female emu lays her eggs the male takes over hatching and raising the children; leaving the female free to find another male. Something to consider perhaps on Valentines Day when you open the fancy box your husband has given you to discover that "red satin sequinned thong"; just want you always wanted (NOT) when all you actually desired was someone to wash the dishes and mind the kids so you could go to yoga class. 

    Eric being made with various batches of coloured fondant/modelling paste

    Roll the fondant/modelling paste paper thin, I mixed the colours together. 

    Use a small sharp knife to cut feather shapes, attach to your bird with cake glue or water. 

    Happy Baking :)

    You might also like to make a batch of raspberry curd this Valentines Day....

                        Raspberry Curd

    To make simple raspberry curd heart cupcakes use a small heart cutter to cut a heart shape from the centre of your baked cupcake. Remove the heart, fill centre with raspberry curd & clotted or pure cream. Top with your heart cut out & dust with icing sugar.

    Wednesday
    Jan262011

    'Flower of a Vampire' trailer

    Wow, the reluctant sous chef and number one cupcake taster for the lone baker has something to share with you today. Yes, it's my step son Daniel and he has just released the trailer for his upcoming short film 'Flower of a Vampire'. We are all so, so proud of you Dan and wishing you a successful second year of film school in 2011!!! 


    'Flower of a Vampire' by Daniel Paxton-Zahra

    Back to baking now :) 

    Wednesday
    Jan192011

    Kangaroo Meat 

    Australian Kangaroo Meat Pie... next time I'll make extra hot food to photograph this was actually "moving" with the tugging of the plate... hungry people are so impatient!!!!!! 

    Quote of week from my husband Mark as he sat down to his kangaroo meat pie... "I love Kangaroo, it's my 7th favourite meat".

    A. who has a "seventh" favourite anything?? Do you open a box of chocolates and point to top right hand corner and say to yourself "there's my seventh favourite caramel fudge".  

    B. If it's your seventh favourite, doesn't that mean you don't like it? Daniel and I both asked this but Mark insisted "he loves Kangaroo" ;)

    Kangaroo meat is low fat & low calorie; because it is extremely lean, Kangaroo is ideally served rare to medium rare when barbecued, pan fried or grilled. The tougher cuts are diced in a casserole. 

    Mark bought kebab Kangaroo meat from the supermarket, kebab meat from Kangaroo should be from the striploin, tenderloin or rump... however the supermarket kangaroo meat was a bit of a mystery and definitely wasn't a prime cut. The resulting barbecued meat had that "elastic" snap of sinew, so the meat was transferred to the kitchen to be slow cooked. 


    diced mystery cut Kangaroo meat from the supermarket

    Cooking Kangaroo on the BBQ; Red wine and port pair well with roo meat, try marinading Kangaroo tenderloin for a couple of hours in a 1/2 cup of red wine, fresh lemon thyme, cracked black pepper, a couple of cloves of crushed garlic & one tablespoon of oil. Pre heat your BBQ, sprinkle roo fillets with coarse sea salt (you'll get that yummy salt crust) and cook on a well oiled grill, rare to medium rare. Rest the meat before serving/slicing. 

    Basic Australian Kangaroo Pies

    Australian pies traditionally have a shortcrust base and puff pastry top, I'm using commercial pastry today.

    makes 6 small hand held pies

    Ingredients

    1 kilo (2.2lbs) of kangaroo meat (tail, shank or roasting cuts) cut into bit sized pieces

    2 tablespoons of oil

    1 large onion, 1 carrot and 1 stick of celery all cut into a small dice

    2 cups low salt beef stock

    1 cup of water

    1/4 cup of red wine (I like more wine than this but my hubby doesn't, reduce stock to add more wine)

    1 tablespoon tomato paste

    1 tablespoon Worcestershire sauce

    good pinch of nutmeg

    2 tablespoons of flour

    salt and black pepper to taste

    3 sheets each of rolled puff pastry and short crust pastry 

    oil 

    6 pie tins

    Method

    Heat the oil in a large pot, brown the meat in two batches, remove the meat into a bowl and set to one side. 

    Add the vegetables to the pot, cook without browning for a few minutes, turn up the heat and add flour & nutmeg, stir for a two to three minutes to cook the flour. 

    Add water, wine, stock, Worcestershire sauce & tomato paste to the pot. Add meat back to the pot. Bring to the boil, reduce heat and simmer for 2 1/2 hours, remove lid and simmer for another 30-45 minutes to reduce liquid. Season with salt and pepper to taste.

    Refrigerate cooked filling until needed.

    Pre-heat oven to 200C (180 fan forced) - 400 F (360F with fan)

    Line pie tins with shortcrust pastry, *blind bake for 10 minutes. Set aside to cool.

    Divide meat mixture between the 6 pie shells, top with puff pastry and crimp edges with a fork. Glaze with milk or egg wash. Make a few small slashes in the top of the pastry to let steam escape.

    Bake pies for 35 to 45 minutes or until golden brown. Let cool a few minutes in tins before turning out and serving. Cooled pies can be individually wrapped and frozen for one month. 

     * blind bake pie shells by weighing down the raw pastry with beans, rice or baking weights. Non stick paper squares make it easy to remove weights after baking. Store your baked rice or beans in a jar and use again next time you are baking pastry.

    Do try replacing the lamb or beef in your favourite curry recipe with Kangaroo too, it really does make for an excellent curry.

    Kangaroo mince can be used in any of your mince recipes such as lasagne, meat balls or burgers. If your using the meat in burgers it must be cooked thoroughly. 

    For an excellent 'cuts of Kangaroo chart' see Southern Game Meats

    You might also be interested in...

    a review of crocodile and kangaroo pies

    or if it's all too much for you then how about pink frosting...

                                          Frosting

    Back to baking cupcakes now. Oh and for the record Mark's favourite meats are: duck, turkey, chicken, lamb, pork, beef &... kangaroo!

    Happy Baking :)

    Wednesday
    Jan052011

    Marks BBQ Beer Butt Chook

                                         beer can bbq chicken

    Back to cupcakes tomorrow, but my husband Mark is so proud of his barbequed beer butt *chook I thought I should share it with you.

    I must admit I was dubious the first time Mark wanted to barbeque a beer can chicken, I thought it was just a "gimmick". I was wrong and it actually makes perfect sense; the chicken is being steamed from the inside resulting in moist chicken meat and the exterior heat gives you a crisp skin finish. With the combined heat cutting down the cooking time, bbq beer butt chicken becomes week night doable... plus no kitchen clean up!

    It doesn't have to be beer... though Mark would disagree. It could be coca cola, rum & coke, lemonade etc... it just has to be a half full can.

    Or you can skip the can altogether and buy a non-stick beer can chicken roaster like this one from Hark.

    Hark non-stick beer can chicken roaster

    Lets cook a chook...

    Pour out half the contents of your can, you can use the beer to soak wood chips (chips need to be soaked overnight), save it to make sauce or just drink it. Now you're going to add flavour by adding straight to the can, it can be any combo you like; lemon or orange zest, squashed garlic cloves, fresh ginger, lemon grass, fresh or dried herbs, chilli and don't forget to add a bit of your chicken rub mix too. Punch a few extra holes in the top of your can using an old fashioned triangle bottle opener... or Marks method of stabbing a screwdriver or nail to form the holes.

    If you are using a beer can roaster, add the flavouring combinations to water, wine or juice. 

    Rub the skin of your room temperature raw chicken (Mark used a free range 1.8 kilo/4 pound chicken) with your favourite BBQ rub. This chicken used a basic mix of equal parts smoked paprika, brown sugar and coarse sea salt... rubbed into the cavity of the chicken first then rubbed into the skin of a lightly oiled chicken. Sprinkle with freshly ground black pepper. 

    Other flavour profiles include, Chinese five spice, cumin, italian seasoning mix, coriander powder, chilli, mustard powder, pre mix rubs, garlic salt, onion powder, etc.

    add flavour to your can

    The half full can is inserted into the chicken creating a tripod, resulting in this rather undignified position!  

    The chicken is cooked by the indirect heat method so in our case we have a hooded 4 burner gas BBQ (sorry BBQ purists); add wood chips to your smoking box or use foil sachets then the BBQ is preheated on high with all burners turned on. Once preheated turn 2 of the burners off, lets say the right hand side. Turn the other two burners on the left hand side down to medium. You should have a temperature of 180 cel or 360 F. 

    Position your chicken (drip tray in place) on the right hand side where the burners are turned off. Close the hood. For this sized chicken it took one hour and 20 minutes, this is included turning the chicken once as our heat is a little uneven. Use a meat thermometer if you are unsure about doneness. 

    That's it all done. You can go with the drama of serving it on the can, I prefer to remove the can (be careful it's hot, use tongs or heat proof gloves) then rest the chicken before carving. 

    Resulting chicken is super succulent

    It's summer here at the moment so we served the chicken with simple salads. 

    * 'Chook' colloquial term used in Australia and New Zealand for chickens. 

    Happy BBQing :) 

    You might also be interested in Bacon & Egg, Prawn Noodle Omelette 

    Friday
    Aug202010

    Mini MasterChef Jam Donuts

                       mini donuts, with plum jam and rose sugar


    doughnut |ˌdəʊnʌt| (also donut)

    noun

    a small fried cake of sweetened dough, typically in the shape of a ball or ring.

    Hmmm, today I tried the jam donut recipe that Gary made during a MasterChef MasterClass episode. Well, they are definitely light and fluffy and they taste divine but are they doughnuts?? 

    The batter is more of a yeasted fritter, they taste a bit like deep fried brioche; which in itself is not a bad thing but I'm not sure without the jam and the sugar coating you would be thinking "doughnut flavour". 

    However, whether your a donut aficionado or a donut newbie this recipe is worth trying. Not as sure about the shaping method which involves grabbing a handful of batter and squeezing off nuggets into the dry fryer, I used spoons! The donuts have a darker exterior than a standard donut due to the larger than usual dairy/sugar ratio in the batter. 

    I didn't have access to fresh lavender (it's still winter here) so I ground crystallised rose petals to flavour the coating sugar. I also changed the jam to plum jam, otherwise what follows is the MasterChef recipe...

    Ingredients

    440ml (15 fluid oz) milk 
    100g (3.5 oz)  unsalted butter, softened
    75g (2.6 oz) caster sugar (superfine)
    4 eggs
    20g (0.7 oz) fresh yeast (or half that amount if using dried yeast)
    4 cups plain flour (all-purpose)
    Vegetable oil, for deep frying
    200g (7 oz) raspberry jam (I used red plum jam)
    clotted cream, to serve

    Sugar Coating

    2 tsp lavender flowers (I replaced lavender with 1 tablespoon of ground crystallised rose petals)
    100g caster sugar (superfine)

    Step 1: Heat milk in a saucepan until tepid (37°C [98F] on a thermometer). Whisk in the butter, caster sugar and eggs. Place the yeast into a bowl and about ½ cup of the milk mixture. Break up the yeast with your hands to form a smooth paste. Transfer to the milk mixture, whisking to combine. Combine flour and ½ teaspoon of salt in a large bowl and make a well in the centre. Gradually pour in the milk mixture, whisking until smooth. Cover and set aside in a warm place to prove for 45 minutes - 1 hour.

    dough has more of a fritter consistency

    cover dough and set aside in a warm place

    dough risen and ready to use


    Step 2: Meanwhile, for the lavender sugar, combine lavender flowers with sugar in a large bowl, rub together with your hands until flowers are bruised. Set aside for 15-20 minutes to infuse.

    ground rose with sugar infusing

    Step 3: Pour oil into a saucepan until one-third full. Heat over medium-high heat until 165°C. Spoon donut mixture into 4cm round balls into the hot oil. Cook for 3-4 minutes until golden and cooked through. Remove, drain on paper towel, then toss in the lavender sugar.

    light and fluffy interior


    Step 4: Spoon jam in a small piping bag with a 5mm straight-edged nozzle. Push nozzle into the centre of each donut and pipe enough jam to fill.

    I used a squeezy cookie decorating bottle to insert the jam


    Step 5: Serve donuts with clotted cream. 

    Whether you serve them with clotted cream, in small cases or even tossed in a brown paper bag to eat in front of the TV they're a yummy treat the whole family will enjoy.

    Be sure to check out the official MasterChef site for the top rating Australian cooking reality show... I particularly love the Gary and George MasterClass recipes. 

    Happy Baking or should that be frying? :)

    You might also be interested in;

          Roses in food 

    Friday
    Aug132010

    Chocolate Transfer Decorations for cupcakes

    white chocolate cupcake with whitened ganache, topped with beetroot white chocolate decoration & gold leaf

    Chocolate transfer sheets are a fun & easy way to make professional looking toppers & decorations for your cupcakes.

    To make your cupcake decorations all you need is a chocolate transfer sheet or two, melted tempered chocolate or melted choc/candy melts (compound chocolate). Make sure your chocolate is just warm to touch... if your chocolate is too hot it will melt the design into a messy blur. 

    If you are new to transfer sheets or unsure about tempering chocolate, practising with compound/melts is a good idea as it's more stable and you will find it easier first time around. I'd recommend an offset/cranked spatula too; as it allows you to evenly and thinly spread the chocolate, but you can use a standard spatula.

    an offset spatula makes spreading the chocolate a breeze 

    available in 100's of designs, chocolate transfers sheet are thin sheets of acetate printed with an edible coloured cocoa butter design. 

     Decorations you can make for your cupcakes include...

    Shards; to make shards spread melted chocolate over the entire chocolate transfer sheet. When the chocolate is set peel away the acetate and break the chocolate into shards. Gently press shards into your frosted cupcakes. 

    Shapes; cut pieces of the acetate sheet into shapes. Spread melted chocolate over pieces and leave to set. Alternatively lay the pieces over a rolling pin, in a small bowl etc to create curves, twists or bowls. When the chocolate is set peel away the acetate and use decorations as desired. 

    Piping; Pipe monograms, words, flowers, hearts or patterns directly onto the transfer sheet. Allow the chocolate to set and carefully peel away acetate. Top your frosted cupcakes with your creations.

    aim for thin chocolate for cupcake toppers


    chocolate on transfer sheet piece drying in a curved shape by resting over a mini rolling pin

    peeling away the acetate leaves behind an edible transferred pattern

    Tips;

    If you pipe monograms or cut shapes you will end up with the inevitable "scrap pile", store your scraps in a sealed container and use them to top chocolate dipped truffles or chocolates.

    In hot weather store all your transfer sheets in the refrigerator in a sealed container to prevent the designs melting.

    Chocolate transfer sheets are available online from Fancy Flours (US) carry 125 different chocolate transfer designs, Cakes Around Town (AU), Roberts Confectionary (AU), Cakes Cookies & Crafts Shop (UK)

    Happy Baking :)


    Make your own beetroot flavoured & coloured chocolate here

    Did you miss Chocolate Twirly Swirly toppers? 

    Thursday
    Aug122010

    Beetroot Chocolate "Yes!", Beetroot Cookies "No!"

    white chocolate coloured & flavoured with dried beetroot (beet) powder

    Using beetroot powder is great way to naturally colour your icings, frostings and is one of my favourite flavourings for white chocolate. White chocolate flavoured with beetroot has a sweet flavour, slight berry notes and a touch of tingly acidity. The pretty natural speckled colour will add another dimension to your chocolate curls, twirls and shapes. 

    Using beetroot powder in white chocolate;

    stir in 1 teaspoon of sifted beetroot powder for every 100g (3.5oz) of tempered white chocolate. 

    Alas, beetroot powder doesn't work for colouring your cakes and cookies. The powder is highly susceptible to changes in pH levels, when exposed to pH levels above 7 the colour quickly fades to tan/yellowish brown.


    Before; the gorgeously coloured beetroot butter cookie batter

    After; the combined oven temperature and raising agent (baking powder) fade the colour dramatically

    Soooo, even though you won't be whipping a red velvet cake with your beetroot powder; you can produce deliciously different chocolate, fabulous frostings and fun confectionaries like coconut ice without having to reach for that bottle of red food colouring. 

    Beetroot powder is available is health food stores, selected grocery stores and chef supply stores. 

    Happy Baking :)

    You might also be interested in;

                            Red food colouring

    Monday
    Aug092010

    Whoopie Pies 

              mini whoopie pie tops a marshmallow and chocolate cupcake

    Off the shelf

    baking book reviews


    This weeks off the shelf is loads of fun & it's not cupcakes; it's Whoopie Pies by Sarah Billingsley and Amy Treadwell.

    This super cute 120 page padded cover hard back book is packed full of whoopie pie recipes & fillings. What is a Whoopie Pie (also known as Gobs)? They're a cross between a cake and a biscuit (cookie), soft textured with a creamy frosting type filling.

    As for the name 'Whoopie Pies' according to Wikipedia; Amish women would bake these (known as hucklebucks at the time) and put them in farmers' lunchboxes. When farmers would find these treats in their lunch, they would shout "Whoopie!" 

    For those outside the US there is a few points I should mention first. Many of the recipes use half butter/half Crisco. Crisco is a vegetable shortening common in the US (copha is not a suitable substitute). However, you can successfully use all butter in the recipes or buy Crisco online in Australia from USA foods; available in three sizes, plus sticks and butter flavoured. 

    marshmallow spreads... 'Fluff' and 'Jet-Puffed'

    Most of the fillings are buttercream based, though the traditional marshmallow fluff filling is included too. 'Fluff' or 'Jet-Puffed' marshmallow are difficult to obtain in Australia but if your curious to try it out Jet-Puffed marshmallow spread & Crisco vegetable shortening both are available online in Australia from USA foods

    Ahhhh, the publishers of this book have gone a little far with the "cute factor" by listing the ingredients in smallish pink font, it can demand some "squinting" or least popping on your glasses. 

    Now on to what I love about this book!! The cake and fillings recipes (listed below) are mix and match, giving you lots of opportunity to experiment with flavour combinations, plus the authors give other suggestions such as jam, cream, fresh fruits, glazes and sprinkles. How about Classic Chocolate Whoopie paired with strawberries & cream, mint buttercream or chocolate ganache? Good to see a couple of vegan & gluten free recipes are included too.

    So far I've baked the classic chocolate whoopie, vanilla whoopie and the pumpkin whoopie... all tasted great with the pumpkin just beating out the chocolate as our favourite. We tried four fillings from the book; salted caramel, strawberry buttercream, coconut cream, classic cream cheese and I also made a plain melted white marshmallow filling. The coconut cream & classic cream cheese were Marks favourite & I love the salted caramel. 

    Kids will find the mix and match fillings and decorating the whoopies fun, adults will love the tiramisu, matcha and ganache flavours to name a few. They're something different to bake for your next function; bake them large, medium or mini, piped or plopped onto the trays  they are delicious. Can't wait to try the carrot cake whoopie's and step son Daniel wants to try lemon with a flavoured cream cheese filling.  

    Recommended because of the novelty factor, the multitude of possible flavour combinations & they are loads of fun for kids and those young at heart. 

    I piped the whoopie batter into small rounds & baked for 5 minutes to create mini sized whoopie cupcake toppers, filled with melted white marshmallow. 

    The cake recipes:

    • Classic chocolate whoopie 
    • Red velvet whoopie 
    • Vanilla whoopie 
    • Mocha whoopie 
    • Marbled whoopie 
    • Chocolate chip whoopie 
    • Lemon whoopie 
    • Gingerbread whoopie 
    • Peanut butter whoopie 
    • Banana whoopie 
    • Pistachio-cardamom whoopie 
    • Graham cracker whoopie 
    • Oatmeal whoopie 
    • Pumpkin whoopie 
    • Carrot cake whoopie 
    • Vegan chocolate whoopie 
    • Vegan vanilla whoopie 
    • Gluten-free chocolate whoopie 
    • Gluten-free vanilla whoopie 
    • Whoopie cake 
    • Jalapeno cornbread whoopie 


    Recipes for fillings: 

    • Classic marshmallow 
    • Chocolate buttercream 
    • Classic cream cheese 
    • Classic buttercream 
    • Chocolate ganache 
    • Whipped chocolate ganache 
    • Mint buttercream 
    • Honey buttercream 
    • Rosewater buttercream 
    • Salty peanut butter 
    • Coconut cream 
    • Malted buttercream 
    • Salted caramel 
    • Candied ginger 
    • Dulce de leche 
    • Maple 
    • Maple-bacon 
    • Root beer 
    • Orange cream cheese 
    • Lemon mascarpone 
    • Tiramisu cream 
    • Strawberry buttercream 
    • Peachy marshmallow cream 
    • Banana 
    • Matcha buttercream 
    • Vegan chocolate "butter" cream 
    • Vegan vanilla "butter" cream 
    • Bacon-chive goat cheese 
    • Chocolate glaze  

     See Whoopie Pies made by the authors themselves in this short video

    Thank you to Jennifer for pointing out that 'Solite' a vegetable shortening available in Australia from cake decorating stores can substitute for Crisco if desired. 

    Happy Baking :) 

    You might also be interested in a recipe for...

               Raspberry Marshmallow