Navigation
SEARCH
This form does not yet contain any fields.

    Entries in yellow (18)

    Friday
    Sep212012

    Day Of The Dead Catrina Cupcake

    day of the dead catrina cupcake

    Join me on Facebook

    Day of the Dead (Spanish: Día de los Muertos) is a Mexican holiday celebrated throughout Mexico and around the world in other cultures. The holiday focuses on gatherings of family and friends to pray for and remember friends and family members who have died.

    wikipedia

    La Calavera Catrina ('The Elegant Skull') 1910 zinc etching by Mexican printmaker José Guadalupe Posada.

    Popularized by José Guadalupe Posada, Catrina is the skeleton of an upper class woman, and one of the most popular figures of the Day of the Dead celebrations, which occur during two days, November 1 and November 2.

    Ha, I love the day of the dead celebration; it's fun, macabre and makes for a fabulous themed event.

    Whether you want to make a Catrina or the simpler skull cupcake picks at the end of today's post, throw a day of the dead party this year!

    starting the skull

    Catrina starts with a basic white fondant skull shape. Features for the skull are indented and surrounds built up with modelling paste. You can see I've marked out where the mouth will be and a hole was added to the bottom for a toothpick. Once dry, lustre, petal dust and edible food marker added shadows and features to the piece. The hat itself is a round of thinly rolled modelling paste with a shell tool used to mark the edges. 

    Scruffy flowers were made with coloured modelling paste. Small pieces of each colour were rolled thinly and the edges were either pulled out with a small ball tool or cut into a fringe with a craft knife. From there they were rolled up and the excess pinched off the end to form a flower. 

    Finished flowers are very small and if you are thinking this all sounds a bit fiddly perhaps day of dead mini fondant toppers are what you are after. 

    Mini Day of the Dead fondant cupcake picks are super cute, easy enough for the kids to make and look fabulous topping a display of mini cupcakes. 

    Mini Day of the Dead fondant cupcake picks 

    basic white fondant skull shapes

    Form a basic skull shape from white fondant, use a toothpick to pierce a hole in the bottom of the skulls.

    Let your skull shapes dry for a few hours (or overnight) and then using edible food markers, edible glitter and lustre duster to decorate your pieces. Insert half toothpicks that have been coloured with food colouring into the skulls and top your mini cupcakes.

    Happy Baking :) 

    Looking for Catrina and Day of the Dead figures? SilverCrow has a range of traditional and not so traditional Day of the Dead pieces. Search 'Day of the Dead' once there.

    one of the many day of dead figures available from SilverCrow

    Or perhaps a Catrina pill/mint box?   

    you might also be interested in gothic horror cupcakes 

    Wednesday
    Oct262011

    Mars Attack!! No bake Mars Bar "planets". 

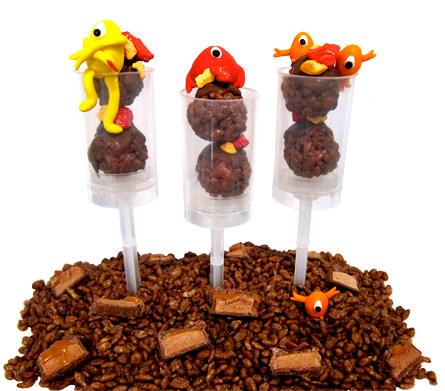
    mars attacks!!! push pops

    Have you entered the cake push pop container competition yet??  I have sample packs of six push pop cake containers to give away to six lucky people.   All you have to do is leave a comment here or on facebook explaining in 25 words of less "your idea" for pops... could be for the cake part or perhaps an event idea. Hubby Mark and Step son Dan will choose two winners each and I'll choose two winners. Competition drawn the last weekend of October. 

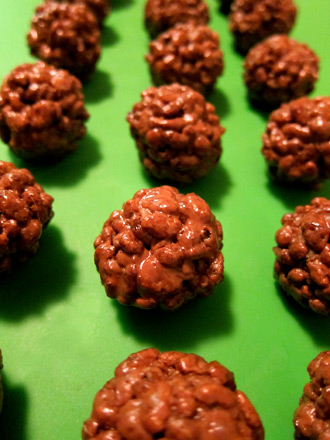
    Last minute non-scary Halloween treats for the little ones, fun no-bake Mars Bars Planet push pops.  A versatile quick and easy mix that can be pressed into cupcake cases, roll in balls to make "planets" and either pop two in each push pop cake container or insert a lollipop stick for planet pops. 

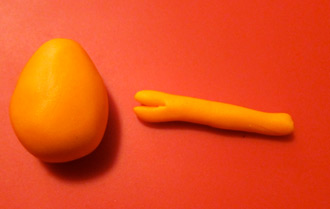
    Give the kids assorted coloured fondant to make simple aliens, a food marker can be used to draw the eyes, mouth or nose if desired. Encourage simple shapes and supply a small paint brush and a glass of water so arms and legs can be attached. 

    simple shapes, easy for little hands to manage

    Mars Bar Planet Balls

    adapted from no-bake chocolate cakes Australian Women's Weekly 'Cupcakes' 

    Ingredients 

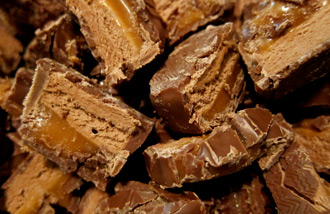
    265 grams  ( 9.34 oz) Mars Bars....  (5 bars)

    60 grams (2.11 oz) butter 

    3/12 cups Cocoa Pops (Cocoa Krispies) 

    Topping

    200 grams (7oz)  milk or dark eating chocolate (melted)

    Assorted small lollies/candies ... I used choc rocks

    Method 

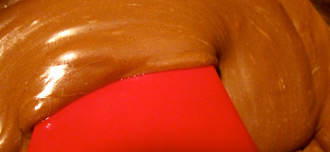
    Slice Mars Bars and place them in a medium saucepan with the butter. Melt over low heat, stirring until smooth.

     Stir in Cocoa Pops until well combined and roll firmly into 24 balls (about 2 heaped teaspoons per ball).

    Top each ball with a little melted chocolate and a few lollies. Refrigerate 30 minutes or until set.

    Top with fondant aliens and package in cake push pop containers or in cellophane bags. 

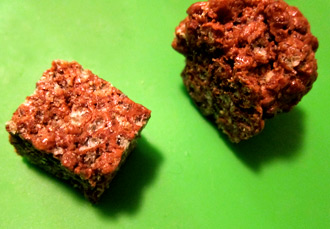
    Other Ideas; Mars Bar mixture can also be used to replace LCM's (Rice Krispie Treats) as structural elements in your cake decorating. Easy to carve, shape and it's not as sticky as the marshmallow mixtures.

    Edible ice-cream bowls can be made by turning smalls bowls upside down, cover each bowl with plastic wrap and spray with oil in a can. Press Mars Bar mixture over the bowls to cover, trim edges if necessary and refridgerate for 30 minutes. Ease off the bowl moulds, peel away plastic wrap and you have "edible ice-cream bowls".

    Happy Halloween and Happy Baking :) 

    Wednesday
    Oct122011

    Evil Egg and Egg Shell Food Containers

    evil egg fondant topped vanilla custard, caramel sauce and brioche cinnamon toast dippers

    Join me on Facebook

    Bake a lot and go through a whole lot of eggs? Well, you might as well put those empty egg shells to use, they make fabulous serving containers for sweet and savoury dishes. You can dye the shells to match your theme, use them for amuse-bouche scrambled eggs, to hold lollies and candies, filled with piped chocolate mousse or as I have done today "evil eggs" for Halloween. 

    Guests spoon off the evil fondant toppers to reveal vanilla custard, I served them in shot glasses with caramel sauce to add to the custard and toasted brioche batons tossed in cinnamon sugar for dipping. Because the custard needs refrigeration and the fondant doesn't like refrigeration, these have to be made no longer that one and a half hours before serving. 

    The easiest way to get a neat cut on your eggs is to use an egg topper, but a knife and steady hand will suffice.

    there is two main types of egg toppers; scissors or the one I use the plunger type.

    My egg topper works by first placing your egg on a folded dish towel, positioning the bowl shaped end on egg and lifting the plunger handle, release the handle and ta-da you have a topped egg. As you top each egg, slide the contents into a bowl to use for your cooking needs. 

    Preparing you shells

    Place your emptied shells in a saucepan, cover with cold water, bring to the boil. Reduce heat to simmer and simmer for 3 minutes. Turn of the heat and with a slotted spoon remove eggs shells from water and transfer to a baking rack to dry overnight. Dried shells can be stored indefinitely. 

    dried shells ready to use

    To make evil eggs, you will need white fondant, egg yellow, red and black coloured fondant and a black food marker for the eyes. Optional; cake decorators clear gel or leaf varnish to add shine to the yolk. 

    Fill your shells with vanilla custard (home made or store bought) until it's three quarters full. Roll and shape pieces of the white fondant and one by one top the custard filled eggs, attaching the fondant to the top of the shell so it's not touching the custard. Shape a pieces of the yellow fondant to form yolks, attach to the white fondant with water.. don't forget to add a few drips! Add eyes the white and red fondant, eyebrows with the black fondant, attach with water. Draw a black dot on the eyes. Glaze if using. 

    Refrigerate one to one and half hours before serving. 

    Happy Baking :) or today it's not baking it's... lol, not sure "egging"?

    my egg topper from The Red Spoon Company (AU)

    more in the mood in for ice-cream?

    Baci ice-cream

    or run out of time for Halloween cupcakes... pop these together in seconds.

    Along came the Spiders

    Thursday
    Jan202011

    Bundy Banana Grog Cupcake and toffee toppers

                bundy banana grog cupcake

    Grog; refers to a variety of alcoholic beverages. The word originally referred to a drink made with water or "small beer" (a weak beer) and rum, which was introduced into the Royal Navy by British Vice Admiral Edward Vernon on 21 August 1740. Vernon wore a coat of Grogham cloth and was nicknamed "Old Grogham" or "Old Grog". In Australia and New Zealand, the word has come to mean any alcoholic drink. wikipedia

    Bundaberg rum; a dark rum first produced in Australia in 1888 to make use of the left over molasses from processing sugar cane, often just referred to as "Bundy".

    All our minds in Australia have been on the floods that have devastated Queensland, the Bundaberg region has been hit particularly hard, half the millions of dollars of sugar crops have been destroyed. Banana crops are fine but with the other fruit crops that have damaged the demand for bananas will push prices up. 

    Today's cupcakes pay homage to Queensland with banana's, Bundaberg rum and sugar. 

    Use overripe bananas, you know... the ones you swear weren't ripe yesterday but all of a sudden they're black and brown. the riper the banana the more intensely "banana" flavoured your cakes will be

    Bundy Banana Grog Cupcakes

    makes 12 cupcakes (I baked small ones today and made 18, baking time was reduced by 6 minutes)

    Ingredients

    1 1/4       cups plain flour (all purpose)
    1 tsp        baking powder
    Pinch       salt
    1 cup       white sugar
    1/2 cup    vegetable oil
    2             large eggs
    3/4 cup    overripe mashed bananas (about 2 medium)
    2 tbls       Bundaberg rum (dark rum)

    12 cup muffin tin lined with paper cases

    Preheat oven 180c (360F)

    Method
    In a small bowl, mix together flour, baking soda and salt.

    In another bowl, whisk together the sugar, oil, and eggs until smooth. Add banana, whisking well, whisk in rum. Swap to a wooden spoon and add flour mixture, stir until smooth... take care not to over mix as it will toughen the mix.

              rum will preserve the yellow colour

    Scoop batter into prepared cupcake pan. Bake in preheated oven for 22 to 26 minutes or until tops of cupcakes spring back when lightly touched Let cool in pan on rack for 10 minutes. Remove from pan and let cool completely on rack.

                 resulting cakes are super moist

            Toffee Nuts and Fruits

    I used 'banana chips', honey dried/baked banana pieces today but any oven roasted nut, freeze dried fruit piece will work. Sugar pieces will last a couple of hours before starting to dissolve. You can also use fresh strawberries or dried apricots, figs etc with spectacular results... however the moisture content means you will have to use the sugar pieces within 30 minutes.

    I didn't want too much of an amber colour today as I wanted the banana chip to shine through, so I removed the toffee from the stove top as soon as I saw the colour starting to change. 

    The bubble in the toffee was caused by my impatience as I started to dip before all the bubbles has subsided ;) You can change the direction of the toffee, create curves etc., by manipulating the direction of the skewer when first dipped.

    This is the bit where I say "it's HOT" so take care and make sure small children and pets are out of the room before you begin.

    Ingredients

    18 banana chips or hazelnuts etc., 

    2 cups sugar

    1/2 cup water

    18 wooden skewers 

    old newspaper to cover your floor

    kitchen sink half filled with ice water

    heavy chopping board or object to way down the end of the skewers

    Method

    Cover your floor area under where you will dip the toffee pieces with newspaper.

    Insert skewers into banana chips.

    Place the sugar and the water in a heavy based medium sized saucepan. Over medium heat, stir until sugar is dissolved. Stop stirring now and continue to cook until the toffee becomes a light amber colour. Remove from heat and dip base of saucepan into the cold water to stop the cooking process. Set aside for 6 to 8 minutes to cool slightly, then dip a banana chip into the toffee, lift out and secure the end of the skewer under your weight.

     excess toffee will fall onto newspaper covered floor

    Let gravity do the rest, the excess toffee will fall onto your newspaper leaving you with a "toffee tail" attached to your banana chip. Leave a few minutes to set. I dipped the end of the banana chips in tempered dark chocolate to finish.

    Pipe a swirl of your favourite chocolate frosting (spiked with rum of course!) onto your cupcakes and top with toffee banana topper.

    * note is you are using hazelnuts or any hard nut, make a hole with a darning needle and then insert your wooden skewer. 

    Donate to the Queensland governments flood relief appeal

    How to clean your (hopefully not burnt) toffee pot;

        Ooops I burnt the toffee again!

    Thursday
    Jun032010

    Cupcake Cases, Liners, Papers & Wrappers

    bright solid colour cupcake cases

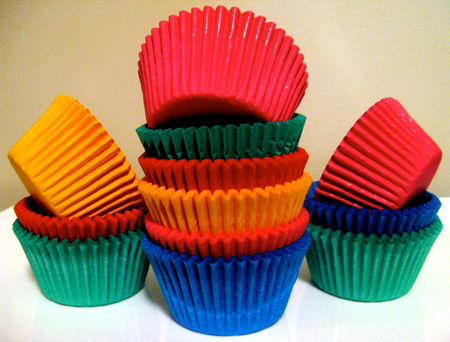
    Cupcake liners can just be pretty, act as an inspiration or match your theme like these versatile solid colour cupcake cases.

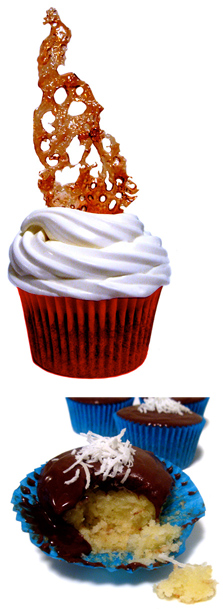
    I'm impressed with how these solid colour cupcake cases are true to colour after baking... even with chocolate batter. They keep their shape well & I haven't experienced "case fall" with them. 

    red and aqua blue used that I used for coca-cola and bounty bar cupcakes

     One problem, about 5% arrived with wrinkles still usable but not terrific for presentation

    wrinkle mid way up the case on a small percentage of those that were delivered

    Other than that I love these 100% Nordic greaseproof cases, with over 10 colours to choose from they are sold in packs of 40 from Fancy Flours (US)

    *Fancy Flours; you will need to search for each colour separately 

    Thursday
    Mar182010

    Coloured Toothpicks

    food colour painted toothpicks

    Last time I was making cupcake picks I was thinking they would look so much better if the toothpick holding it up was in a matching or contrasting colour rather than the raw wood. 

    Today I made batches of coloured toothpicks to store for future use.

    Method one bright colours; paint undiluted food colour paste or gel straight onto the toothpick. Works well with yellow, red, orange and pink. Does not work with blues, purples, greens... they all look come out looking "black". Set aside on a baking rack to dry out completely. 

    You can also get a distressed or shabby chic look by wiping off undiluted colour with a cloth. Set aside to dry.

    obtain soft shades with method two

    Method two is my favourite; dilute a drop or two of food colour in warm water, soak batches of toothpicks until desired colour is reached. With this method you can get all the pastels and shades you desire.  Set aside to dry.

    You can also use natural colour solutions to soak the toothpicks in; coffee, black tea, matcha, beetroot (beet) juice and the like. 

    Wooden skewers can be coloured in the same way as the toothpicks.

    Do allow the toothpicks to dry throughly, preferably overnight. If they aren't dry enough they look like the yellow toothpick in the top photo, slightly glossy.  

    Tuesday
    Feb162010

    Cupcake Cases, Liners, Papers & Wrappers

    Cupcake liners can match your theme, act as an inspiration, or just be pretty like these cupcake cases with a touch of gold.

    These sweet pretty pink & yellow medium weight cases with a swirl of gold are what I would describe as "fairy cake" size with a 2.5cm (1") wall & a 4.4cm (1.75") base. 

    Multi packs of four colours containing 135 cups from Fancy Flours

    A traditional pattern in gold adorns white cases. Available in packs of 25, they are made from greaseproof Swedish paper, 3.1cm (1.25") tall and 5cm (2") across the base. Also available as mini's from Fancy Flours 

    Both types bake extremely well, with little or no staining; they do look better with light coloured cake, think sponge cake or vanilla buttercake.

    You might also be interested in:

        All that glitters

    You might also be interested in:

       Raspberry Jam

    Monday
    Feb012010

    Cupcake Cases, Liners, Papers & Wrappers

    Cupcake liners can just be pretty, act as an inspiration or match your theme.

    I do like a design to carry through to the base of a liner like this fabulous swirl pattern does on these bold solid colour liners. Imagine a spring time yellow theme, blue cries out for piles of white frosting and green is just so minty!

    These cases have straight sides, are of medium size and are made from quality greaseproof Swedish paper. 

    Available in six different colours: Yellow, Blue, Green, Red, Purple & Gold

    The cases cup in packs of 40 from Fancy Flours

    Page 1 2