lemon myrtle and golden syrup mini friands
Join me on Facebook
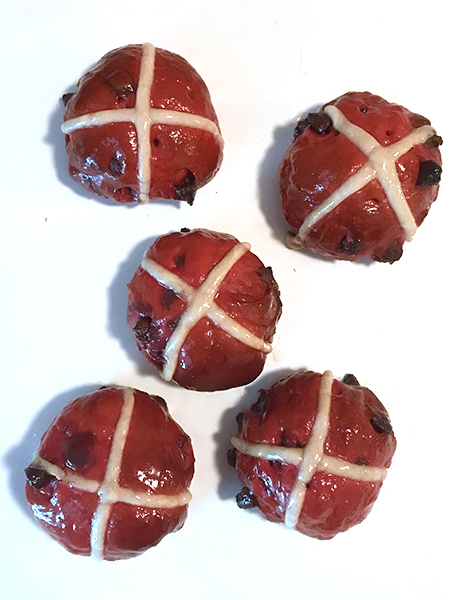
 Anzac Day 25th April: a national day of remembrance for Australia and New Zealand
Feel like baking something different this ANZAC Day but still want that aussie theme? Then mini lemon myrtle and golden syrup friands tick all the boxes. Friands are the Australian version of French financiers... ours are baked in an oval shape, flavoured and often with fruit. Lemon myrtle is Australian plant and golden syrup whilst not originating in oz is the traditional flavour of an Anzac biscuit.
These little tea cakes taste like "a cuddle from nanna", all sweet and familiar. Plus it's a one bowl, no mixer and 10 minutes or under bake.
With less than a cup of flour it's an easy swap to gluten free, just change out the flour for plain gluten free and make sure your baking powder is gluten free too.
 Lemon Myrtle
Botanical name Backhousia citriodora, Lemon Myrtle has long been used in culinary and medicinal ways by Indigenous Australians and is a popular "bush food" flavour. Grows wild in parts of Queensland.
Dang just I love Lemon Myrtle with it's delicious lemon/bordering on lemon grass aroma and flavour plus a little goes a long way!

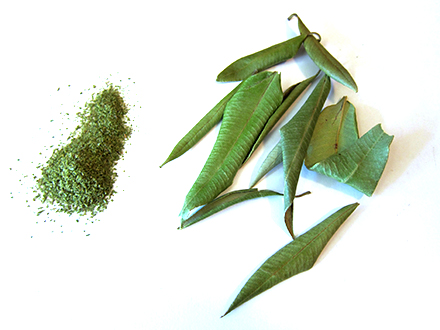 You buy it in leaves or ground.
Use the ground in your cakes, biscuits/cookies, breads. Try it mixed in mayo and dips, add it to rice and noodle dishes taking advantage of the lemon grass like flavour... go easy it's strong.
 lemon myrtle mayo dip for seafood
The leaves are used for teas, infused into milk or cream for ice-cream, custards or white chocolate ganache to fill your macarons.
 I'd like to tell you I make my own tea, nah I buy green tea lemon myrtle tea bags for afternoon drinking.
Lemon Myrtle and Golden Syrup mini friands
 Pans: these are a friand pans, I'm using the mini with the embossed base today but you could use a mini muffin tin.
Ingredients
*I cup of almond meal (almond flour)
1 1/4 cups of sifted icing sugar (confectioners)
3/4 cup of sifted plain flour (want gluten free? Swap out for gluten free flour)
1/2 tsp baking powder
1/2 teaspoon of ground lemon myrtle
5 egg whites
125g salted butter, melted
1/4 cup of golden syrup (oil your cup for easy removal)
Preheat oven to 180 cel (170 cel fan forced)
*I'm using Australian measuring cups, a cup is 250ml
Method
 sift straight into your bowl to save dishes and time
 Put the almond meal, icing sugar, flour, baking powder, lemon myrtle, egg whites, melted butter and golden syrup into a mixing bowl.
Stir or whisk until just combined, don't over mix.
 Divide mixture into two mini greased friand tins, or if you just have one you bake in batches.
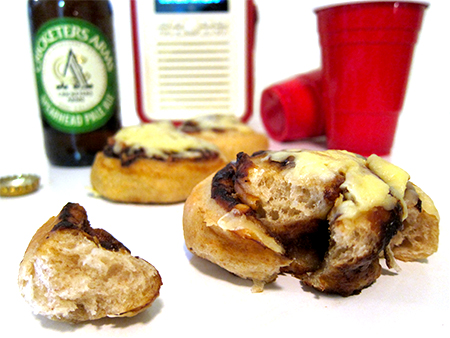
 Bake for 8 to 10 minutes, being careful not to over bake... they will look like this, a bit golden around edges, slightly puffed.
All done that's it .... they are best eaten warm or at least the same day, but they do freeze extremely well once cooled.
 Scented with lemon myrtle they have a slight sugar crust and are super moist and light.
Notes: if you've used a mini muffin pan instead of friand pan, the baking time will be slightly different... check from 8 minute mark to avoid over baking.
Happy Baking :)
 and since I was thinking of nanna's, it was far more likely your nan would give you lollies so in that spirit make starburst fruit chew flowers for your cupcakes.