Navigation
SEARCH
This form does not yet contain any fields.

    Entries in cakes (4)

    Tuesday
    Nov052013

    Chocolate Soil 


    crystallised chocolate soil 

    Join me on Facebook or view my Flickr Gallery

    A two ingredient chocolate soil, I'll give you all the dirt today (ok couldn't resist) on how make it with the least amount of cleaning up.  

    With chocolate soil you can add crunch and texture to a plated dessert, make pot plant cupcakes, set up a garden scene for your cake or perhaps just sprinkle on your favourite ice-cream. 

    Flavour it up; you can use a flavoured dark chocolate i.e. blueberry, orange, mint etc for flavoured soil or add your own flavour by stirring in cinnamon, ginger, chilli flakes, a drop or two of peppermint oil or whatever takes your fancy. 

    We are aren't going to use a *candy thermometer, we are going to do this by eye... a photo will act as your guide. 

    Here we go...

    Chocolate Soil 

    Ingredients

    100g (3.5OZ) Caster Sugar

    75g (2.6OZ) Dark Chocolate roughly chopped (even if you don't usually like 70% dark chocolate, I would recommend using it here because your are adding sugar to counteract the bitterness)

    Tools.... a wire whisk and a baking tray lined with non stick paper ready for you to tip your completed soil on. 

    Method

    On you stove top in a small to medium saucepan add the caster sugar, gently pour in 2 tablespoons of cold water. We are being gentle so we don't splash sugar crystals on the side of the pan.

    Turn on your heat to high and you are going to just let it do it's thing without stirring, the sugar will dissolve and bubble and boil until you see "golden brown edges". 

    the center of the boiling sugar is still clear, the edges have changed to golden brown. 

    have your roughly chopped chocolate ready to go

    Immediately remove saucepan from the heat and all at once whisk in the chocolate, along with any flavouring if using. Don't forget to whisk around the edges. Whisk until all the chocolate is coated, this doesn't take long ... a couple of minutes.

    it starts to look like "soil" almost instantly 

    Yep, you're done, it's finished and ready to poured onto your non stick paper prepared baking tray to cool.

    finished chocolate soil

    Once cool, store in an airtight container for up to a week, or freeze up to a month.

    *I've adapted this recipe from Heston Blumenthal's chocolate soil... halved the sugar and made it a simpler soil. His recipe has many more elements and is part of his wickedly delicious tiramisu recipe. Check out Hestons tiramisu on SBS food

    Clean up tips: Remember how we cleaned up our sugar work saucepans? It's the same today, fill your saucepan with water, bring to the boil, empty the water out and wash as per usual. Clean your whisk the same way, boiling water will remove any stuck on crystallised chocolate.

    *really want to, need to, use a candy thermometer... 135 cel or 275 F. 

    Happy Baking :) 

    You might also like to make fast bubble sugar decorations/toppers.

    Make quick and easy faux gingerbread mushrooms

    You've made the soil now make the dust... Nutella dust 

    a change from chocolate? Make a fondant gold fish! 

    Sunday
    May272012

    Little Bo Peep Cupcake - Steaming Fondant

                           little Bo Peep cupcake with steamed fondant finish

    Join me on Facebook

    Been watching 'Cake Boss'? Always wanted to try steaming your fondant but worried your flowers will droop, your bows flop and your bits fall off? It's easier than you think, trays of fondanted cupcakes to your giant tiered creation literally take seconds to steam to that shiny finish you have always desired.

    A quick look at steaming today...

    my portable steamer for cakes... and my clothes when the fibromyalgia prevents me from ironing!

    Firstly, the steamer unit; we are talking "clothing steamers" here, the type you would use to get the wrinkles out of a business shirt or your work jacket. Clothes steamers are either freestanding (like the ones Buddy uses on Cake Boss) or portable like the one I use.

    I use a small portable steamer unit.

    Make sure your steamer head is clear from any blockage.

    All the steamers work in pretty much the same way; you put water in the tank and turn it on. Make sure your hose isn't tangled and your steamer head is clear from any blockage and you are ready to steam!! You will know it's ready to use when you see steam coming from the head.

    Steam: Not standing too close to your cake and using light sweeping movements, (similar to if you are spraying painting) move your steamer head over your fondanted cake. This only take seconds. You will now have a shiny cake.

    Troubleshoot: 

    You don't want to melt your cake so don't linger on any one spot with the steamer... light sweeping movements only. As you can see on the quick demo cupcake I made, even the finest modelling paste pieces like the bow and crook won't collapse and your lashes/eyes and bit and bobs won't fall off when light steaming has taken place.

    Avoid any risk of water spotting by making sure your hose is not kinked, a kinked hose will lead to a build up of steam and water droplets that will stain your cake. Ditto with the steaming head; blockages lead to water droplets. 

    Practice!! Practice steaming on dummy fondanted cupcakes/cake if it's your first time, it's the best way to get  to know your particular steamer and will save you any heartbreak down the track. 

    Colors intensify/change with steaming. If you are matching a clients fabric sample for example you will need to check the steamed colour change. 

    I've used the cute little boiled lollies on the demo Little Bo Peep Cupcake today to remind you of what the surface of your steamed cake will feel like after steaming; a little bit sticky/tacky. Your cake will fingerprint easily, dust etc will attach to the surface, something to keep in mind if you will be transporting your cake. 

    Isomalt gems, sugar work, boiled lollies and candies are not meant to be steamed, but if your steaming at the venue, the cake is about to be devoured then of course you can steam.

    That about covers it, steamed fondant finishes can look fabulous whether it's shiny, shiny, primary colours or a gentle sheen on ivory.

    Have fun and happy steaming :) 

    Monday
    Aug162010

    Mini Madeleine's 

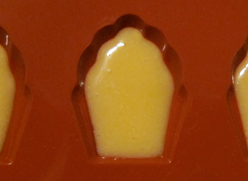
               20 hole Paderno silicone mini madeleine mould

     Tool time the kitchen tools and gadgets I love

    Awww, this silicone baking pan is just so gosh darn cute!! Bake mini madeleine cakes (sometime called cookies) in this adorable World Cuisine/Paderno non-stick silicone mould. 

    Each madeleine hole holds a half teaspoon of cake batter.

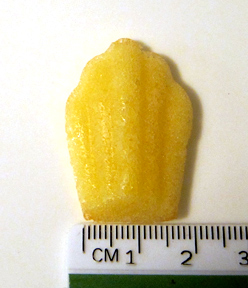
    The resulting cakes measure a tiny 1.5 cm (0.6 inch), perfectly sized for cupcake toppers. 

    The mini madeleine mould is temperature resistant from -40 to 260C (-40 to 500F) making it ideal for baking cakes, cookies, as a mould for chocolates, candies, jellies or even ice-cubes. 

    Available from...

     Happy Baking :) 

    Monday
    Aug092010

    Whoopie Pies 

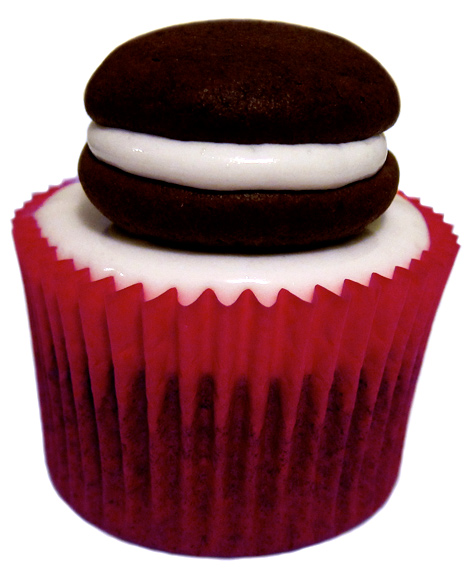
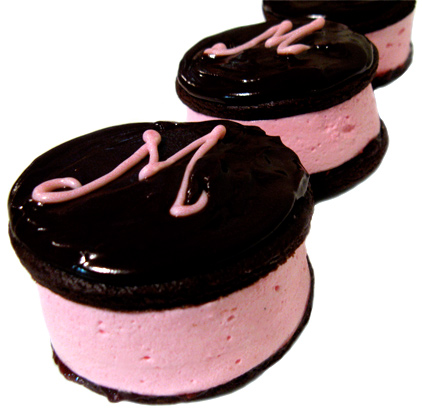
              mini whoopie pie tops a marshmallow and chocolate cupcake

    Off the shelf

    baking book reviews


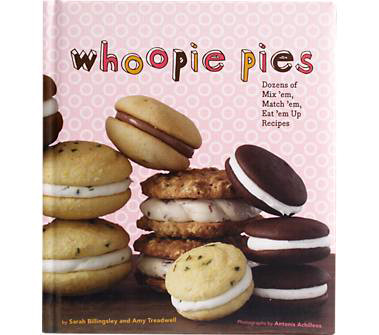
    This weeks off the shelf is loads of fun & it's not cupcakes; it's Whoopie Pies by Sarah Billingsley and Amy Treadwell.

    This super cute 120 page padded cover hard back book is packed full of whoopie pie recipes & fillings. What is a Whoopie Pie (also known as Gobs)? They're a cross between a cake and a biscuit (cookie), soft textured with a creamy frosting type filling.

    As for the name 'Whoopie Pies' according to Wikipedia; Amish women would bake these (known as hucklebucks at the time) and put them in farmers' lunchboxes. When farmers would find these treats in their lunch, they would shout "Whoopie!" 

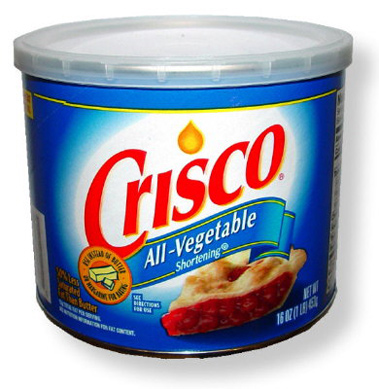
    For those outside the US there is a few points I should mention first. Many of the recipes use half butter/half Crisco. Crisco is a vegetable shortening common in the US (copha is not a suitable substitute). However, you can successfully use all butter in the recipes or buy Crisco online in Australia from USA foods; available in three sizes, plus sticks and butter flavoured. 

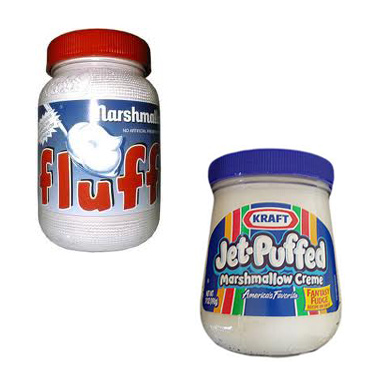
    marshmallow spreads... 'Fluff' and 'Jet-Puffed'

    Most of the fillings are buttercream based, though the traditional marshmallow fluff filling is included too. 'Fluff' or 'Jet-Puffed' marshmallow are difficult to obtain in Australia but if your curious to try it out Jet-Puffed marshmallow spread & Crisco vegetable shortening both are available online in Australia from USA foods

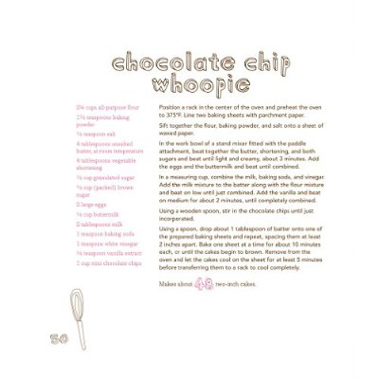
    Ahhhh, the publishers of this book have gone a little far with the "cute factor" by listing the ingredients in smallish pink font, it can demand some "squinting" or least popping on your glasses. 

    Now on to what I love about this book!! The cake and fillings recipes (listed below) are mix and match, giving you lots of opportunity to experiment with flavour combinations, plus the authors give other suggestions such as jam, cream, fresh fruits, glazes and sprinkles. How about Classic Chocolate Whoopie paired with strawberries & cream, mint buttercream or chocolate ganache? Good to see a couple of vegan & gluten free recipes are included too.

    So far I've baked the classic chocolate whoopie, vanilla whoopie and the pumpkin whoopie... all tasted great with the pumpkin just beating out the chocolate as our favourite. We tried four fillings from the book; salted caramel, strawberry buttercream, coconut cream, classic cream cheese and I also made a plain melted white marshmallow filling. The coconut cream & classic cream cheese were Marks favourite & I love the salted caramel. 

    Kids will find the mix and match fillings and decorating the whoopies fun, adults will love the tiramisu, matcha and ganache flavours to name a few. They're something different to bake for your next function; bake them large, medium or mini, piped or plopped onto the trays  they are delicious. Can't wait to try the carrot cake whoopie's and step son Daniel wants to try lemon with a flavoured cream cheese filling.  

    Recommended because of the novelty factor, the multitude of possible flavour combinations & they are loads of fun for kids and those young at heart. 

    I piped the whoopie batter into small rounds & baked for 5 minutes to create mini sized whoopie cupcake toppers, filled with melted white marshmallow. 

    The cake recipes:

    • Classic chocolate whoopie 
    • Red velvet whoopie 
    • Vanilla whoopie 
    • Mocha whoopie 
    • Marbled whoopie 
    • Chocolate chip whoopie 
    • Lemon whoopie 
    • Gingerbread whoopie 
    • Peanut butter whoopie 
    • Banana whoopie 
    • Pistachio-cardamom whoopie 
    • Graham cracker whoopie 
    • Oatmeal whoopie 
    • Pumpkin whoopie 
    • Carrot cake whoopie 
    • Vegan chocolate whoopie 
    • Vegan vanilla whoopie 
    • Gluten-free chocolate whoopie 
    • Gluten-free vanilla whoopie 
    • Whoopie cake 
    • Jalapeno cornbread whoopie 


    Recipes for fillings: 

    • Classic marshmallow 
    • Chocolate buttercream 
    • Classic cream cheese 
    • Classic buttercream 
    • Chocolate ganache 
    • Whipped chocolate ganache 
    • Mint buttercream 
    • Honey buttercream 
    • Rosewater buttercream 
    • Salty peanut butter 
    • Coconut cream 
    • Malted buttercream 
    • Salted caramel 
    • Candied ginger 
    • Dulce de leche 
    • Maple 
    • Maple-bacon 
    • Root beer 
    • Orange cream cheese 
    • Lemon mascarpone 
    • Tiramisu cream 
    • Strawberry buttercream 
    • Peachy marshmallow cream 
    • Banana 
    • Matcha buttercream 
    • Vegan chocolate "butter" cream 
    • Vegan vanilla "butter" cream 
    • Bacon-chive goat cheese 
    • Chocolate glaze  

     See Whoopie Pies made by the authors themselves in this short video

    Thank you to Jennifer for pointing out that 'Solite' a vegetable shortening available in Australia from cake decorating stores can substitute for Crisco if desired. 

    Happy Baking :) 

    You might also be interested in a recipe for...

               Raspberry Marshmallow