Navigation
SEARCH
This form does not yet contain any fields.

    Entries in recipe (47)

    Sunday
    Jul092017

    Golden and Maple Syrup Honeycomb

                                            chocolate dipped golden and maple syrup "honeycomb"

    Join me on Facebook

    Confectionery: lollies, candies and sweets

    Now we're talking! I've been trying off and on, to get homemade honeycomb to taste like a Crunchie bar. Cadburys Crunchie is a milk chocolate coated honeycomb bar and is lighter in texture and tastier than the shattering type alternatives. 

    cadburys crunchie bar

    I got pretty close last week with this version; adapted from Australian Chef Luke Mangan's salted chocolate honey comb, I've omitted the honey, instead using a golden syrup/maple syrup combo for a vegan version and bumped up the bi carbonate of soda (baking soda), I did try the salt sprinkle but with the upped bi carb it's better without it.

    This is a lolly, candy, confectionery so obviously not for the 'I quit sugar' crowd, but for those who like partaking in a sugary treat it's a fabulous one to pull out of the freezer when needed for quick entertaining. 

    Ingredients

    125 grams Glucose Syrup

    350 grams Caster Sugar

    2 tbsp Golden Syrup

    1 tbsp Maple Syrup

    3 tsps of Bicarbonate of Soda (Baking Soda)

    75 mls water

    Dipping

    200 grams of dark chocolate (animal product free if you want vegan "honeycomb")

    choice of granola, freeze dried berries, coconut, crushed pretzels, nuts, cocoa nibs etc.  

    make sure you sift your bicarbonate of soda, otherwise you risk those lumps in your finished candy. 

    You'll need either to line a heat proof bowl with non stick baking paper or lightly oil a silicone cake pan and place it on top of baking sheet. 

    I used a silly shaped silicone cake pan just to show a friend "it always pops out", a round or square silicone cake pan would be easier. 

    Now you just place your sugar and all the syrups into a medium saucepan, the mixture will rise quite a lot once the bicarbonate of soda is added so make sure the sides of the saucepan are high enough, no one wants boiled over sugar on their stove top.  

    Add the water to the saucepan too and stir the lot over medium heat just until the caster sugar is dissolved. Bring the mixture to the boil and boil until the mixture is *dark golden. It takes a few minutes, just err on the less side, the mixture can burn quite easily.

    Quickly, Quickly. 

    Turn off heat, quickly and lightly whisk in your bicarb ... it's a barely a mix through, this is to make sure it doesn't deflate.

    Quickly pour into prepared mould (careful it's HOT), leave the mould in place until cool. 

    Once cool it's pops straight out of the silicone mould, if you used the baking paper in a bowl un-mould and peel away paper.

    Tap or cut with large knife into *pieces. 

    Gently melt your chocolate in a bowl over hot water. Start dipping your pieces into chocolate and then into toppings of choice such as freeze dried strawberry pieces.  Place on rack to set.

    At this stage serve, I served mine in a "grab piece pile" with espresso for a late night pick me up. Or freeze the pieces in a single layer in a freezer container or freezer bag until needed. Keep some unchocolate dipped for those who like it plain, use leftover crushed honeycomb in coconut yoghurt, mixed in with granola, for hokey pokey ice cream, cookies, slices, cakes and plated desserts. 

    This is a freshly made piece, the top photo shows the slight darkening on freezing and defrosting... both lots tasted the same. My step son didn't mind the salt sprinkle, but his girlfriend Emer and I thought it was too salty with the increased bicarbonate.  

    Notes:

    *I can't stress enough the mixture is hot, remove pets and small children from the work area whilst making. 

    *Troubleshoot, don't over whisk once bicarbonate is added for a light honeycomb. Don't cook to long to prevent burning. 

    *Pieces... the small shattered pieces can be mixed into tempered chocolate and moulded into love hearts, skulls, frogs or whatever you like for honeycomb crunch chocolates.

    *there is no candy thermometer used in this recipe, the sugar mixture is brownish due to the syrups your aiming for "browner" without burning. 

    Happy baking  and confectionery making :) 

    You might be interested in an also vegan 2010 version of honeycomb with less bicaronate that results in a lighter colour and harder finish. 

    Friday
    Jun302017

    Lime paneer and paneer parantha (Indian Cheese Flatbread)

                                 lime smoked paneer parantha 

    Paneer is a fresh curd/cottage cheese common in South Asia, especially in Indian, Pakistani, Afghan, Nepali, Sri Lankan, and Bangladeshi cuisines.

    Join me on Facebook

    Surprised by limes was I.

    An unprecedented bounty of limes on the backyard lime tree this year took me by surprise; at first I was enjoying the lime slices in soda and the freshly squeezed lime in salad dressings, followed by lime curd, lime sorbet and then came the slight panic that the limes will fall soon and the tree still seemed to have 1000 fast ripening limes. Juice has been frozen, zest is dehydrating and now I'm up to making lime paneer! 

    This simple two ingredient fresh cheese can be used in many Indian/Indian inspired dishes such as the paneer parantha recipe today or anytime you need a cottage cheese. 

    You'll need a deep colander lined with muslin and your ready to make your cheese.

    Lime Paneer

    Ingredients 

    I litre or quart of full cream milk 

    60 mls (2 fluid oz) of lime juice in small jug

    Method 

    In heavy based saucepan bring your milk almost to the boil, your milk will be hot and there will be tiny bubbles around the side of your saucepan. For those who love their cooks thermometer the milk will around 80 Celsius (175F). Turn off the heat.  

    Immediately start adding your lime juice a drizzle at a time, stirring gently after each addition. Keep adding the lime juice/gently stirring until the milk separates and you have curd and whey.

    gently stirring lime juice into hot milk

    It doesn't look attractive at this stage, a pale green water with white floaty curd.

    Leave the saucepan to cool for around 30 minutes, place your prepared colander in your kitchen sink before gently pouring in your milk mixture. 

    Gather your muslin up from the sides, twist top and start to gently squeeze the excess whey (fluid) from the curds. The more whey that is removed the firmer your finished cheese will be. This will take a few minutes to do. 

    cheese squeezed and ready to be pressed

    Time to press into a block. Untwist the top of your muslin and wrap excess length around your cheese, place your cheese between two chopping boards and apply weight to the top board. Weight can be a stack of books to another saucepan filled with water, anything to squish the cheese. Leave your cheese for 30 to 45 minutes to press. 

    Ta daaa! Finished fresh paneer/cottage cheese, you should have about 250g (8.8OZ).

    From here you can use it in recipes like palek paneer the spinach and cheese curry and the stuffed flatbread parantha paneer. 

     I've included "Jimmy's" recipe video for making the flatbread, I have used his brand of atta flour... oddly recipe on side of flour is different than what is shown in video... both methods work. 

    Parantha Paneer

    Ingredients 

    2 cups of *Atta flour (you can use wholemeal flour) 

    1/2 tsp salt

    150 ml luke warm water, more if needed. 

    Plus a neutral oil for oiling your pan, I used Grapeseed oil. 

    *atta flour is a semi strong indian grown/processed wholemeal flour perfect for making flatbread... you can see it's a finer mill than western wholemeal flour, worth seeking out but standard wholemeal flour will also work. Here atta flour is seen with salt added ready to be mixed. 

    Food processor: place flour and salt in food processor and turn on whilst pouring enough water down chute to form a soft dough. 

    Hand method: place flour in mixing bowl, whisk in salt and stir in enough water to form a soft dough. Knead on lightly floured surface until smooth. 

    Both methods wrap the dough and allow to rest for 30 minutes. 

    After resting, pinch off two small palm sized pieces of dough (mine were 50 grams each because I'm the weighing "type"). Roll or press both balls until they are around 10 cm (4 inches) in diameter.

    Season your cheese with 1/2 tsp of salt and spices of choice and crumble. Love it hot? Green chopped chillies can be added now if desired. I also lightly smoked my cheese with a smoking gun at this stage for a faux oven flavour.

    Top one of the rounds with seasoned paneer and in my case fresh coriander (cilantro) leaves. 

    Take the second round and place on top of the filled round and pinch together to seal. 

    Roll out the filled parcel until it is thin. I rolled mine on a non stick mat and did not add extra flour, if you are rolling a bench top, lightly flour your dough/rolling pin. 

    I usually just roll a few at a time, cover to stop drying out between cooking each one.

    Cook your flatbread on a hot pre heated crepe pan, frypan or flat griddle. I used an electric crepe maker set on maximum heat. If using non stick cookware a light brush of oil is all you will need, slightly more for stainless steel cookware. Bubbles form on surface of cooking flatbread, when nice and bubbled flip over. 

    Once you flip your flat bread will puff up like a pillow (it will deflate on cooling), cook another minute or so until golden and remove from heat. At this stage you can brush on melted butter and stack in a flatbread basket or wrap to keep warm whilst you make the rest. 

    Parantha is a stand alone snack served with indian pickles, a tamarind sauce etc, in the west you'll often see it eaten alongside curries curries too. I like it for brunch as it is... ohhh, mango pickle would be good. Unlike the lamb or cauliflower parantha the filling doesn't fall out, think of it more as an enriched bread with most of the cheese incorporating into the dough. 

    Fun to make and eat, happy baking :) 

    You might also be interested in a lightened Chocolate and Tia Maria Fridge Cake.   

    Wednesday
    Apr122017

    Cauliflower Cheese

                                                         cauliflower cheese

    Join me on Facebook

    I laughed out loud when I saw that this months ABC baker's challenge was cauliflower cheese, you forget we don't all have the same food experiences. To me cauliflower cheese is bog standard but lovely, old school cooking, something that could still be part of your Sunday roast or you have a distant memory of your gran's. 

    Cauliflower cheese is served mainly as a side dish, paired with a roast dinner or another protein. Cauliflower in Australia now is more often seen in curries, stuffed in flat breads like Gobi ke Parathe (YUM!!), salads, roasted, stir fries, soups, as a faux pizza base or the popular cauliflower rice but there is still a place for the classic cauliflower cheese in your repertoire. 

    supermarkets and fruit/veg shops carry the already chopped cauliflower for quick low carb cooking. 

    Baking along with a talented group of bakers that are a part of ABC (Avid Baker's Challenge), this month was 'Cauliflower Cheese' from Smitten Kitchen

    I've made the basic cauliflower cheese in individual portions with a couple of small changes to Smitten Kitchen's recipe. I also include a wasabi variation and a gluten free cauliflower and cheese soup recipe.  

    The first printed version of cauliflower cheese is in the 1861 publication of 'Beeton's Book of Household Mangement'. Where hot white sauce (Mrs. Beeton uses a sauce blanche) is poured over the cooked cauliflower, topped with grated parmesan, bread crumbs and then put under the griller (broiler/salamander) until bubbling and golden.

    The cheese sauce for the cauliflower cheese today is a Béchamel (white sauce), a sauce that is Italian in origin but now is probably more well known as one of the French mother sauces. Béchamel is the base to other sauces, add cheese like we are today and it's "Mornay sauce".

    I made buckets (literally) of Béchamel decades ago when working in seafood retail/catering, some became mornay sauce, used in seafood crepes, seafood pies, seafood bakes and goodness proving it was a long time ago seafood "vol au vents". 

    Start by preparing your cauliflower by cutting it into florets and either steaming them or boiling them. I cooked them to the "cooked but still holding shape stage", as I didn't bake the dish further as Smitten Kitchen did. 

    cauliflower florets ready for steaming

    Whilst the cauliflower was steaming, butter was melted and flour added and stirred together until flour is cooked off, 2 to 3 minutes to make the white roux.

    Milk is added and stirred continuously until thickened and hot. Grated mature cheddar cheese (tasty) was stirred in then.

    *I upped the flour used to 40 grams and reduced the butter to 50 grams. I reduced the cheese too, Smitten Kitchen uses 155 grams, I used 75 grams to be added to the sauce and 25 grams to be sprinkled on top and I used 2 cups (500ml) of 2% milk. I prefer to make the sauce thicker because you can always thin it with a little warm milk but not visa versa.  

    Time to add the seasonings. 

    Coleman's mustard strong enough to "put hairs on your chest"as nan would say.

    I added a large teaspoon of prepared English mustard, a grate of fresh nutmeg and a shake of white pepper for the seasoning. Taste the sauce and adjust the seasoning to personal taste. 

    Cauliflower was arranged in 4 separate ramekins, then topped with the sauce, sprinkled with grated cheese and put under a hot grill (we say "grill" in Australia... it's broiler or salamander elsewhere) to gratin. Serve when bubbly and golden. 

    Change up your cheese or veg

    Change your cheese for another strong tasting cheese (be careful if using a blue cheese, you could end up with a gray coloured sauce) or if using a milder cheese pump up the flavour with more mustard or chilli and the like. Use broccoli or cauliflower and broccoli instead of plain cauli, or how about potatoes or sweet potatoes for a change? Mornay sauce matches most vegetables, adjust seasonings accordingly and if your not going for a baked or gratin finish then add a crispy finishing touch. 

    I used a wasabi cheddar for an alternative version of cauliflower cheese that I'll be serving with fish this Easter. A ittle wasabi paste was added for an extra kick. Wasabi cheddar cheese was swapped out for the mature cheddar and wasabi paste used instead of the mustard, nutmeg and white pepper. Pour the hot sauce over your cooked cauliflower, I topped with butter browned panko crumbs and wasabi sesame seeds. 

    wasabi paste

    wasabi sesame seeds 


    Ooops, I was supposed to use the black bowls my "gee this is such a yellow sauce" thought carried onto the bowls.

    Gluten free Cauliflower Cheese soup

    A simple pureed veg soup is a nice gluten free addition to your Easter feast. 

    Ingredients

    1 medium cauliflower, cut into florets

    1 large leek or 2 medium onions, diced

    2 stick of celery diced

    I medium potato, peeled and diced 

    1.5 litres of salt reduced vegetable or chicken stock

    200 grams of grated matured cheddar cheese

    2 tablespoons olive oil 

    English mustard

    fresh nutmeg

    salt and pepper

    optional extra cheese for garnish

    Method

    In a large pot over heat the olive oil over a medium heat, and add all the cut vegetables. Stir and place a lid partially over pot, continue to cook for ten minutes. Stirring occasionally to prevent catching. 

    Add the stock and bring to the boil, reduce the heat then and simmer until veggies are soft. 

    Remove pan from heat, add the grated cheese and heaped teaspoon of English mustard and a light grating of nutmeg. Puree the soup in pot with a stick blender. If soup is too thick, thin with a little boiling water. Taste the soup, add salt and pepper to suit you and your family being mindful of what garnishes, if any, you are using. Serve the soup piping hot with extra crumbled or grated cheese and grated nutmeg. 

    Happy Baking :)  

    You might be interested in a quick and easy peach verrine 

    or make some agar agar jelly pearls

    Saturday
    Mar052016

    No Bake Speculoos Tarts 

                                                 no bake speculoos (biscoff) tarts

     Join me on Facebook

    What are Speculoos? A lightly spiced caramelised biscuit (cookie). You can buy them in biscuit form or as a jarred cookie paste (butter). I'm using the popular Lotus brand speculoos/biscoff paste and biscuits from Belgium in these no bake "pantry ingredients" tarts. 


    'Speculoos' in Flemish and 'Biscoff' in English

    The world is in love with cookie butters. Available in smooth or crunchy, spread on bread straight from the jar it looks like peanut butter but tastes... umm, well like "squooshed up cookies". 

    Lets get started, today I've used four 11 cm x 6 cm (4.5 inches x 2.5 inches) individual tart tins. You could also use 8 smaller tart tins. The recipe is easily doubled so if your loving your cookie butter go for it!! 

    Little tart tins; a gift from Ireland .. thank you Emer, I love them!!  


    Ingredients

    1 packet (124 grams) Biscoff/Speculoos biscuits 

    62 grams (2.18 oz) unsalted butter melted

    80 grams (2.82 oz) chopped dark chocolate

    8 tsps of homemade or store bought dulce de leche or thick caramel sauce

    500 ml (16.90 oz) whipping cream

    400 g jar of Speculoo/Biscoff cookie paste

    Biscoff biscuits (cookies) in Australia come in 124 gram packets. 

    A basic crumb crust for cheesecakes and desserts is half the ratio of melted butter to biscuit crumbs.

    So for 124 grams of biscuit crumbs I used 62 grams of butter.


    Method 

    Crush the biscuits, by either pulsing in a food processor or popping in a zip lock bag and bashing with a rolling pin. Place the crushed biscuits in a medium mixing bowl. 

    Melt the butter. Make a well in the biscuit crumbs and *quickly mix together with a wooden spoon.

    Divide mixture between the tart tins you have chosen and press firmly with your finger tips or small spoon. covering the bases and sides. Chill for 20 minutes.

    Melt your chopped chocolate. Using a pastry brush or a small spoon coat the inside of the shells with melted chocolate. Chill until chocolate sets. 

    Spread two teaspoons of caramel per tart tin (one teaspoon each if using eight smaller tins). Refrigerate whilst you prepare filling.

    To make the filling put the whipping cream and speculoos/biscoff paste into a bowl.

    Whip (briefly) to combine. You are just "combining" it is literally seconds not minutes, your mixture will thicken almost immediately. Do not over beat you don't want your mixture to split. 

    Pipe or plonk. Probably best suited to plonking more than piping, but you can pipe if desired. If you are plonking, spread a generous amount of filling in each tart shell and either swirl or lift up soft peaks with a small flat knife. If piping, you get a soft "almost hold" finish.  Pop them in the fridge for a final chill.

    Either way you will have some leftover filling, this can be enjoyed from small dessert glasses with whipped cream, a drizzle of caramel, chocolate decorations.... oh and cookies for dipping if you bought extra.  

    Unmould your chilled tarts ready for serving.  Top with a dark chocolate decorations if desired. 

    *Notes: all biscuit (cookie) crumb bases are much easier to press into tins if used quickly whilst the mixture is still warm from the butter. If your room is cold or you were called away briefly you can find it more difficult to get a neat finish. A quick microwave on low for a few seconds will make the mixture easier to work with again. 

    In Australia Biscoff biscuits are available from Coles supermarkets for under $2 a pack. Speculoos (Biscoff) butter is available from Dutch Grocery stores in Australia including "It's all Dutch to me"   "Dutchfood" online and Continental Delicatessens.

    Want to swirl up your own Biscoff Spread? Jamieanne at the Sweetest Kitchen does exactly that swirls up her own out of the biscuits, coconut milk and more. Find her here.   Go a step further and bake your own Speculaas, Martha Stewarts recipe here

    Happy Baking or No Baking :) 

    Monday
    Aug172015

    Tiesen Sinamon (Welsh cinnamon cake) cupcakes

    Tiesen Sinamon (Welsh cinnamon cake) cupcakes

    Join me on Facebook

    Ahhh ha ha, I love this metal Welsh dragon my step son Daniel gave me from his recent travels to Wales. 

    Wales; with a dragon on their flag, it's the birth place of my Uncle John, home of Dr. Who and according to fairy expert Janet Bord (is too such a person!!) the little folk abound in Wales.   Welsh flag

    Tiesen Sinamon is traditionally a round cinnamon cake topped with raspberry or apricot jam and spread with meringue. The cake is returned to the oven to brown the meringue. Here favourite my little one bowl cake recipe is spiced with cinnamon, filled with raspberry jam and topped with fluffy meringue (7 minute type) frosting before torching.  

    Tiesen Sinamon (Welsh cinnamon cake) cupcakes ... the one bowl method used here results in cake similar to the original Tiesen Sinamon texture. By all means substitute your go to buttercake cupcake recipe and add cinnamon if desired.  

    Preheat oven to 180C/350F 

    Line two 12 cup trays with paper liners (the small patty/fairy cake size... this a UK size, old Australia size and smaller than US cupcake)

    Ingredients

    125g butter (4.4oz) softened

    1 teaspoon vanilla extract

    2/3 cup (150g) castor sugar (superfine)

    3 eggs  room temperature

    1 1/2  cups (225g) self-raising flour

    1 1/2 tsp cinnamon 

    1/4 cup milk (60ml) room temperature

    Method

    In your mixer bowl with flat beater blade attached, beat butter, extract, sugar, eggs, sifted flour, cinnamon together & milk on low speed with an electric mixer until ingredients are just combined. Increase speed to medium & beat for 3 minutes until smooth and pale in colour.

    Drop spoonfuls of mixture into the paper liners. Bake about 20 minutes. Allow to cool in tins for 5 minutes removing to a wire rack to cool.

    Fluffy Frosting
    Makes 3 cups
    • 1 cup white sugar (granulated)
    • 4 large egg whites

    Directions
    1. In the heat-proof bowl of an electric mixer, combine sugar and egg whites. Place the bowl over a pot of gently simmering water, and whisk until the mixture feels warm to the touch and the sugar has dissolved, about 5 minutes.
    2. Return the bowl to the mixer stand. With the whisk attachment, whip on high 
    3. until cooled, about 8 minutes. Use immediately.

    *If the weather is humid, you may need to beat the frosting for an additional minute in each step to stiffen it.

    Use a good store bought raspberry jam or make your own.... Raspberry Jam recipe Traditionally raspberry jam is "loose" (wetter) than say ummm "apricot". If you prefer a firm set jam use pectin sugar as per instructions. 

    To Serve

    Cut a small hole in to the top of each cooled cake. Fill the cavities with about one teaspoon of raspberry jam, top with a blob of meringue frosting (use a star piping tip if you prefer a less rustic looking cupcake) torch with a kitchen blow torch.  

    Happy Baking :) 

    You might also be interested in Raspberry and Orange Gluten Free Friands

    Saturday
    Mar072015

    Game of Thrones Cookies and Bee Mead

    Game of Thrones honey spiced cookies

     Join me on Facebook

    Dang!!! You know I love a geek shop, and Warpzone Prints is a geeky cookie cutter paradise. The store sells a plethora of cutters including Harry Potter, Dr. Who, retro movie monsters, Bill Nye the science guy and today's Game of Thrones cutters. If your looking for something to wash down today's cookies, scroll right down to Bee Mead :) 

    Making stamped cookies; I've adapted my cookies from a Martha Stewart recipe for sugar cookies, but you could use your favourite sugar cookie recipe and reduce or even omit the baking powder. 

    Stamped Honey and Spice Sugar Cookies
    Makes about about 30
    Ingredients
    • 2 cups sifted plain flour (all-purpose) flour
    • 1/4 teaspoon baking powder
    • 1 tsp ground cinnamon
    • 1/4 tsp ground ginger
    • 1/4 tsp ground allspice or ground cardamom  
    • 2 tablespoons of *honey 
    • 1/2 cup butter (well softened)
    • 3/4 cup sugar
    • 1 large egg
    • 1 teaspoon pure vanilla extract
    Extras: 
    An extra bowl of flour to flour rolling pin, bench and cookie cutters. 
    A soft new toothbrush or other small cleaning brush to clean cutters. 
    Enough room in your freezer to slide in cookie trays to chill dough cut outs. 
    Method
    1. In a large bowl, sift together flour, spices and baking powder. Set aside.
    2. In bowl of an electric mixer fitted with paddle attachment, beat butter and sugar on medium speed until fluffy, about 3 minutes. Add egg & honey beat until smooth, 1 minute.
    3. Add reserved flour mixture, and mix on low speed until thoroughly combined. Stir in vanilla. Wrap dough in plastic, and refrigerate for about 45 minutes.
    4. Position two racks in oven; preheat oven to 160 Celsius (325 degrees). Line two baking trays with baking paper or a non-stick baking mat; set aside.
    5. On a well-floured work surface, roll out chilled dough to 0.3 cm (1/8 inch) thick (you can roll between two sheets of non stick paper if you prefer). Stamp out cookies with your floured cookie cutters. With a metal spatula, transfer whole cookies to the prepared baking trays. Brush off excess flour with a small brush. the center details of the cutters are weaker, stamp your cookies with gentle but even pressure.
    Flouring your cutters and cookie spatula will make working the dough that much easier.
    Brush off excess flour with a small artists brush
    .

    6. Transfer baking tray to the *freezer, and chill until cookie dough is firm, about 15 minutes. Place the baking tray in the oven, and bake cookies for 6 to 10 minutes. 

    7. Let the cookies cool on the baking sheet for about 3 minutes, and then use a metal spatula to transfer them to a wire rack to cool completely. Cookies will keep at room temperature in an airtight container for up to 5 days. 
    * left your cookie cutouts too long in the freezer and they are frozen? Don't worry, just bake them a few minutes longer. 

    *I used honey in these cookies, when you are baking with honey you will  notice your baked goods will brown more quickly... keep an eye on them, particularly if your stamped cookie has small protruding parts like wolves ears. 

    Hand wash your cutters in warm soapy water, using a soft toothbrush/small cleaning brush to clean dough still left in details.

    Friends and family took the opportunity to partake in a Bee Mead tasting last week. Pure Australian Clover Honey is combined with New Zealand Manuka honey to produce this light and refreshing take on mead. "Refreshing" was the word coined by everyone that tried it. If you are a mead connoisseur Bee Mead probably isn't going to hit the spot with you, but for the rest of us I can't think of a better "Games of Thrones"  season returns beverage. Bee Mead is a clear lightly sparkling, ciderish and meadish (my blog I can make up words!!) with final note of honey tasting drink. My stepson Dan thought it was highly drinkable, with not too much sweetness. My friend Jacinta thought it was surprising (in a good way), light and refreshing.  Bee Mead is available in honey, honey ginger and lime/lemon.... we tried the honey. Serve well chilled or over ice.... in your Game of Thrones goblet of course.   Pop over to the Bee Mead website for more information.  Dan Murphy's is selling it in Australia. 

    Happy Baking :) 

    In the mood for honey? Honey Joy cupcakes here

    Thursday
    Oct162014

    Half a Grasshopper Pie

                                                   Half a Grasshopper Pie

    Join me on Facebook. 

    Grasshopper Cocktail: The drink reputedly originated at Tujague's in the French Quarter New Orleans. The cocktail contains equal amounts of creme de menthe and white creme de cacao with added cream and shaken with ice.

    You start with the thought "I'm going to make Nigella Lawson's Grasshopper pie", that was until you realise you don't have and can't get some of the ingredients.... which brings us to today's recipe a "half a grasshopper pie".

    I thought I did, I thought I did... have whie creme de cacao. I didn't. We don't have Bourbon biscuits here but I'm Australian so dark chocolate Tims Tams it was. 

    Tim Tams: chocolate coated and chocolate cream filled biscuits (cookies) popular in Australia, use the equivalent in you country i.e. chocolate coated oreos. 

    We also don't have the mini white marshmallows Nigella uses here so I thought white soft eating marshmallows will do. Three supermarkets later I cannot buy white marshmallows, I can buy fruit swirled, chocolate dipped, pink and white mixed but no "white". 

    Yep, this is why I found myself separating pink from white marshmallows. I've since found out Aldi in Australia has white eating marshmallows... dang I should have asked my all knowing friend Jacinta first! 

    Half a Grasshopper Pie recipe

    1 loose bottomed 25x5 cm (10x2 inch) fluted tart tin

    300g grams (10.5oz) of chocolate coated cream biscuits (approx one and half packs of dark chocolate Tim Tams) 

    50g (1.75oz) of dark chocolate (I used Lindt 70%)

    50g (1.75oz) softened butter

    200g (7oz) grams soft white eating marshmallows (cut in half or quarters depending on size)

    2tsp of pure vanilla extract/essence

    80ml (2.7 fluid ozs) green creme de methe 

    125ml (4.22 fluid ozs) milk

    375ml (12.7 fluid ozs) thickened cream

    few drops of green food colouring

    *optional vanilla whipped cream, fresh mint and chocolate curls to serve


    oiled scissor blades make short work of cutting marshmallows 

    Process the chocolate biscuits (cookies) with the chocolate in a food processor until it's a rough crumb, add the butter and pulse until it just comes together. 

    Base processing finished and ready to press into shell. 

    Using the back of a spoon or your hands press the crumbs evenly around the base and sides of fluted tart tin. Make sure you press firmly, particularly around the edges coming up the sides. Refrigerate the base. 

    Put the cut marshmallows with the milk in a small saucepan, *over low heat. Once the milk starts to foam around the edges, remove from heat and stir marshmallows to completely melt in. Pour into a heat proof bowl, stir in the creme de menthe, vanilla and green food colouring if using. Set aside to cool. 

    Whisk the cream until soft peak stage (it will hold it's shape but drop gently off a spoon), add cooled marshmallow mixture. Whisk until combined but not over beaten. 

    Pour mixture into chilled crust. Spread lightly to fill shell evenly, create a few swirls or smoother finish... whatever you prefer.

    Refrigerate pie a minimum of four hours, use a plastic dome lid or aluminium foil to create a dome over the pie. You don't want the surface to be touched.

    When ready to serve either top with crushed chocolate biscuits (cookies) or as I did with a dollop of vanilla white cream, chocolate curls and a fresh mint leaf. 

    * Trouble shooting: gentle, gentle heat melting marshmallows if the mixture boils the marshmallows don't reset. 

    * a delicate texture similar to a Sara Lee Bavarian dessert, this pie needs to be refrigerated... it will collapse if left in a warm place. 

    Was the pie worth it? Absolutely!!  Happy Baking :) 

    You might also be interested in Ode to Bounty Bar cupcakes   

    Tuesday
    Nov052013

    Chocolate Soil 


    crystallised chocolate soil 

    Join me on Facebook or view my Flickr Gallery

    A two ingredient chocolate soil, I'll give you all the dirt today (ok couldn't resist) on how make it with the least amount of cleaning up.  

    With chocolate soil you can add crunch and texture to a plated dessert, make pot plant cupcakes, set up a garden scene for your cake or perhaps just sprinkle on your favourite ice-cream. 

    Flavour it up; you can use a flavoured dark chocolate i.e. blueberry, orange, mint etc for flavoured soil or add your own flavour by stirring in cinnamon, ginger, chilli flakes, a drop or two of peppermint oil or whatever takes your fancy. 

    We are aren't going to use a *candy thermometer, we are going to do this by eye... a photo will act as your guide. 

    Here we go...

    Chocolate Soil 

    Ingredients

    100g (3.5OZ) Caster Sugar

    75g (2.6OZ) Dark Chocolate roughly chopped (even if you don't usually like 70% dark chocolate, I would recommend using it here because your are adding sugar to counteract the bitterness)

    Tools.... a wire whisk and a baking tray lined with non stick paper ready for you to tip your completed soil on. 

    Method

    On you stove top in a small to medium saucepan add the caster sugar, gently pour in 2 tablespoons of cold water. We are being gentle so we don't splash sugar crystals on the side of the pan.

    Turn on your heat to high and you are going to just let it do it's thing without stirring, the sugar will dissolve and bubble and boil until you see "golden brown edges". 

    the center of the boiling sugar is still clear, the edges have changed to golden brown. 

    have your roughly chopped chocolate ready to go

    Immediately remove saucepan from the heat and all at once whisk in the chocolate, along with any flavouring if using. Don't forget to whisk around the edges. Whisk until all the chocolate is coated, this doesn't take long ... a couple of minutes.

    it starts to look like "soil" almost instantly 

    Yep, you're done, it's finished and ready to poured onto your non stick paper prepared baking tray to cool.

    finished chocolate soil

    Once cool, store in an airtight container for up to a week, or freeze up to a month.

    *I've adapted this recipe from Heston Blumenthal's chocolate soil... halved the sugar and made it a simpler soil. His recipe has many more elements and is part of his wickedly delicious tiramisu recipe. Check out Hestons tiramisu on SBS food

    Clean up tips: Remember how we cleaned up our sugar work saucepans? It's the same today, fill your saucepan with water, bring to the boil, empty the water out and wash as per usual. Clean your whisk the same way, boiling water will remove any stuck on crystallised chocolate.

    *really want to, need to, use a candy thermometer... 135 cel or 275 F. 

    Happy Baking :) 

    You might also like to make fast bubble sugar decorations/toppers.

    Make quick and easy faux gingerbread mushrooms

    You've made the soil now make the dust... Nutella dust 

    a change from chocolate? Make a fondant gold fish! 

    Saturday
    Oct192013

    Chocolate Tia Maria Fridge Cake 

    last of the chocolate coffee liqueur fridge (ice box) cake

    Join me on Facebook

    Oh, have you tried replacing some of the cream in your ganache for plain Greek yoghurt?

    Even if yoghurt isn't in your top 500 foods, once added to ganache a little bit of magic occurs. Well, ok not "magic" (I'm trying to sell you on the idea because I like it so much), but rather the yoghurt has a two fold effect of lightening the texture of the ganache and adding an acid component that cleans the palate. 

    I like a ratio of 50% cream to 50% Greek yoghurt. The yoghurt ganache can be made with white, milk and dark chocolate. Think white chocolate yoghurt ganache with strained passion fruit puree for truffles or dark chocolate yoghurt ganache sauce with profiteroles or for your berries and waffles. What follows is the basic ratio/method that you can use in your existing recipes, plus a retro fridge cake laced with Tia Maria that the my step son Daniel declared was so nice "I could eat this everyday". 

    Chocolate Tia Maria Refrigerator Cake

    Ingredients

    Sponge fingers come with different amounts of biscuits depending on the brand... from 250g to 400g but the following recipe makes plenty of ganache, in fact you might have some over to top a cupcake or two. 


    I x packet of savoiardi/sponge finger biscuits

    125 ml (quarter of a cup) of very strong brewed black coffee  (you can make up instant if you don't have shots of expresso handy) 

    1/4 cup caster sugar (superfine) 

    3 tablespoons of coffee liqueur (add more coffee if you want to avoid the alcohol) 

    1 tsp of pure vanilla extract/essence

    150g  (5oz)  milk chocolate, roughly chopped

    150g  (5oz) dark chocolate, roughly chopped

    250 ml (one cup) thickened cream (whipping cream)

    250 ml (one cup) plain thick Greek yoghurt

    Place the sugar and coffee in a saucepan, bring to a rapid boil and boil one minute or until sugar is dissolved. Remove from heat. Stir in Tia Maria and vanilla extract. Set aside. 

    Melt the chocolate with half the cream in a heat proof bowl over pan a simmering water. Remove from heat and stir through the remaining cream and yoghurt. Refrigerate until the ganache is thick enough to spread. 

    Divide up your sponge fingers, I made my cake by laying six sponge fingers side by side and allowed another 12 sponge fingers to create two layers on top. *This size will give you leftover ganache, if you are using a larger packet of biscuits you will use all the ganache. 

    Spread some of the chocolate ganache onto your cake platter to secure the first row of sponge fingers. 

    Start to build the cake by dipping biscuits in the coffee/tia maria solution, lay six across the bottom, top with ganache, dip another six biscuits lay those on top of the base layer, top with ganache and lay final layer of dipped biscuits on top. Use remaining ganache to cover the sides and top of cake. 

    Chill for 4-6 hours. 

    Optional: decorate with your choice of chocolate curls, grated chocolate, chocolate coated coffee beans or crushed choc/coffee candy bars. 

    adapted from no bake Irish gateau Hamyln all colour cookbook: 200 chocolate recipes 

     Happy Baking :)

    You might also interested in no bake Tia Maria Treats

    Or perhaps you have been hankering to make a Chinese dragon  

    Friday
    Dec072012

    Chocolate Oreo Fudgy Peppermint Christmas Treats

    chocolate oreo fudgy peppermint treats

    Join me on Facebook

    Melt, mix, pour, chill and eat.

    A quick, easy recipe for chocolate Christmas treats... they taste yummy and are perfect unadorned for gift giving or decorated with mini Oreo's for your Christmas get together.

    makes 36 to 40 squares

    23x23cm (9x9in) cake tin lined with non stick baking paper... as there is no baking involved don't worry if you don't have the exact matching tin size.

    Ingredients

    360g (11.5 oz) dark eating chocolate... just pick one you like the taste of and roughly chop. 

    1 can sweetened condensed milk

    30g (1oz) butter

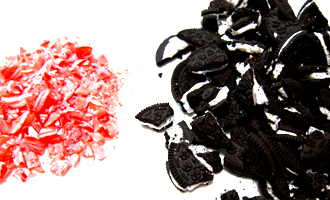
    I pack Oreo's, lightly crushed

    1/3 cup crushed candy canes

    Optional decoration; more crushed candy canes, mini Oreo's and a dab of pure cream or ganache or frosting to hold the decorations on. 

    Method

    Place the roughly chopped chocolate, butter and sweetened condensed milk in a medium large saucepan. Stir over low heat until about 3/4 of the chocolate is melted, remove from heat and continue to stir until the *chocolate is fully melted. The mixture should be barely warm at this stage.

    Stir in your lightly crushed Oreo's and crushed candy canes. Pour into prepared tin and smooth top with a dampened spatula. 

    Refrigerate for 2-3 hours before cutting into squares. Decorate if desired. 

    Store in an airtight container for up to a week in the refrigerator.

    Happy Baking :) 

    *Note: I know it's tempting but do melt the mixture slowly, if you turn up the heat the chocolate risks overheating and becoming grainy and you want smooth and creamy :)

    adapted from Christmas 'AWW little Christmas treats' 'dark chocolate nougat fudge bars'

    Try your hand at making your own fruit mince

    star fruit mince pie pops 

    or how about traditional shortbread... wonderful crushed and added to melted chocolate too!