Navigation
SEARCH
This form does not yet contain any fields.

    Entries in pink (35)

    Thursday
    Mar152018

    Beetroot Orange Chocolate Chip Hot Cross Buns

                           beetroot orange chocolate chip hot cross buns

    Join me on Facebook 


    Make me smile they do (say I sounding a bit too much like Yoda), I love a chenille chick almost as much as I love a warm hot cross bun on Good Friday. 

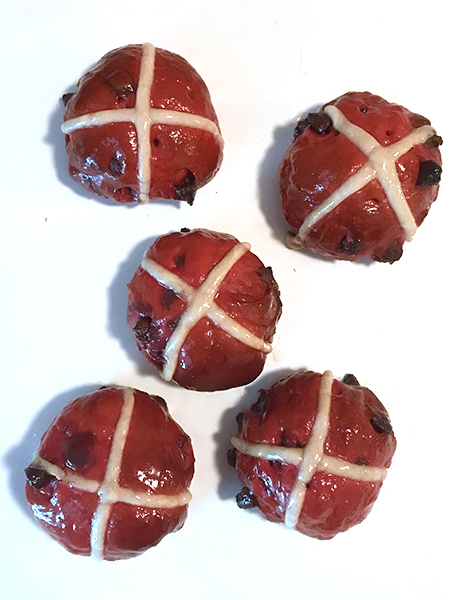
    This years hot cross bun flavour is beetroot (beet) with a touch of orange and lots of chocolate chips!! Served warm with a scoop of chocolate ice-cream and you have a delicious fun Easter dessert. 

    I've been trying to preserve the colour in beetroot baking for years, here is a failed example from 2010 where brightly coloured cookie dough is piped, ending up with non descript brown. 

    Beetroot fresh or dried in baking is highly susceptible to rising ph levels caused by baking powder or heat, ph level over 7 and you will get a beige to brown result. I had previously got a slight colour with yeast baking but not pink/beet reddish shade I was after. 

    I remembered that the Vitamin C used in high school as a bread improver also preserved colour so I gave it a whirl and "success" I got pink buns!

    I used *dried beetroot powder for the flavour and colour and *ascorbic acid powder for the vitamin C element. 

    The resulting beet flavour isn't "beetroot-y", but rather it tastes more like berry and pairs beautifully with chocolate. 

    Beetroot Orange Chocolate Chip Hot Cross Buns (makes 14 buns)

    Ingredients 

    for the bun dough

    350ml full fat milk

    50g  butter 

    1 lightly beaten room temperature egg

    470g white bread flour

    30g  dried beetroot powder

    75g caster sugar (superfine)

    7g sachet of instant yeast

    1/2 tsp Ascorbic Acid

    1tsp salt

    zest of one orange

    150g choc chips

    for the cross

    75g plain flour (all purpose)

    for the sugar glaze 

    1/3 cup water

    2 tablespoons of sugar

    Method

    In a small saucepan bring the milk to the boil, remove from heat and add the butter. Leave until just warm.

    Put the bread flour, beetroot powder, caster sugar, yeast, ascorbic acid and orange zest in a bowl. Whisk to combine, add salt and whisk again. 

    Transfer bowl to you mixer with dough hook attached. 

    Pour in you warm milk mixture, then add beaten egg. Mix on on low (setting 2 on KitchenAid) for 5 minutes or until dough is smooth and elastic.

    Transfer dough to an oiled bowl and cover. Pop the dough in a warm place for an hour to rise until it's doubled in size.

    Take your dough out of bowl and lay in on a non stick mat, roll or pat out to form a rectangle.

    Sprinkle half the choc chips over one half of the dough, fold the other half of dough over to cover choc chips and roll again. 

    Repeat with remaining choc chips. 

    Form the dough into a ball or roll and put it back in your oiled bowl to rise another hour in a warm place. 

    Have a baking tray ready lined with non stick paper. 

    Working with a few pieces at a time break pieces of dough the off, keeping the rest covered. I weighed my pieces to be 75 grams each. 

    Squash each piece into a round with the palm of your hand, fold the edges to the centre, flip over and smooth into a ball. 

    Repeat until you have buns evenly spaced on your tray, cover tray loosely with oiled plastic wrap. Allow to rise for the final time for one hour. 

    Preheat oven to 220C (210 fan).

    Make your cross mixture by placing flour in small bowl and adding enough water to form a pipeable paste. Transfer mixture to a piping bag fitted with a round writing tip or fill ziplock bag and snip one of the bottom corners.

    Once the final rise is done, pipe a cross on each bun. 

    Bake in preheated oven for 20 mins on the middle shelf. As you won't be able to see if they are golden due to pink colouring, I have allowed for tester buns and you will still end up with a complete dozen...a bakers "snack" we could say. 

    For the glaze, stir the sugar and water together heat stirring until it starts to simmer, simmer a couple of minutes and then remove from heat. 
    Brush the hot glaze over the buns. 

    Buns are best served warm on the day. 

    I served mine filled with scoops of chocolate ice-cream but do try toasted with a smear of chocolate hazelnut spread too. 

    *Ascorbic Acid (Vitamin C) from chef supply stores, health food stores and pharmacies. 

    *Beetroot powder is available from chef supply stores and selected supermarkets. In Australia I use Melbourne Food Depot or Herbie's brands. 

    Other uses for beetroot powder: apart from changing up a plain hummus or tzatziki you can...

    add it straight to white chocolate... I love this for the berry/tingly flavour it brings, balancing the sweetness of the white. Stir in 1 teaspoon of sifted beetroot powder for every 100g (3.5oz) of tempered white chocolate, mould, make bark/shards as per usual. 

    Use as a natural colourant for you icing and frosting. 

    Or love a bit of drama? Try adding beetroot powder to your mayo. 

    Happy Baking :) 

    You might also be interested in Candied Beetroot Slices 

    Or prefer and bunny shaped egg

    Monday
    Feb062017

    The Browniest Cookies 

                                        the browniest cookies

    Join me on Facebook 


    Baking along with a talented group of bakers that are a part of ABC (Avid Baker's Challenge), this month is the 'Browniest Cookies' from Smitten Kitten. 

    Like all brownies it's easy to put together, chocolate is melted with butter and sugars whisked in.

    White sugar to creates the brownie crust and brown sugar to keep the cookies soft. 

    Eggs, vanilla, baking soda and salt are whisked in next, followed by sifted cocoa powder. 


    Flour is stirred in followed by chocolate chunks. I divided mixture in half and added half cup of fresh raspberries to the batter.  Both batters were then refrigerated. 

    The recipe calls for the batter to be scooped, I rolled in smaller 25 gram balls and slid the trays into the freezer for 15 minutes to insure they would keep their shape. 

    Resulting cookies are fudgy, with a thin crisp crust, definetly chocolately but did polarise the testers with the flavour.  They aren't overly sweet tasting cookies, but it was the touch of bitterness they bring with so much cocoa powder and unsweetened chocolate that some weren't keen on.  

    I drizzled melted chocolate on the raspberry ones and added love heart sprinkles for Valentines Day.  

    Tiny cookies won't crinkle as much due to chilling and the short bake time... about 6-7 seven minutes.

    The recipe today is similar to Martha Stewart's 'Chocolate Crackle' type cookies that we have made every Christmas for over a decade. The other Martha Stewart cookies that are brownie/crinkle like are the 'Outrageous Chocolate Cookie' we also make for holidays. 

    my step son made these brownie cookies for high school food tech in 2009   

    Today's cookies are good, but won't replace the Martha Stewart cookies in our Christmas repertoire. 

    Like a full cocoa flavoured cookie? get the full recipe for today's bake from Smitten Kitten 'The Browniest Cookies' 

    Happy Baking :) 

    You might also be interested in making Eric the Valentines Emu

    Tuesday
    Jun302015

    Sugar, Sugar … White Sugar Chart

                                   Love bite 'The Simpsons' cupcake

    Join me on Facebook

    Years have gone by since I last saw an episode of 'The Simpsons', yet I nevertheless felt a sense of melancholia at the news Season 27 will see Marge and Homer legally separate... but hopefully it won't be for long. 

    Homer made me think of donuts, donuts made me think of icing and icing made me think of white sugar... so here we are a white sugar chart.
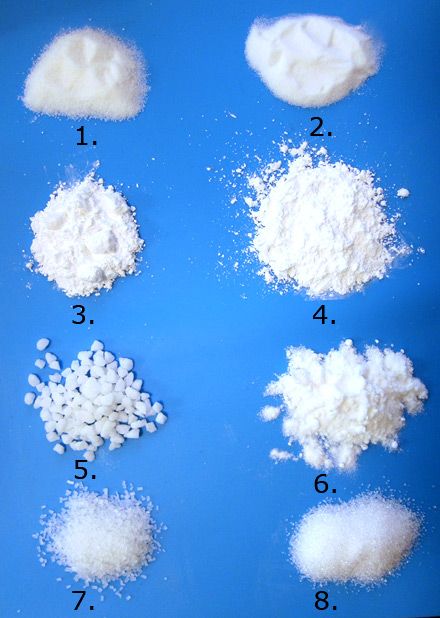
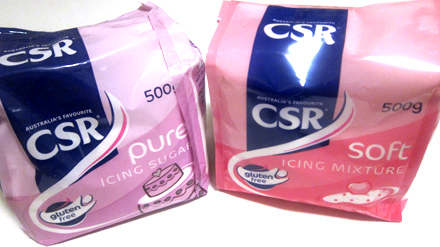
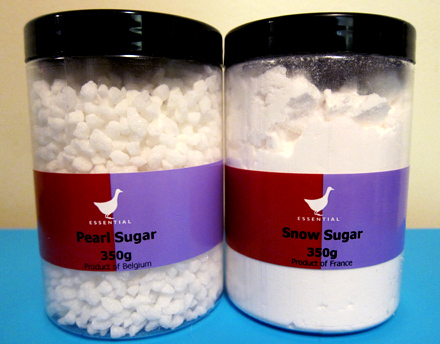
    1. White sugar (granulated) 2. Caster/Castor (superfine) 3. Pure icing sugar (pure confectioners sugar) 4. Icing sugar mixture (confectioners sugar with corn starch) 5. Pearl sugar (sugar nibs, hail sugar) 6. Snow sugar (snow powder) 7. &  8. Sanding sugar 

    1. White sugar (granulated), the most commonly used and versatile sugar of the bunch and in a pinch you can process granulated sugar into caster or icing sugar. White granulated is the sugar that you will use in much of your cake baking. With an approximate granule size of 0.5mm (0.19 inch) white sugar is the perfect size to aerate you cake batters. Use it to make toffee/pulled sugar work, caramel, cookies, confectionary and to sweeten your latte when you have decorating fatigue! 

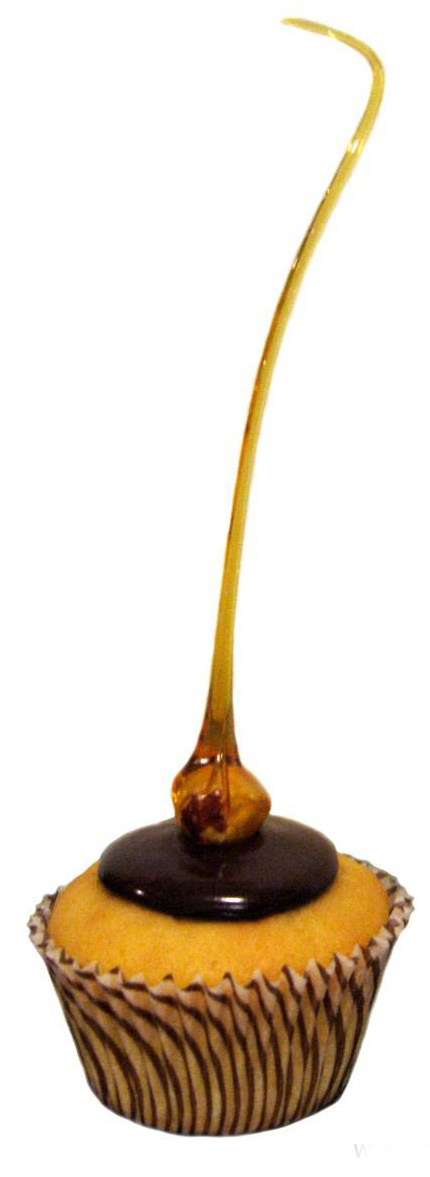
    white sugar is used to make dropped sugar work (how to make toffee toppers here

    2. Caster sugar (superfine), is a used extensively in UK, Australian, New Zealand baking. With an approximate granule size of 0.35 (0.13 inch) it's what you use when you need your sugar to dissolve quickly, don't want to develop a sugar crust or need to dissolve in a cold liquid such as cocktails or punch. Using caster sugar in pavlovas will prevent the weeping that can occur with undissolved sugar crystals. 

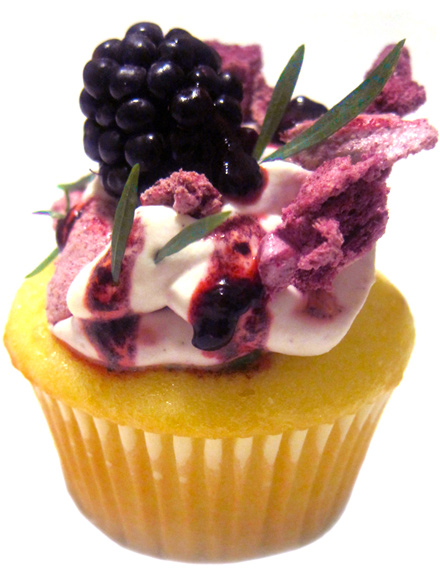
    caster sugar is used in the blackberry bash meringue (recipe here)

    3. Pure icing sugar (pure confectioners sugar). I use this the most in cake decorating, it's what I use to make my icings, for dusting, piping and for rolling fondant out on. Pure icing sugar is granulated white sugar ground to a powder, it has no additives so is perfect for royal icing work, and sets to a firm finish when making a heated glace icing. It is however "lumpy" without the additives to separate the tiny granules and will always need to be sifted.

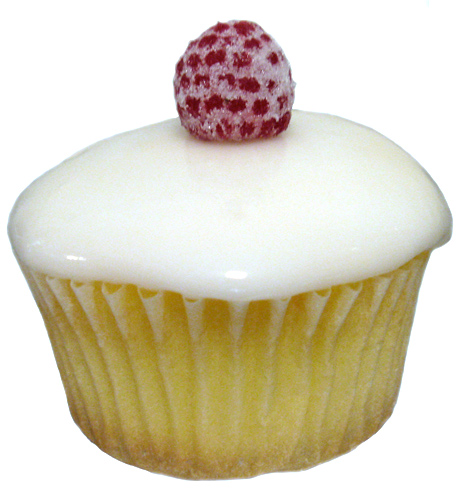
    glace icing like I used today in the Love bite cupcake and this raspberry cupcake (recipe here)

    4. Icing sugar mixture (confectioners sugar). Hate sifting or have young cake decorating kids? This is the icing mixture for you with no lumps, fuss or need for sifting. Soft icing sugar mixture is comprised of 96% cane sugar and 4% tapioca or maize starch in Australia. You cannot use icing sugar mixture for royal icing work as the starches can develop mould. The starches also inhibit "setting" that you get with heated pure icing sugar. 

    pure icing sugar and soft icing mixture

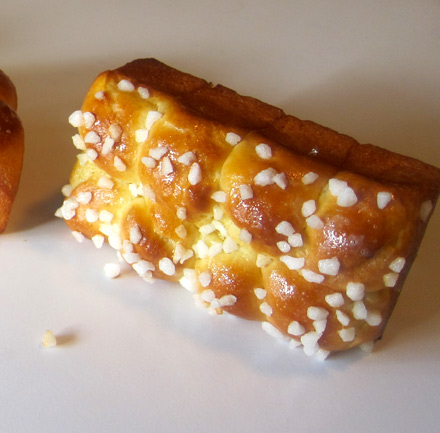
    5. Pearl sugar (nibs, hail sugar), is a popular European sugar. Pearl sugar is resistant to melting so you will see it used topping brioches, choquettes and yeasted buns. My step son Daniel and I love this sugar for it's crunch and the touch of sweetness that it adds without being overly sweet. 

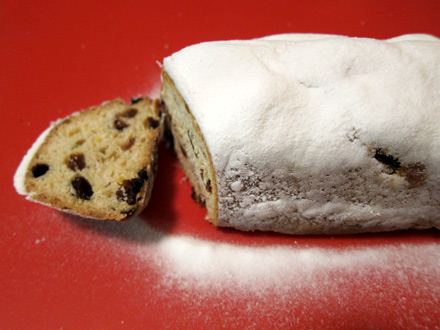
    6. Snow sugar (snow powder, everlasting sugar). Another popular European sugar, snow sugar is the sugar you use at Christmas for your stollens, snowy Christmas cookies and the like. Shipping your aunt a batch of cookies? snow sugar will ensure they will be as white and snowy as when you packed them. Perfect for stencilling too as your pattern won't disappear. Ingredients in snow sugar differ a little brand to brand, the one I use has a little cornstarch, dextrose and vegetable fat added to pure icing sugar.  It has a less sweet mouth feel than icing sugar alone. 


    pearl sugar used in recent brioche post 

    snow sugar is perfect for Christmas stollens and stencilled sugar designs

    7. and 8. Sanding sugar, coarse white sugar available in different grades. With a sparkly finish, sanding sugar is used for decorating cakes, cookies and sprinkled on raw shortbreads/butter cookies before baking. Sanding sugar comes in a wide range of colours to suit any occassion including Halloween!! 

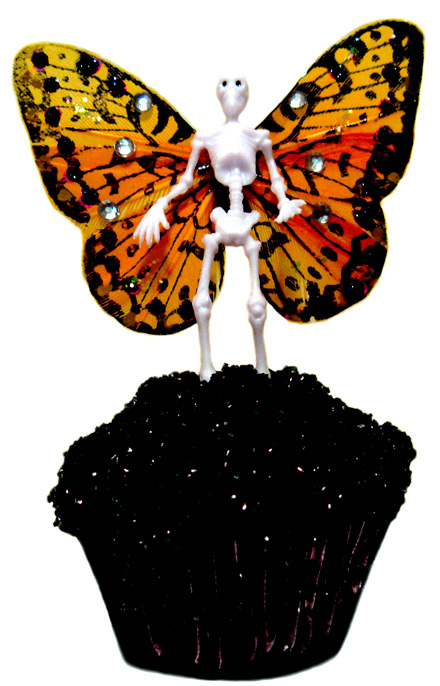
    black sanding sugar glistens on Halloween cupcake

    Happy Baking :)  

    Wednesday
    May132015

    Yoghurt Cheese, suspended Tim Tams and more

    Raspberry Tim Tam cupcake with biscuit/cookie pieces suspended in cake batter. 

    1. Yoghurt Cheese used in cheesecake to replace sour cream 2.Smeared to accompany Indian spicy potato curry puffs 3. Rolled into balls and drizzled with flavoured olive oil to pair with breads 4. Yoghurt cheese left to drain overnight is firm enough to cut. 

    Answering your emails today: some are from ummm, months ago... I swear I'm much faster answering questions on Facebook

    Eve wrote March 31st.. "where do you get your cupcake papers from I like the one where you have the raven on there"  

    Answer: Hi Eve, the cupcake papers in mention are an older style, unfortunately they have been discontinued by Wilton some time ago. 

    Karen wrote April 9th.. "Can I replace sour cream with yogurt cheese in cheesecake recipes" and "do I just strain it and does it matter what type of yogurt?"

    Answer: Yes Karen you can replace sour cream with yoghurt cheese in cheesecakes, cake batters, dips etc. Yes, you just strain bought or homemade yoghurt.

    The way I do it is using the little box thingy (also known as Cuisipro Donvier Yogurt Cheese Maker ) it's plastic box with a stainless steel mesh insert.

    You can also use food grade muslin double or triple folded, put the yogurt into the muslin lift the whole lot into a strainer suspended over a bowl, cover loosely and refrigerate 2 hours to overnight depending how thick you want your cheese. The muslin needs to be washed, sterilised in boiling water and throughly dried before storage.

    I do it this way, spoon yoghurt (plain Greek yoghurt in this case) into box, top with lid and refrigerate 2 hours to overnight. 

    Here you can see how the yoghurt has shrunk down forming the yoghurt cheese. In the bottom of the container is the liquid whey which you can pop in a smoothie, use in baking or even feed it to your dogs. 

    About two to three hours for the consistency needed to *replace sour cream and over night to make balls and for yoghurt cheese that can be sliced. Yoghurt cheese can be used in plethora of sweet and savoury applications. 

    Muslin is better for homemade, very thin yoghurt or large quantities of yoghurt, the box is convenient and easy to clean for shop bought thicker/Greek yoghurt, full fat or light, suits smaller quantities 3 cups of yoghurt will yield 1 cup of yoghurt cheese when drained overnight.  

    To salt or not to salt: some people salt their yoghurt before straining. I prefer to leave the yoghurt plain and salt/season or sweeten the finished cheese.

    *even though you may have thick yoghurt to start with, a short drain to rid some the whey will give you a better substitute to sour cream than using yoghurt with no draining. 

    Kim Cu`c wrote April 3rd.. "I am new baker and want strawberry oreos to not melt away" Kim supplied a photo of her cupcakes where the oreo pieces dissolved and sunk during baking time. 

    Answer:  Goodness, Kim Cu' c you were way to hard onself in your mail, your cupcakes looked awesome!! It's a tiny baking error that we all made at one time, easy to fix :) I've used an Australian chocolate cream biscuit the Tim Tam to demonstrate "cookie suspension". 

    Break your cream filled cookie/biscuit into a small bowl and pop into freezer whilst you make your cake batter.

    Remove cookies from freezer add a teaspoon or two of flour and toss your cookie/biscuit pieces in that. Alternatively toss in sifted cocoa if you are making chocolate cake. 

    Fold the floured, chilled cookie/biscuit pieces through the cake batter and bake as per usual. 

    The flour stops the sinking and pieces will be evenly distributed, the chilling keeps the filling relatively in place for a confetti like finish. 

    The Steamer: General answer to all that have asked about the "steamer" I use on cakes... I don't know if I have worded the post incorrectly for some countries? I call it a "clothes/clothing steamer", it was what you would steam business shirts, suits, wedding dress or your curtains with. I'm happy to recommend books to a yoghurt cheese box but I cannot recommend an electric appliance I have never used in another country, sorry :( Original post that has caused the "what is it" confusion here

    My steamer came from K-Mart in Australia.

    Cuisipro Donvier Yogurt Cheese Maker from Kitchenware suppliers and Amazon of course Cuisipro Donvier Yogurt Cheese Maker

    Happy Baking :) 

    Make a Matcha cupcake 

    Friday
    May012015

    Freeze dried fruit meringue 

    blackberry bash eton mess cupcake with freeze dried blackberry meringue and fresh tarragon 

    Join me on Facebook

    Ok, I confess. I did tell him they were lollies, my step son that is... when he was little and we were going to the city for the day I'd buy him a packet of freeze dried fruit for a treat.

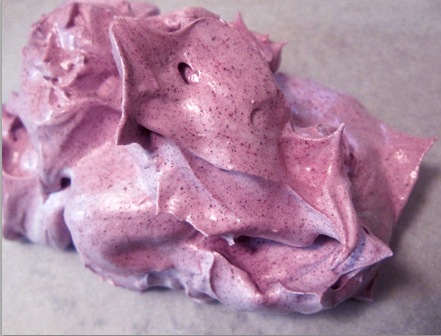
    Freeze dried fruit is an awesome patisserie ingredient, with the intense flavour and natural colour of fresh real fruit and slight "fizz/sherbet" mouth feel. 

    Freeze dried fruit powders come in a plethora of fruit, veg and herbs, whole, pieces and powder. 

    You can use freeze dried fruit powders in all of your favourite frostings from buttercreams to seven minute, just add a few teaspoons of powder (or to taste) in the last minute on mixing.  

    freeze dried black berry whipped cream

    Ganache and whipped cream you betcha :) The more creamy, the more fat your mixture contains the more powder you will have to use. The resulting flavours aren't as intense as "meringue" but still add a flavour boost. 

    Macaron shells and meringues come to life with a fresh flavour burst of chosen fruit. Think pavlovas, meringue based roulades and souffles too. 

    Cookies, biscuits, cake batters, tart and pie crusts can all be flavoured/coloured with freeze dried fruit powder. I made the best ever passionfruit shortbread last Christmas thanks the to addition of freeze dried passionfruit powder. 

    Wake up your breakfast by adding freeze dried fruit powders or pieces to your homemade granola, stir through yoghurt, add to your waffle batter or add a spoonful to your smoothie. 

    One of my favourite uses for freeze dried fruit powder is just flavouring sugar. Here castor sugar/super fine is flavoured with freeze dried berry powder and used for donut coating sugar. Flavoured sugar; a few teaspoons of freeze dried fruit powder per cup of sugar, mix and then store in an airtight jar. Use as required on you tea cakes, pancakes, donuts and the like. 

    Blackberry meringue

    You can use any meringue recipe italian, french or swiss... just add powder in last, about a tablespoon for 3-4 egg whites.

    Pre heat oven to 90cel  (194F) 

    line baking tray with non stick paper

    4 egg whites are room temperature

    220g (7.75oz) caster sugar (superfine)

    I pinch of cream of tartar

    10 to 15 grams (0.35 to 0.50oz) of freeze dried blackberry powder

    Whisk egg whites with an electric mixer until soft peaks form, gradually add sugar until combined, add blackberry powder and continue to whisk until thick and glossy.

    Spread onto prepared tray and bake for one and a half to two hours. Turn oven off and leave in oven until cool about another 2 hours.  

    Bash or break pieces off to stir through chantilly (vanilla) whipped cream with fresh berries for you eton mess. Either serve in small glasses, a giant bowl or fill cored cupcakes with the mixture. 

    I used fresh tarragon to add, ummm well "freshness" and the herbal aniseed flavours compliments the blackberries beautifully. 

    Haven't used freeze fruit before? Then I would suggest you start with raspberries, whole, bits or powder or passionfruit powder. Unless you are growing your own, both these give you the most bang for you buck and they are popular too!  

    A note on colours; blackberry, blueberry and black currant all give a "purple colour range", for pink or red use raspberry, sometimes the strawberry powder whilst tasting of fresh strawberries gives you an orange colour hue.

    Pros:   intense concentrated real fruit flavour, intense natural colour, slight fizz, a little goes a long way, your not adding excess liquid to you mixes, enjoy fruit out of season. Whole freeze dried fruits can be ground to powder or broken into small bits. 

    Cons:  cost, it's not inexpensive, powders will clump, pieces soften if exposed to moisture... silica sachets recommended if you buy a larger quantity than a sachet. 

    Where to get it is going to depend on where you are located: places to look specialty supermarkets and food stores, health food stores, patisserie supplies store. Seek out local growers for supreme quality. 

    New Zealand: Fresh As this brand is available to ship to Australia and also available from gourmet grocer online  

    Australia: The Essential Ingredient Sydney, Melbourne and online    

    Tastebom has a nice range, as does Melbourne Food Depot 

    US:  Amazon  

    Happy Baking :)  

    You might also be interested in red plum fruit caviar 

    or an easy white chocolate plastique

    Monday
    Dec102012

    Cherry Eton Mess

    cherry eton mess

    Join me on Facebook

    Tis the time for lots of macaron's that haven't quite "footed" and meringues that didn't quite, ummm "meringue?". What to do? Why make Eton Mess for dessert of course.

    Eton mess is a traditional English dessert consisting of a mixture of strawberries, pieces of meringue and cream, which is traditionally served at Eton College's annual cricket game against the students of Harrow School. wikipedia

    Oh my, I couldn't resist the boxes brimming with sweet dark cherries that fill the Australian fruit shops in December, plus I had macarons "oddments" and end of batch meringes from Christmas gift baking. So lets make a delightful mess... albeit a bit "girlie" today, I'm afraid I went too far with the 100's and 1000's (nonpareils).

    Cherry Eton Mess 

    (by all means go traditional and use strawberries instead if preferred) 

    Ingredients 

    *2 cups of chilled whipping cream

    2 tablespoons of sugar

    1 vanilla pod scraped of seeds (use vanilla extract to taste if you don't have pods)

    700 grams (25oz) of fresh cherries 

    leftover macaron shells, meringue pieces or buy a packet of meringue shells

    Method

    Pit most of the cherries, leaving a few whole ones for decoration. Place the pitted cherries and one tablespoon of the sugar in a small bowl and give the mixture a gentle squeeze to release a little of cherry juice, stir to combine. Refrigerate until serving time.

    Whip the cream, with the remaining one tablespoon of sugar and seeds from the vanilla pod until soft peaks form. Refrigerate until serving time.

    Assembly

    When you're ready to serve, in no particular order, spoon cream, cherries, broken pieces of meringues and macaron's into serving glasses. 

    Top with whole cherries dipped in melted white chocolate if desired. 

    *variations; try adding plain yoghurt or creme fraiche to the whipping cream. I often use 1 1/2 cream to half yoghurt, it will lighten the mouth feel and is more refreshing in summer. 

    Macerate the cherries or strawberries with sugar and a juice or alcohol of choice before assembling, brandy, grand marnier or a favourite dessert wine are good choices.

    Have fun and happy baking :)

    Want to make your own meringues? Here is a recipe for 4 individual pavlova shells that you can break up for your Eton Mess... omit or change colour as desired. 

    More desserts in glasses? How about Peach Verrines in Minutes

    More cherries? A quick cherry cupcake decoration

                          Snow Cherries

    Tuesday
    Nov272012

    Raspberry Custard Melting Moments recipe

                                        raspberry custard melting moments 

    Join me on Facebook

    Melting moments biscuits (cookies) are popular in Australian cafes and loved by home bakers.

    Yum, melting moments today; the soft textured shortbreads sandwiched with a sweet filling are perfect to serve with a cup of tea or favourite brewed beverage (I mean coffee, not beer... but hey I'm not one to judge). 

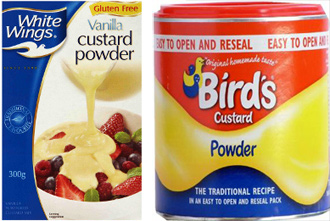
    popular brands of custard powder

    Now I've used 'custard powder' as part of the flour component of the recipe, it gives the biscuits a golden glow and a slight custard flavour. Custard powder is a commercial product that Aussies and Brits have been raised with, you can replace with an equal amount of cornflour if desired.

    Mine have a white chocolate raspberry ganache filling, but they can also be filled with butter cream or even a simple icing. 

    Raspberry Custard Melting Moments

    adapted from Donna Hay's 'modern classics book 2'

    Preheat oven to 160C (320F)

    line two baking trays with non stick paper

    makes 36 biscuits (18 sandwiched)

    ingredients

    175g unsalted butter, cubed and softened 

    1/4 cup pure icing sugar (confectioners sugar)

    1 tsp pure vanilla extract/essence 

    1 cup plain flour, (all purpose) sifted

    1/4 cup custard powder sifted 

    pinch of salt

    filling

    90 ml (3 fluid oz) pouring cream

    2 tablespoons of raspberry puree (squashed fresh or frozen raspberries pushed through a sieve)

    2 tablespoons of homemade or best quality raspberry jam

    1 piece of lemon zest (use a potato peeler)

    180 grams (6.34 oz) white eating chocolate finely chopped 

    method

    Place the cubed softened butter, icing sugar and vanilla in the bowl of electric mixer and beat on medium high speed until light and fluffy. 

    what light and fluffy looks like

    With a spatula or metal spoon stir through the sifted flour, custard powder and salt. You're just stirring until the ingredients are just combined, excess stirring with cause the gluten to develop and toughen the resulting cookies.

    Ok, if your mixture is too soft to roll into balls pop the whole bowl in the fridge for 20-30 minutes to firm up enough to roll teaspoons of the mixture into balls.

    Divide the balls between lined trays. Use a fork to press gently on top of each ball to make a indented pattern.

    Bake biscuits 15 to 17 minutes until lightly golden. 

    Set aside to cool.

    Make the filling by heating the cream, raspberry puree, raspberry jam and lemon zest stirring gently to incorporate until the cream "just" comes to the boil. Remove from heat, remove the lemon zest and pour hot mixture over the white chocolate, stir until smooth. Allow to cool until thick enough to spread.

    pipe the filling like I have with raspberry or plop on a little like I have with the *vanilla nutmeg

    Spread or pipe filling onto 18 cookie halves and sandwich with another cookie.

    Melted moments benefit from being stored overnight before eating... if you can wait!!

    Oh, I made up gift tins using small blank tins and printed labels on A4 paper. Clip art reindeer from Microsoft clip art.

    Goodness, this story is getting longer and longer I'll go before we hear the New Year countdown.

    Happy Baking :)

    *vanilla nutmeg filling; follow instructions for raspberry filling omitting the jam, raspberry puree and lemon. Once melted add one teaspoon of pure vanilla extract. Allow to cool until thick enough to spread. Grate fresh nutmeg on filling before sandwiching cookie.


    You might also be interested in making you own raspberry jam

    Got leftover custard powder, why not give 'Mum's vanilla slices' a try?

    Saturday
    Oct062012

    Hard Boiled Egg Moulds

    Bet you've always thought "If only my hard boiled egg was shaped like a bunny"... now you can! With the help of an egg press.

    Whether destined for your bento box to ward off the afternoon blues at the office or as a healthy snack for the kids on the weekend, these are fun to make and sooooo cute! 

    The only tricky bit is peeling a hot hard boiled egg, but once it's peeled put your egg in your bunny or bear mould; press down and clip. You then put the whole mould into a bowl of cold water in the refrigerator for 10 minutes. Unclip your mould to your smiley bunny. Good for animal shaped sushi rice too.

    These make fabulous cake pop moulds as well, albeit they are on the large size but a single bear for a baby shower favour in a cello bag with complimentary ribbon would make a lovely take home treat.

    If your not a foodie what about using them to press bath bombs for Christmas gifts?

    Ideal inexpensive stocking fillers, pop one, two or three in with your next Amazon order ...  Kotobuki Plastic Egg Mold, Rabbit and Bear 

    Happy Baking :) 

    Friday
    Oct052012

    Fast Bubble Sugar Cupcake Decorations

                 mini cupcake topped with bubble sugar (isomalt) topper

    Join me on Facebook or view more cupcakes in my Flickr Gallery

    Well, you know I love a bubble sugar decoration... today an even faster way to produce *isomalt bubble sugar toppers. 3 minute baking time, cool and taaa daaa you have bubble sugar toppers for your cupcakes and plated desserts.

    For this method use CakePlay isomalt sticks or left over cooked isomalt. Ideally two Silpat baking mats but two good quality silicone mats will do. 

    CakePlay sticks are precooked isomalt, available in clear and a range of colours. I used left over cooked isomalt that had already been coloured with americolor electric shades. 

    Method

    Pre heat oven to 180c (355 F)

    Grind a few sticks or left over isomalt in a mortar and pestle (or zip lock bag and a rolling pin) until you have a fine powder. Isomalt shatters quickly with little effort.

    Sift the crushed isomalt over your first Silpat. Reverse the second Silpat and place on top of the crushed isomalt to create a "sandwich". 

    Bake 3 to 4 minutes in preheated oven. Remove from oven and allow to cool without lifting the top Silpat.

    Once cool peel back the top Silpat and break bubble sugar into shards. Wearing gloves will protect the pieces from fingerprinting. Pieces are tissue paper thin, yet sturdy enough to handle. 

    Happy Baking :)

    Coca cola cupcake topped with traditional bubble sugar, where hot sugar is poured over a tilted alcohol covered tray.

    *Why Isomalt??: Bubble sugar made from sugar tends to be a thicker and we don't want to take out someone's crowns when they are eating your cupcake. The isomalt method is alcohol free. Isomalt holds up better than sugar work, that said it's always best to top your cakes/desserts just before serving.

    Got a question? Join me on Facebook for the fastest reply.

    You might also like to see another method of making bubble sugar with isomalt...

    Baking isomalt powder bubble sugar

    Or try your hand at toffee springs 

    Friday
    Sep212012

    Day Of The Dead Catrina Cupcake

    day of the dead catrina cupcake

    Join me on Facebook

    Day of the Dead (Spanish: Día de los Muertos) is a Mexican holiday celebrated throughout Mexico and around the world in other cultures. The holiday focuses on gatherings of family and friends to pray for and remember friends and family members who have died.

    wikipedia

    La Calavera Catrina ('The Elegant Skull') 1910 zinc etching by Mexican printmaker José Guadalupe Posada.

    Popularized by José Guadalupe Posada, Catrina is the skeleton of an upper class woman, and one of the most popular figures of the Day of the Dead celebrations, which occur during two days, November 1 and November 2.

    Ha, I love the day of the dead celebration; it's fun, macabre and makes for a fabulous themed event.

    Whether you want to make a Catrina or the simpler skull cupcake picks at the end of today's post, throw a day of the dead party this year!

    starting the skull

    Catrina starts with a basic white fondant skull shape. Features for the skull are indented and surrounds built up with modelling paste. You can see I've marked out where the mouth will be and a hole was added to the bottom for a toothpick. Once dry, lustre, petal dust and edible food marker added shadows and features to the piece. The hat itself is a round of thinly rolled modelling paste with a shell tool used to mark the edges. 

    Scruffy flowers were made with coloured modelling paste. Small pieces of each colour were rolled thinly and the edges were either pulled out with a small ball tool or cut into a fringe with a craft knife. From there they were rolled up and the excess pinched off the end to form a flower. 

    Finished flowers are very small and if you are thinking this all sounds a bit fiddly perhaps day of dead mini fondant toppers are what you are after. 

    Mini Day of the Dead fondant cupcake picks are super cute, easy enough for the kids to make and look fabulous topping a display of mini cupcakes. 

    Mini Day of the Dead fondant cupcake picks 

    basic white fondant skull shapes

    Form a basic skull shape from white fondant, use a toothpick to pierce a hole in the bottom of the skulls.

    Let your skull shapes dry for a few hours (or overnight) and then using edible food markers, edible glitter and lustre duster to decorate your pieces. Insert half toothpicks that have been coloured with food colouring into the skulls and top your mini cupcakes.

    Happy Baking :) 

    Looking for Catrina and Day of the Dead figures? SilverCrow has a range of traditional and not so traditional Day of the Dead pieces. Search 'Day of the Dead' once there.

    one of the many day of dead figures available from SilverCrow

    Or perhaps a Catrina pill/mint box?   

    you might also be interested in gothic horror cupcakes