Navigation
SEARCH
This form does not yet contain any fields.

    Entries in tutorial (8)

    Friday
    Feb032017

    Year of the Rooster cupcake

                                           year of the rooster cupcake

    Join me on Facebook

    After the Monkey and before the Dog, every twelve years comes the Rooster. 

    Year of the Rooster .... 1933, 1945, 1957, 1969, 1981, 1993, 2005, 2017, and 2029.

    I find the Chinese horoscope so confusing! It is the year of the rooster, the fire rooster or the female fire chicken. The chicken puzzles me, a chook is not a rooster. I decided to go with the Rooster like the ones you see as Chinese prints adorning restaurants and my Dad's nursing home was rather fond of them too. 

    If your in Melbourne the Chinese New Year festival runs to the 12th of February at Crown Casino, lots of fun and celebratory goings on around town. 

    Making a Rooster.... 

    I made a simple shape from a 50% white modelling chocolate, 50% fondant. Toothpicks mark the leg holes.

    I cut feather shapes from orange fondant for around the neck and marked a centre line. Marked the body with crescent shapes. 

    Black fondant was rolled super thin (add some cmc if necessary) and cut into longer feather shapes. The shapes are then shredded along the edges. 

    The pieces were attached to the body with a light touch of water. Here I am starting to attach the comb and playing with placement of tail feathers. 

    Gold leaf was applied to cupcake with a brush small brush, lifting on small pieces and laying them on pre dampened surface. 

    The finished dry rooster was shaded in petal lustre dusts, gold, red and blue. Attached to the cupcake with toothpick legs for easy removal. 

    Happy Chinese, Lunar, Spring Festival time :) 

    You might also like Chinese chicken wings 

    Or back to year of the Dragon

    Monday
    Sep142015

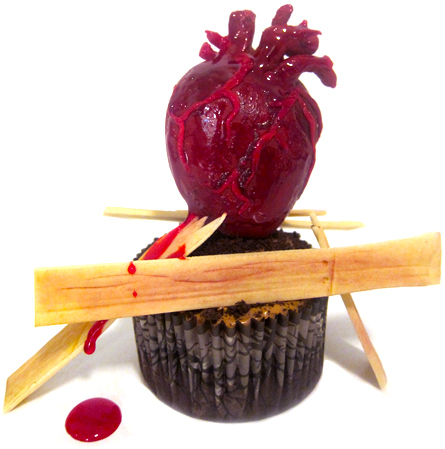
    The Tell-Tale Heart Cupcake

                                          The Tell-Tale Heart Cupcake

    Join me on Facebook 

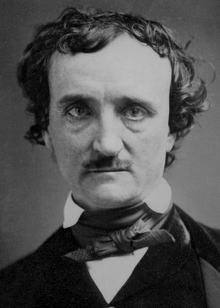
    "Villains!" I shrieked, "dissemble no more! I admit the deed! --tear up the planks! here, here! --It is the beating of his hideous heart!" Edgar Allan Poe

    I absolutely love 'The Tell-Tale Heart' the gothic story written in 1843 by Edgar Allan Poe!

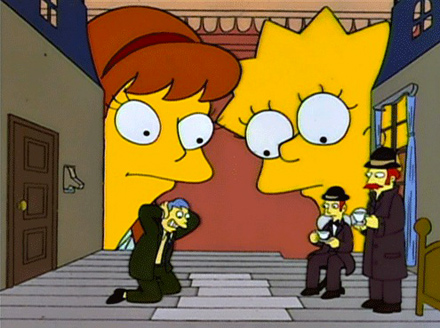
    My step son said today it reminds him of 'The Simpsons', yes it is a much referenced tale in pop culture.

    Of course you will need fondant "floor boards" for your tell tale heart cupcakes. 

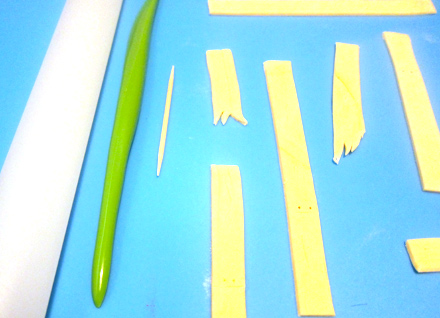
    White fondant was tinted with ivory colour gel, rolled thinly and cut into strips.  Using a toothpick and modelling tool mark out "wood grain", "nail holes" and "joins". Allow to dry.  

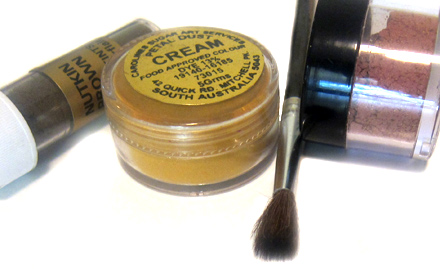
    With a small soft brush lightly apply brown shades of petal dust to highlight the grain. Your aiming to only highlight the grain with the darker colours so remove excess brown dust on a piece of paper towel before applying. Top with a dusting of cream or yellow petal dust. 

    When making hearts; mine are small so I've just used 50/50 white modelling chocolate and fondant. If making larger hearts consider using a lolly, chocolate, RKT or cake pop mixture inside the heart.  

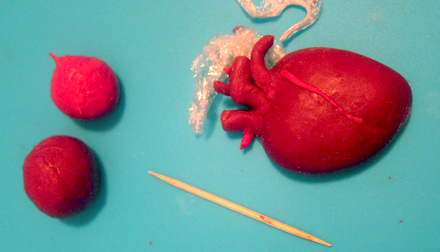
    The mixture is coloured red with cake gel colour (I used no taste red for bulk of the heart and a little red red for veins). Make a heart shape, make sure you add the aorta and other arteries to the top and few veins for texture.  Allow to dry. Dust lightly with brown petal dust.  

    Assemble your cakes, I used frosted cakes with cookie crumb topping. Attach your heart to your cake with a single toothpick, lean or attach boards with frosting.

    Using cake decorating gel (coloured red if clear) and a small paint brush paint a thin coat of "blood goo" on to your hearts. The brown petal dust you used earlier will blend/smudge giving you a "meaty" look to your heart. 

    Happy baking or gothic Halloween making :) 

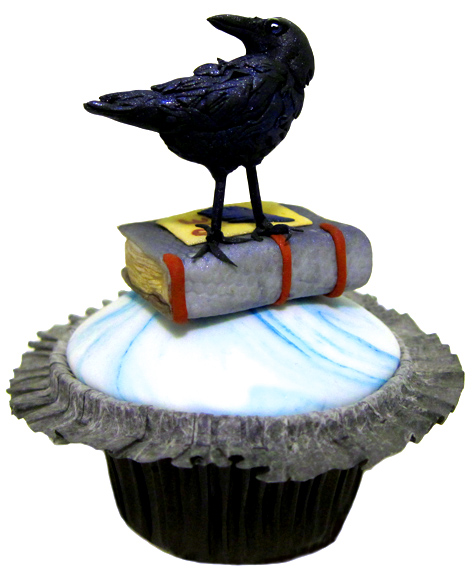
    In the mood for more Poe cupcake raven tutorial.  

    Saturday
    Mar282015

    Four and Twenty Blackbirds baked in a Pie cupcake

                            four and twenty blackbirds baked in a pie cupcake

    Join me on Facebook

    Ahhhh ha ha, I was so tempted to make a cupcake from the original verse from 'Sing a Song of Sixpence' ...

    Sing a Song of Sixpence,
    A bag full of Rye,
    Four and twenty Naughty Boys,
    Baked in a Pye.
    Tommy Thumbs Pretty Song Book: published in London around 1744  wikipedia

    Instead I went with the modern to version to tie in with this cute retro pie bird from Tala that my friend Jacinta gave me.

    Thanks Jacinta, I love my pie bird :) 

    Live birds inside pies were actually served as an entremet during dinners in the 1500's. An "amusement" between courses, written about in Christoforo Ji Messiaburgo's cookbook on how to prepare a banquet, 'Banchetti composizioni di vivande e apparecchio generale'.

    Today's cupcake uses simple shapes, I've made a smaller cupcake but you could use a variation of the same design in a larger cake.

    I use the heavily fondanted (that's not a word, but you know what I mean) cupcakes as place setting markers, or central cake surrounded by the eating cupcakes.

    For a nursery rhyme theme go with the other verses, perhaps golden foil wrapped chocolate coins for...

    The king was in his counting house,
    Counting out his money;

    Mini honey cakes for...

    The queen was in the parlour,
    Eating bread and honey

    Start making today's cupcake by covering your ganached or butter cream topped cupcake with a thin layer of fondant. Today I use americolor ivory for the "pastry" colour. 

    Here I was still deciding what size bird head to go with, small if you want 24 birds in the pie or larger if you want the pie bird look.  

    Make your beaks, heads, cherries, wings etc with coloured fondant. I used a black food marker for the centre of the eyes and white food colour on the tip of a tooth pick to create a highlight on the eyes. 

    Roll more ivory coloured fondant out thinly and cut a circle big enough to cover the already fondant covered cupcake. Dampen the edges of most of the round (leave a little undampened so you can lift edge if you want a bird popping it's head out). Crimp the edges. 

    Cut, snip and generally poke holes through the top layer of fondant where you want your beaks, birds etc to be. Colour fondant using petal dusts and a small soft artists brush. I used Caroline's petal dusts, in brown, egg yellow and cream.  

    Fun part now... start inserting all your little pieces. Use a dampened paintbrush, water pen or cake glue to attach your pieces. Allow to dry and you've got your self a cute little cupcake that could be part of a major theme for your baby shower or the like event. 

    Happy Baking :) 

    Trivia: Four and Twenty pies are the iconic Australian meat pie synonymous with attending a football match. 

    Prefer a more realistic black bird... learn to a make a Raven

    Butterflies more your thing, learn to make a beaded sugar butterfly 

    Tuesday
    Oct222013

    Catrin Day of the Dead Cupcake

    catrin day of the dead cupcake

    Join me on Facebook

    Day of the Dead (Spanish: Día de los Muertos) is a Mexican holiday celebrated throughout Mexico and around the world in other cultures. The holiday focuses on gatherings of family and friends to pray for and remember friends and family members who have died. November 2nd is the official date for Day of the Dead, it is celebrated between October 31st and November 2nd.

    In 2013 Day of the Dead celebrations begin November 1st and finish November 2nd. 

    I've made a Cartrin this year, because a lady needs a dance partner. 

    Made in the same way as the Catrina skull last year, you start with a white egg shaped piece of fondant or modelling paste.

    Roll small sausage shapes and add to the skull to build up features. Use your finger tips and modelling tools to blend and shape the skull. Use a toothpick to mark out cracks and scratches on the skull.

    Start the body with a torso shaped piece of fondant or puffed rice treat. If using puffed rice treat, cover with a base layer of fondant first. Cut a vest and apply with damp brush, I had imprinted the rolled fondant so I dusted with green lustre dust at this stage to bring out the pattern and add depth of colour. Small balls of fondant were marked with a toothpick and attached as the buttons.

    Make white collar for the shirt, attach. Proceed to make the jacket, again attaching with a brush barely dampened with water.

    Bow tie is made with two rectangles, the larger one is pinched in the middle and shaped. The smaller one is wrapped around the center of the large one.

    Make pocket handkerchiefs with small triangles, attach to jacket and then attach false pocket flap to the top.

    For the hat I used puffed rice treat to reduce the weight, I know he is a skeleton and all but I didn't want to squoosh his head. Squeeze and shape the puffed rice treat into a top hat, cover with fondant. Make a band and brim with fondant.

    For the buttonaire see Catrina Cupcake  

    Leave the pieces to dry, supported where necessary to keep the shapes. Once dry use dusts to shade the piece and insert either a strand of dry spaghetti or a small wooden through the whole piece and attach to your cupcake.

    Happy Baking :)  

    Amazon has a range of day of the dead figures... click on the Senorita to visit Amazon :) 

    You might also be interested in a recipe for quick and easy Chocolate Peanut Spiders for the kids and young at heart.

    Friday
    Oct052012

    Fast Bubble Sugar Cupcake Decorations

                 mini cupcake topped with bubble sugar (isomalt) topper

    Join me on Facebook or view more cupcakes in my Flickr Gallery

    Well, you know I love a bubble sugar decoration... today an even faster way to produce *isomalt bubble sugar toppers. 3 minute baking time, cool and taaa daaa you have bubble sugar toppers for your cupcakes and plated desserts.

    For this method use CakePlay isomalt sticks or left over cooked isomalt. Ideally two Silpat baking mats but two good quality silicone mats will do. 

    CakePlay sticks are precooked isomalt, available in clear and a range of colours. I used left over cooked isomalt that had already been coloured with americolor electric shades. 

    Method

    Pre heat oven to 180c (355 F)

    Grind a few sticks or left over isomalt in a mortar and pestle (or zip lock bag and a rolling pin) until you have a fine powder. Isomalt shatters quickly with little effort.

    Sift the crushed isomalt over your first Silpat. Reverse the second Silpat and place on top of the crushed isomalt to create a "sandwich". 

    Bake 3 to 4 minutes in preheated oven. Remove from oven and allow to cool without lifting the top Silpat.

    Once cool peel back the top Silpat and break bubble sugar into shards. Wearing gloves will protect the pieces from fingerprinting. Pieces are tissue paper thin, yet sturdy enough to handle. 

    Happy Baking :)

    Coca cola cupcake topped with traditional bubble sugar, where hot sugar is poured over a tilted alcohol covered tray.

    *Why Isomalt??: Bubble sugar made from sugar tends to be a thicker and we don't want to take out someone's crowns when they are eating your cupcake. The isomalt method is alcohol free. Isomalt holds up better than sugar work, that said it's always best to top your cakes/desserts just before serving.

    Got a question? Join me on Facebook for the fastest reply.

    You might also like to see another method of making bubble sugar with isomalt...

    Baking isomalt powder bubble sugar

    Or try your hand at toffee springs 

    Sunday
    Nov132011

    Gold Fish Cupcake

    fondant goldfish cupcake pick tops a fondant covered jasmine tea cupcake

    Come join me on facebook!  or view my Flickr cake and baking gallery 

    I loved my goldfish, I truly did. I lugged around my fish tank, filters, pumps and paraphernalia from apartment to apartment when I was young. Then the inevitable happened the fish tank sprung a leak and my father said to me "don't worry I'll come over and get your fish and put the fish in my pond" and so he did... where his giant fish proceeded to gobble up my fish in 39.9 seconds! 

    Today we are making a fondant goldfish, mine is flat backed but you can make it 3D the same way. I've added a toothpick to turn it into a cupcake pick.

    Okay let's get started.

    You'll need:

    Fondant (with some *CMC added) or modelling paste in colours of choice

    lustre or petal dusts in colours of choice

    toothpicks painted with food colour of choice

    cake/flower glue (optional)

    leaf glaze (optional)

    Start by making an egg shape with your fondant and shape it into a "fish" shape.

    Add scale indents with the tip of piping nozzle or similar. I wanted lots of texture on my fish, but if you want a more realistic fish make your indents further apart.

    Role out some of the fondant laced with CMC as thinly as you can. Cut fins and tail with a small knife or small scissors, adhere to your fish body with water. Shape slightly to give add the illusion of movement.

    Use plastic wrap or small pieces of foam to support shaped tail and fins.

    Add a ring for the eye socket, add a small piece of thin fondant for the gills, cover the join of the tail with another piece of thin fondant and blend in. Check whether you need to add more scales or any finishing touches. Make a hole in the underneath of the fish with a toothpick. Allow to dry, 6 hours to overnight.

    Once dry take a small dry paintbrush and dust with colours of choice, starting with the back of the fish. I used white lustre dust and red petal dust. Blend, blend, blend with your paintbrush until you have desired finish. You can let the base colour show through like I did or fully cover with the dusts. 

    Dip you toothpick into cake/flower glue or dampen with water and insert into the base of the fish. Add the eyeball to your fish with a little black fondant, glaze with leaf glaze if desired. That's it! You have your self a fish cupcake pick.

    Happy Baking :)

    *CMC powder, modelling paste, leaf glaze, cake/flower glue, lustre dust and petal dust are available from cake decorating suppliers/shops. 

    or how about going a little Japanese with a chocolate goldfish covered in gold leaf

    Then there is roses made from Starburst fruit chews.

    Friday
    Oct142011

    White Chocolate Plastique (Modelling Chocolate


    white chocolate plastique rose, dusted with gold lustre dust

    Today I have an easy and excellent icing sugar (confectioners sugar) based white chocolate plastique for you to try. With no cooking involved you can whip this up in minutes, ready to create flowers or figures. This plastique can also be added to your precoloured fondant.

    White Chocolate Plastique (Modelling Chocolate)

    suitable for modelling figures and flowers, not for covering cakes. 

    Ingredients

    25g (0.88oz)white chocolate (I used couverture) 

    100g (3.5oz) icing sugar (confectioners sugar)

    75g (2.65oz) cocoa butter

    100g (3.5oz) glucose syrup

    Method

    In the bowl of a food processor combine the first three ingredients, until well blended. Add the glucose syrup and blend. Depending how warm your kitchen is, you will now have a ball of mixture or coarse breadcrumb like mixture... either way, tip contents onto non stick mat and knead until smooth and elastic. *Your chocolate plastique is now ready to use. 

    Uses

    The chocolate plastique can be rolled paper thin, perfect for petals.

    roll paper thin with a plastic rolling pin

    Use it to create figures. Knead in food colours as desired.

    Mixing half and half with pre-coloured modelling/flower paste will give you the flexibility of the plastique combined with the strength of the paste. Depth of colour is easily reached by over tinting your modelling paste before knead together with plastique. 50/50 is the ratio I usually use, however in hot weather I use 70 modelling paste/30 plastique. 

    Storage

    Keep leftover chocolate plastique well wrapped in plastic wrap and in an airtight container.

    *Troubleshoot: if you have hot hands, your plastique might seperate a little... just leave to one side for 10 minutes & then try kneading again. A few minutes of refrigeration can also help.

    Glucose syrup if you haven't used it before is extremely sticky, have a scrapper on hand if any adheres to the inside of your bowl to make sure you get it all out and incorporated into plastique. 

    Happy Baking :)

    You might also be interested in liquid sweeteners and syrups

    Thursday
    Jan062011

    Strawberry agar agar jelly pearls

    strawberries and cream cupcake topped with strawberry agar agar jelly pearls

    Join me on Facebook or view more cakes in my Flickr Gallery

    Goodness, I had a fabulous finish to 2010 when I was invited in December to give an interview on the gorgeous blog Haniela's, then on Christmas Eve I was featured on my all time favourite cupcake blog Cupcakes Take The Cake which caused me to burn the turkey I'm sure as I was so distracted and happy!! 

    On to the first cupcake of 2011, which ties into answering the first email of year (ok, technically this a December 2010 mail but you know I'm always running behind) which comes from Issy in Auckland NZ and read.....

    hi love your blog and I wanted to know if you can make fruit pearls without the chemicals. I'm a vegetarian so gelatine isn't an option. i wanted fruit pearls to go on cupcakes. 

    Thanks for the mail Issy. The chemicals Issy is referring to are from an earlier post I did on making fruit caviar/pearls with the molecular gastronomy method favoured by many chefs. 

    Ok, Issy you can make fruit pearls or caviar with just agar agar, however you have to use them immediately if you are using them for cupcake toppers as they shrink dramatically when exposed to air. They do taste exactly of the juice you use & are easy to handle. Unlike the molecular gastronomy version that are a gel "case" with fluid inside the agar agar version are a solid soft gel. 

    Making Strawberry Agar Agar Pearls

    you will need accurate scales and a plastic syringe

    Recipe

    100 ml (3.4 fluid oz) of strawberry juice or juice of choice

    1 gram (0.035 oz) of agar agar powder

    1 cup of flavourless vegetable oil

    Apple juice for storing the pearls in. 

    Method

    In a small saucepan whisk together the juice and the agar agar powder. Over medium heat, whisking constantly bring the mixture to a boil. Reduce heat and simmer until the agar agar is completely dissolved. Remove from heat and let the mixture stand for 4 to 5 minutes.

    Fill your syringe with the juice mixture and add to the oil... drop by drop.

    Strain the pearls from the oil and transfer to apple juice until ready to use. The apple juice washes away the oil residue and the leftover cup of oil can be reused for baking.


    Now you will have perfect small fruit pearls ready to top your cupcakes.

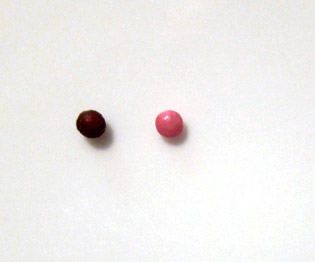
    And here comes the "but"... these guys shrink dramatically when exposed to air.

    On the left is one of the fruit pearls after being exposed to air for 3 hours, on the right is a nonpareil (a hundred and thousand sprinkle). 

    As you can see the shrinkage is extreme, but if you're serving them straight away they are pretty, taste great and easy to make. 

    Hope that helped Issy, let me know if you decide to  make them. 

    Happy Baking :)

    Related posts...

    Plum fruit caviar/pearls the molecular gastronomy method

    A hybrid gel that moulds easily and is extremely stable, made from gelatine/agar agar is used to create gel shapes for topping peanut butter frosting.