Navigation
SEARCH
This form does not yet contain any fields.

    Entries in "how to" (11)

    Saturday
    Mar282015

    Four and Twenty Blackbirds baked in a Pie cupcake

                            four and twenty blackbirds baked in a pie cupcake

    Join me on Facebook

    Ahhhh ha ha, I was so tempted to make a cupcake from the original verse from 'Sing a Song of Sixpence' ...

    Sing a Song of Sixpence,
    A bag full of Rye,
    Four and twenty Naughty Boys,
    Baked in a Pye.
    Tommy Thumbs Pretty Song Book: published in London around 1744  wikipedia

    Instead I went with the modern to version to tie in with this cute retro pie bird from Tala that my friend Jacinta gave me.

    Thanks Jacinta, I love my pie bird :) 

    Live birds inside pies were actually served as an entremet during dinners in the 1500's. An "amusement" between courses, written about in Christoforo Ji Messiaburgo's cookbook on how to prepare a banquet, 'Banchetti composizioni di vivande e apparecchio generale'.

    Today's cupcake uses simple shapes, I've made a smaller cupcake but you could use a variation of the same design in a larger cake.

    I use the heavily fondanted (that's not a word, but you know what I mean) cupcakes as place setting markers, or central cake surrounded by the eating cupcakes.

    For a nursery rhyme theme go with the other verses, perhaps golden foil wrapped chocolate coins for...

    The king was in his counting house,
    Counting out his money;

    Mini honey cakes for...

    The queen was in the parlour,
    Eating bread and honey

    Start making today's cupcake by covering your ganached or butter cream topped cupcake with a thin layer of fondant. Today I use americolor ivory for the "pastry" colour. 

    Here I was still deciding what size bird head to go with, small if you want 24 birds in the pie or larger if you want the pie bird look.  

    Make your beaks, heads, cherries, wings etc with coloured fondant. I used a black food marker for the centre of the eyes and white food colour on the tip of a tooth pick to create a highlight on the eyes. 

    Roll more ivory coloured fondant out thinly and cut a circle big enough to cover the already fondant covered cupcake. Dampen the edges of most of the round (leave a little undampened so you can lift edge if you want a bird popping it's head out). Crimp the edges. 

    Cut, snip and generally poke holes through the top layer of fondant where you want your beaks, birds etc to be. Colour fondant using petal dusts and a small soft artists brush. I used Caroline's petal dusts, in brown, egg yellow and cream.  

    Fun part now... start inserting all your little pieces. Use a dampened paintbrush, water pen or cake glue to attach your pieces. Allow to dry and you've got your self a cute little cupcake that could be part of a major theme for your baby shower or the like event. 

    Happy Baking :) 

    Trivia: Four and Twenty pies are the iconic Australian meat pie synonymous with attending a football match. 

    Prefer a more realistic black bird... learn to a make a Raven

    Butterflies more your thing, learn to make a beaded sugar butterfly 

    Friday
    Mar202015

    Come on get Happy Partridge Family cupcakes

                                                  come on get happy partridge family cupcakes

    Join me on Facebook 

    Ear worm: An earworm, sometimes known as a brainworm, is a catchy piece of music that continually repeats through a person's mind after it is no longer playing  wikipedia 

    Isn't it the worst thing (ok not the worst thing, but come with me here) when a song or jingle gets stuck in your head. 

    I saw a bright yellow fluffy Easter chick in a half shell at the supermarket, that made me think of The Partridge Family opening credits, which led me to singing in my head 'C'mon get Happy' for the rest of the day. I didn't know all the lyrics so it was "Hello world dah duh dah GET HAPPY" :D  

    Having a 70's theme party? Or perhaps you mum still has her David Cassidy posters and you want to make her some partridges...   

    fondant coloured with blue, yellow and red

    Trivia; the artwork on the partridge family bus was inspired by the work of Piet Mondrian a dutch artist 1872-1944 

    Start with brightly colouring your fondant, I've used Americolor gel pastes today: electric blue, yellow, pink, purple, red red for the fondant and bright white for the toothpicks I used for the legs. A black food marker was used for the eyes. 

    My partridges shaped from white fondant are "chubby" because I thought it was cuter. 

    I started with this shape and pulled the top over to one side. Insert half a white food colour painted toothpick for each leg on the small partridges. 

    toothpicks painted with white food colour... make sure people know there is toothpicks in these cakes

    Roll out your pre coloured fondant, cut into tear drop shapes (for the large bird I used a round cutter and trimmed to shape). Dampen the back of your partridges and apply coloured fondant shapes. Draw eyes on with a black food marker. Insert the birds into prepared cakes. Roll a small piece of white fondant into a snake shape, cut small pieces off to make birds feet. Apply feet by slightly dampening ends and pressing on base of legs, use a spare tooth pick to secure the feet in place.  

    All done except for song 'C'mon get Happy'  

    and Happy Baking :)  

    Chocolate Hot Cross buns anyone? Recipe here

    Planting an Easter garden you will need quick chocoalte soil 

    Tuesday
    Oct282014

    Halloween Cake Lace Butterflies

                                   metallic cake lace butterflies 

    Join me on Facebook

    Can butterflies be creepy? I thought so when I was saying to a friend I was planning on making butterflies for Halloween, they disagreed but hey, I was determined to get more use out my gorgeous but expensive Claire Bowman silicone butterfly mat.

    Claire Bowman making cake lace butterflies

    As seen in the video, butterflies made the Claire Bowman way usually have a *first layer of pre made metallic icing and after baking a second layer of white cake lace icing. The second layer is to prevent brittleness, but since I haven't had a problem with the butterflies being brittle I just used one layer of silver.

    I baked the mat/butterflies for 5 minutes at 60 cel (140 F) . Leave to cool for a few minutes, check a butterfly by lifting a corner... they should peel off easily. If your butterfly still seems to soft, return to oven for a few more minutes.

    Once baked, I placed my butterflies on the back of an egg carton covered with plastic wrap to add shape.

    When fully set, a soft brush was used to dust on cake decorating black shimmer dust. The finished butterflies reminded me of vintage marcasite brooches. Attach the butterflies to cocktail and dessert glasses with a *tiny dab of cake glue and of course the butterflies make the perfect toppers for your Halloween cupcakes, chocolate truffles and cookies too.

     *for use on the glasses the single layer cake lace worked perfectly, staying firm and in shape all day. If you need to manipulate the butterflies further then I would recommended following Claire Bowman's instructions. 

    *make sure you only use a dot of cake glue if the butterflies become wet they will dissolve. 

    Happy Baking :)  

    You might also be interested in an attack of the swamp zombie cupcake

    or perhaps Poe is more to you liking with The Raven and Black Cat cupcakes

    Tuesday
    Oct222013

    Catrin Day of the Dead Cupcake

    catrin day of the dead cupcake

    Join me on Facebook

    Day of the Dead (Spanish: Día de los Muertos) is a Mexican holiday celebrated throughout Mexico and around the world in other cultures. The holiday focuses on gatherings of family and friends to pray for and remember friends and family members who have died. November 2nd is the official date for Day of the Dead, it is celebrated between October 31st and November 2nd.

    In 2013 Day of the Dead celebrations begin November 1st and finish November 2nd. 

    I've made a Cartrin this year, because a lady needs a dance partner. 

    Made in the same way as the Catrina skull last year, you start with a white egg shaped piece of fondant or modelling paste.

    Roll small sausage shapes and add to the skull to build up features. Use your finger tips and modelling tools to blend and shape the skull. Use a toothpick to mark out cracks and scratches on the skull.

    Start the body with a torso shaped piece of fondant or puffed rice treat. If using puffed rice treat, cover with a base layer of fondant first. Cut a vest and apply with damp brush, I had imprinted the rolled fondant so I dusted with green lustre dust at this stage to bring out the pattern and add depth of colour. Small balls of fondant were marked with a toothpick and attached as the buttons.

    Make white collar for the shirt, attach. Proceed to make the jacket, again attaching with a brush barely dampened with water.

    Bow tie is made with two rectangles, the larger one is pinched in the middle and shaped. The smaller one is wrapped around the center of the large one.

    Make pocket handkerchiefs with small triangles, attach to jacket and then attach false pocket flap to the top.

    For the hat I used puffed rice treat to reduce the weight, I know he is a skeleton and all but I didn't want to squoosh his head. Squeeze and shape the puffed rice treat into a top hat, cover with fondant. Make a band and brim with fondant.

    For the buttonaire see Catrina Cupcake  

    Leave the pieces to dry, supported where necessary to keep the shapes. Once dry use dusts to shade the piece and insert either a strand of dry spaghetti or a small wooden through the whole piece and attach to your cupcake.

    Happy Baking :)  

    Amazon has a range of day of the dead figures... click on the Senorita to visit Amazon :) 

    You might also be interested in a recipe for quick and easy Chocolate Peanut Spiders for the kids and young at heart.

    Saturday
    Jul062013

    Dragon Egg Cupcake 

                                                dragon egg cupcake 

    Join me on Facebook

    “Well, I don’t have any pet dragons – maybe they would come in handy from time to time– nobody has given me any dragon eggs and since she had to walk into fire in order to hatch them I am not sure I particularly want that bit of it.”           

    Prime Minster of Australia Julia Gillard 

    Guardian UK May 27th 2013 political editor Lenore Taylor discussing HBO's Game of Thrones with Prime Minster Glilard.

    Dang, maybe Prime Minster Julia Gillard should have risked that walk into fire because one month later on the June 27th the morning newspaper read... 

    Ok, it's an emotive headline... but hey Australia was having it's own "Game of Thrones" moment when Julia Gillard was replaced by Kevin Rudd who had been replaced by Julia Gillard three years earlier.

    Confused? here is a mini Australian leader explanation before we get onto the cupcake...

    Ok, it works like this a Prime Minister has a decline in his or her personal ratings, and a perceived loss of support amongst the MPs in their own party. Sometimes you might be directly challenged by an MP who thinks they can be a better leader and they have the numbers..  and at other times like with Prime Minster Gillard you are so sure of the support of your MP's you make the challenge to squash any rumors. But oh dear, then there is a spill, MP's "cross" and all of sudden you aren't Prime Minster anymore. Kevin Rudd is the new Prime Minister of Australia. 

    For the cupcake today I wanted a melted/worn... but pretty (ok, that last bit isn't too Game of Thronesish).

    I started with a simple fondant egg shape, narrowing a little more at the top to allow for layers of fondant scales.

    The scales are tiny triangles of fondant. Attach the scales with water (that is as in "dampen backs slightly" you don't want wet fondant), starting around the centre and working up and then down if you want to the whole egg. I gently pressed down on the scales with a downward movement to go with the melting/worn theme today.

    Using silicone cog moulds, I moulded fondant cogs and stretched and squeezed them lightly into "worn like" pieces. I attached the cogs using water around the edges of a red fondant covered cupcakes. Let everything dry at this point because once dry you are going get a out a small *paint brush and your metallic food paints and get painting. 

    For the wings cut some wing shapes from modelling paste. The wings must be rolled out as thinly as possible as to not add excess weight to your eggs. 

    Wing with base coat of metallic dust. Please forgive food coloured hand.

     Now for the fun part, paint your cupcake to your hearts desire. I used a small artists brush I dabbed various Americolor airbrush sheen colours on the top of the cakes. The cogs were painted with copper and bronze food paint from the same range. The dragons egg was swiped in downwards motion with blue and green sheens. For the wings I used petal dusts in jade, slate and white shimmer and blend, blend, blend until you happy with the result. Lastly a light dusting of jade dust on top of egg and white shimmer on the front. 

    Cut slits in each side of your eggs, flick out a few scales as your dragon is breaking out. Insert the wings that have a little cake glue applied on wide end. Prop your eggs to support the wings drying in position, this can take a few hours to overnight depending on the temperature where you are. 

    So, coming to close now and if you still wondering "where in the hell is Australia?" or "what is this thing called HBO's Game of Thrones?"... tune in later in next week for pulled sugar work or if you are a fan of the Iron Throne check back on the weekend for some Game of Thrones baking. 

    Happy Baking :)

    You might also be interested in Bubble Wrap Chocolate 

    or how about a candied beetroot topper?

    Tuesday
    Nov272012

    Raspberry Custard Melting Moments recipe

                                        raspberry custard melting moments 

    Join me on Facebook

    Melting moments biscuits (cookies) are popular in Australian cafes and loved by home bakers.

    Yum, melting moments today; the soft textured shortbreads sandwiched with a sweet filling are perfect to serve with a cup of tea or favourite brewed beverage (I mean coffee, not beer... but hey I'm not one to judge). 

    popular brands of custard powder

    Now I've used 'custard powder' as part of the flour component of the recipe, it gives the biscuits a golden glow and a slight custard flavour. Custard powder is a commercial product that Aussies and Brits have been raised with, you can replace with an equal amount of cornflour if desired.

    Mine have a white chocolate raspberry ganache filling, but they can also be filled with butter cream or even a simple icing. 

    Raspberry Custard Melting Moments

    adapted from Donna Hay's 'modern classics book 2'

    Preheat oven to 160C (320F)

    line two baking trays with non stick paper

    makes 36 biscuits (18 sandwiched)

    ingredients

    175g unsalted butter, cubed and softened 

    1/4 cup pure icing sugar (confectioners sugar)

    1 tsp pure vanilla extract/essence 

    1 cup plain flour, (all purpose) sifted

    1/4 cup custard powder sifted 

    pinch of salt

    filling

    90 ml (3 fluid oz) pouring cream

    2 tablespoons of raspberry puree (squashed fresh or frozen raspberries pushed through a sieve)

    2 tablespoons of homemade or best quality raspberry jam

    1 piece of lemon zest (use a potato peeler)

    180 grams (6.34 oz) white eating chocolate finely chopped 

    method

    Place the cubed softened butter, icing sugar and vanilla in the bowl of electric mixer and beat on medium high speed until light and fluffy. 

    what light and fluffy looks like

    With a spatula or metal spoon stir through the sifted flour, custard powder and salt. You're just stirring until the ingredients are just combined, excess stirring with cause the gluten to develop and toughen the resulting cookies.

    Ok, if your mixture is too soft to roll into balls pop the whole bowl in the fridge for 20-30 minutes to firm up enough to roll teaspoons of the mixture into balls.

    Divide the balls between lined trays. Use a fork to press gently on top of each ball to make a indented pattern.

    Bake biscuits 15 to 17 minutes until lightly golden. 

    Set aside to cool.

    Make the filling by heating the cream, raspberry puree, raspberry jam and lemon zest stirring gently to incorporate until the cream "just" comes to the boil. Remove from heat, remove the lemon zest and pour hot mixture over the white chocolate, stir until smooth. Allow to cool until thick enough to spread.

    pipe the filling like I have with raspberry or plop on a little like I have with the *vanilla nutmeg

    Spread or pipe filling onto 18 cookie halves and sandwich with another cookie.

    Melted moments benefit from being stored overnight before eating... if you can wait!!

    Oh, I made up gift tins using small blank tins and printed labels on A4 paper. Clip art reindeer from Microsoft clip art.

    Goodness, this story is getting longer and longer I'll go before we hear the New Year countdown.

    Happy Baking :)

    *vanilla nutmeg filling; follow instructions for raspberry filling omitting the jam, raspberry puree and lemon. Once melted add one teaspoon of pure vanilla extract. Allow to cool until thick enough to spread. Grate fresh nutmeg on filling before sandwiching cookie.


    You might also be interested in making you own raspberry jam

    Got leftover custard powder, why not give 'Mum's vanilla slices' a try?

    Monday
    Oct152012

    Butterscotch Brittle Recipe

                                  salted butterscotch brittle

    Join me on Facebook

    Have you tried your hand at making your own confectionary? It would have been my Mum's birthday today, and as Mum loved all forms of caramels including hard butterscotch lollies I thought we could look at making candies/lollies starting with cooking sugar to the 'hard crack' stage. 

    'Hard crack' lollies include; candy canes, lollipops, brittles, praline, lollies categorised as "boiled lollies" like fruit/acid/sour drops and hard caramels. 'Hard crack' is reached at 150C (300F), we are taking it a little further today to produce caramel.

    Glucose syrup is another form of sugar and like fructose often added to granulated sugar when making candy. The glucose syrup helps prevent the sugar crystallising. In Australia you can buy glucose syrup in any supermarket, you might have to seek it out in other parts of the world.

    Butterscotch Brittle

    Buttery and carmelly (ok, that's not a word... but it should be!) with a touch of sea salt, today's hard lollies are meant to be sucked, add peanuts, pecans or macadamia for nut brittle. Whether packaged in cello bags complete with a small hammer to crack off pieces, or neatly moulded; butterscotch brittle makes for a lovely homemade gift. 

    lightly oil a 18cm x 28cm tin (7in by 11in sheet pan)

    Ingredients

    2 cups white sugar (granulated white) 

    1/3 cup water

    *2/3 cup glucose syrup

    2 tsp of pure vanilla extract/essence

    125g butter, cubed (4oz)

    pinch or two of salt

    flaked sea salt if desired for topping

    Method

    In a medium saucepan combine, sugar, water and glucose syrup. Stir together over a low heat until the sugar is dissolved.

    Bring to boil, wash down any sugar crystals around the edge of sugar mixture with a damp pastry brush.

    a damp pastry brush is used to wash down any sugar crystals

    Reduce heat to low, (mixture should still be boiling) and boil without stirring for 7 to 10 minutes or until it reaches 170C (338F) on a candy thermometer. The mixture should be an amber colour.

    a inexpensive candy thermometer is the easiest way to ensure accurate setting points. 

    Remove saucepan from heat and with a wooden spoon stir in butter, vanilla and two pinches of salt (if your using salt on top reduce pinch of salt to one pinch).

    Pour into oiled pan, make sure you do this in one pour... if you scrape the pan onto what you have poured it will leave marks/discoloration on the finished candy.

     Whilst the mixture is still fairly hot, score lines and sprinkle with sea salt. Scoring the lines allows for fairly neat breaks in the finished candy, however to get "perfect" pieces you have to score very deeply or use a candy mould with shapes of choice.

    Allow to totally cool. Pop out of tin and package as desired. 

    *glucose syrup is thick and very sticky, oil the measuring cup for ease of pouring.

    * stir in 1 to 2 cups of dry roasted peanuts when adding the butter for butterscotch peanut brittle. 

    Happy Baking :)

    you might also be interested in liquid syrups 

    you might also be interested in honey comb/sponge candy

    Monday
    Oct082012

    Dried Chicken Dog Treats

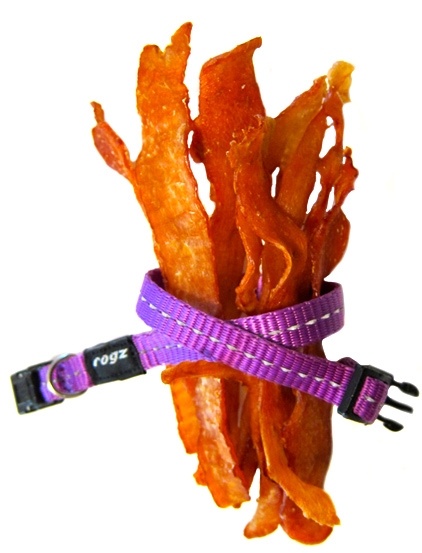
                                                           dried chicken treats

    Join me on Facebook

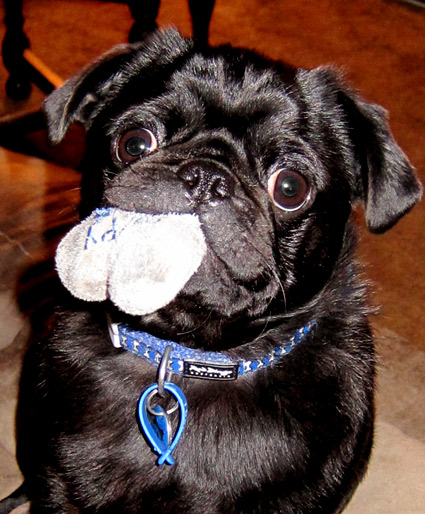
    Oh my goodness, we have a naughty pug. A pug that grabs your mobile phone and runs like the wind, a pug that unrolls all the toilet paper, a pug that chews EVERYTHING.  According to the vet and the inhome dog trainer (yes, that's what stage we up to) it's the humans not Gallifrey the pug. And so we train Gallifrey, and train Gallifrey, and train Galifrey. 

    Gallifrey the naughty pug

    Pugs can quickly turn into piglets with too many treats, the vet suggested baking chicken treats and breaking them into small pieces for the times that we are training Gallifrey.... I bake a lot of these treats!!!

    If you have a dehydrator follow the manufacturers instructions, but those who don't (like me) here is how to bake them.

    Dried Chicken Dog Treats

    pre heat oven to 120c (250F)

    Ingredients

    chicken breasts

    Method

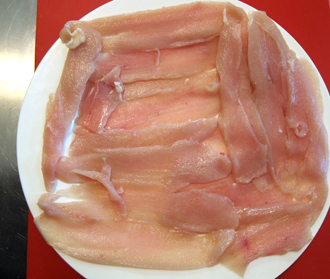
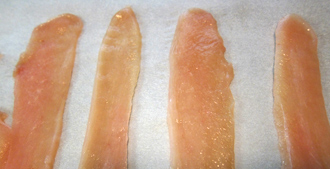
    Partially freeze your chicken breasts to make slicing easier. Slice the chicken breasts lengthwise as thinly as possible. 

    thinly sliced chicken breast

    Lay the chicken breast pieces out on a baking tray lined with baking paper or on a non stick baking mat. 

    Bake chicken pieces for 45 minutes, turn the pieces over and continue to bake until deep golden brown.

    Cool on baking rack.

    Break into small pieces for training treats. 

    Store in an airtight container for up to one month.

    Happy Baking and may your doggie be well trained :)

    Friday
    Oct142011

    White Chocolate Plastique (Modelling Chocolate


    white chocolate plastique rose, dusted with gold lustre dust

    Today I have an easy and excellent icing sugar (confectioners sugar) based white chocolate plastique for you to try. With no cooking involved you can whip this up in minutes, ready to create flowers or figures. This plastique can also be added to your precoloured fondant.

    White Chocolate Plastique (Modelling Chocolate)

    suitable for modelling figures and flowers, not for covering cakes. 

    Ingredients

    25g (0.88oz)white chocolate (I used couverture) 

    100g (3.5oz) icing sugar (confectioners sugar)

    75g (2.65oz) cocoa butter

    100g (3.5oz) glucose syrup

    Method

    In the bowl of a food processor combine the first three ingredients, until well blended. Add the glucose syrup and blend. Depending how warm your kitchen is, you will now have a ball of mixture or coarse breadcrumb like mixture... either way, tip contents onto non stick mat and knead until smooth and elastic. *Your chocolate plastique is now ready to use. 

    Uses

    The chocolate plastique can be rolled paper thin, perfect for petals.

    roll paper thin with a plastic rolling pin

    Use it to create figures. Knead in food colours as desired.

    Mixing half and half with pre-coloured modelling/flower paste will give you the flexibility of the plastique combined with the strength of the paste. Depth of colour is easily reached by over tinting your modelling paste before knead together with plastique. 50/50 is the ratio I usually use, however in hot weather I use 70 modelling paste/30 plastique. 

    Storage

    Keep leftover chocolate plastique well wrapped in plastic wrap and in an airtight container.

    *Troubleshoot: if you have hot hands, your plastique might seperate a little... just leave to one side for 10 minutes & then try kneading again. A few minutes of refrigeration can also help.

    Glucose syrup if you haven't used it before is extremely sticky, have a scrapper on hand if any adheres to the inside of your bowl to make sure you get it all out and incorporated into plastique. 

    Happy Baking :)

    You might also be interested in liquid sweeteners and syrups

    Saturday
    Sep242011

    Chocolate Peanut Butter Spiders

                                         chocolate peanut butter spiders

    Join me on Facebook! 

    Finishing off "easy ideas" week with Chocolate Peanut Butter Spiders. Five minutes and three ingredients, that's all you'll need to make 24 crunchy and chocolately mini spiders. 

    If your an Australian with kids you have probably made these or eaten these before, they are made with the popular fried noodles made by 'Chang's'. This is pretty much the recipe you will find on the packet and I added black cachous on the dark spiders for the extra crunch of "spider eggs" ;) 

    Chang's Original Fried Noodles

    Ingredients

    1 pkt Chang’s Original Fried Noodles 100g (3.5oz)
    2 Tablespoons Crunchy Peanut Butter
    200g (7oz) chopped Milk or Dark Chocolate... this can eating chocolate like I used today or cooking chocolate or even compound chocolate/candy melts if you prefer. 

    Optional: black cachous 

    Method

    Microwave chocolate and peanut butter in microwave safe mixing bowl for about 30 seconds on high. If not melted, then microwave again in 5 second intervals. Stir until smooth. Add noodles, stir lightly with a metal spoon until well coated. With a teaspoon, spoon the mixture onto non-stick baking paper or mat. Using heaped teaspoons, this mixture will yield 24 to 40 spiders. Top with black cachous if using. 

    black cachous for spider eggs

    Place in refrigerator until set. Package as gifts or just eat them straight away!!

    Happy weekend baking :)