The alarm goes off when it is still properly dark. Not the polite kind of early. The stubborn kind. 4:00 some mornings. 2:25AM on the ambitious ones. Matt usually pops up like he has somewhere important to be. I negotiate with the snooze button for a minute or two (it rarely wins, but I like to make it work for it).
There is a particular silence before dawn in a bakery. It is not poetic. It is just quiet. The kind of quiet where you can hear the hum of the fridge and your own joints waking up. I make coffee. Always coffee. Sometimes I stand there longer than necessary, hands around the mug, pretending this counts as a ritual.
I once read about morning ME time. Yoga stretches. Affirmations. Breathing with intention. Some days I manage a stretch while waiting for the kettle. Some days my affirmation is simply, please let the oven be preset today. It varies. I am not rigid about it. I have found that just showing up before the chaos feels like enough.
Apron on. Comfy shoes. Bakers best friend. (I have learned this the hard way.)
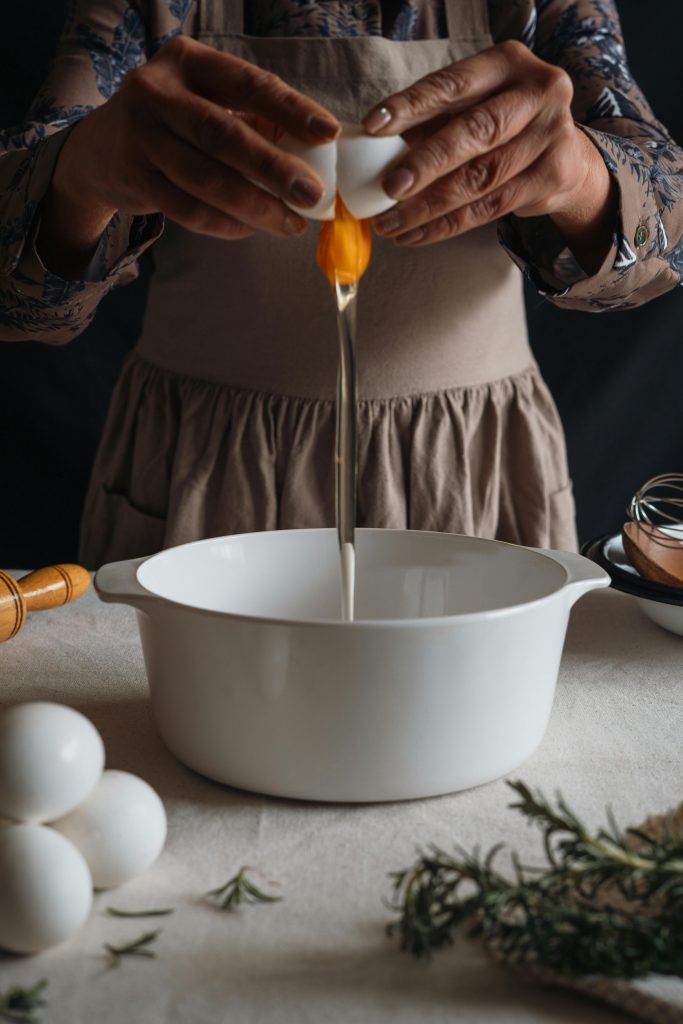
By 5:08 I clock in. Turn on the proofer. Fill the sink with soapy water. Pull pastries from the fridge. Clear whatever the night shift left behind. There is usually flour in places flour should not be. There are sour cherry pies waiting to go in, their components thawed from the freezer, which means they need the oven immediately because they take close to 90 minutes to bake.
Except the top oven is not at 500 degrees.
It is not on.
There is a brief internal monologue. It is not graceful.
It will take a full hour to preheat, so there is nothing heroic to do. I pivot. Orange cranberry scones from the freezer. Chocolate chunk and salted oatmeal cookies. Sausage rolls, egg washed and sprinkled with thyme. I mix the days sourdough. Dry mise for tomorrow. The work expands to fill the gap.
Around 6:00 I finally eat something resembling breakfast. A hot Blueberry Bran muffin, just baked. Half is oddly satisfying. The coffee holds me together. Barely.
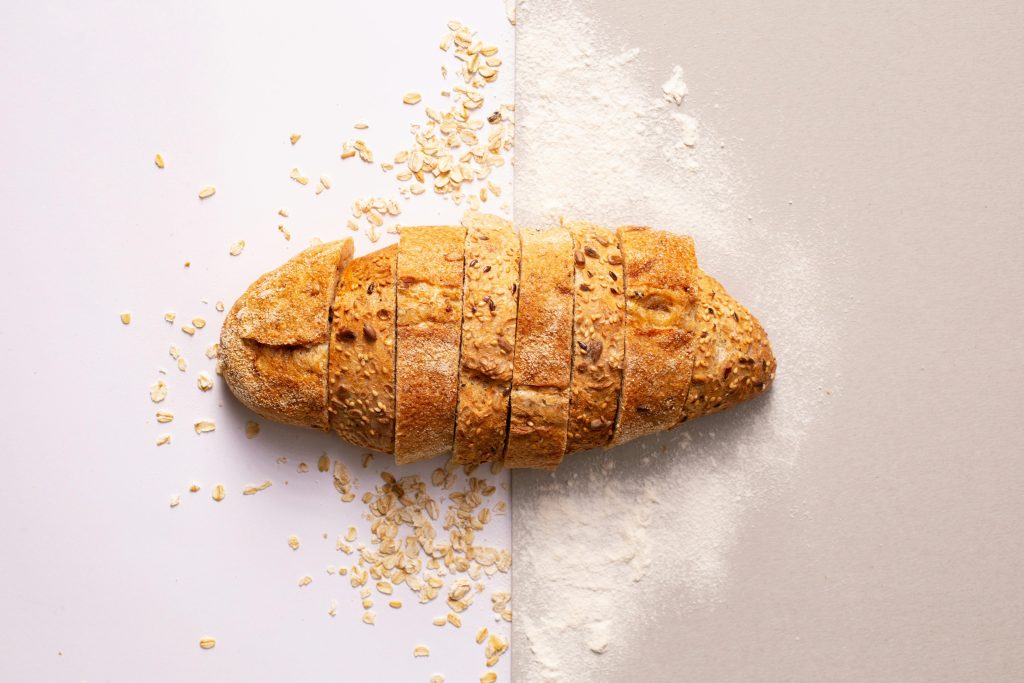
The morning moves in stages. Sponge and dough. The sponge is that yeasty, watery, sugary mixture that smells faintly alive. The dough takes the rest of the flour and whatever mix ins we are using that week. Walnuts. Seeds. Apples. Millet, sunflower, pumpkin seeds lined up in bowls like they are waiting their turn. Grain and water. Heat and time. It is simple until it is not.
Shaping loaves is the part that humbles you. Hundreds of them. Each dough has a personality. Some are cooperative. Some sulk. It takes a while to understand what they want from your hands. Cinnamon Chip. Banana Walnut Scuffin. Mediterranean Olive. A tiny Whole Wheat Sourdough roll fresh from the oven stuffed with cheese. I have learned not to rush that stage, even when I want to.
Between batches I feed the sourdough. Morning feeding. Later, the afternoon feeding. It feels a bit like tending something older than you. Score the loaves. Plain sourdough and olive. Load them in. Drop the temp. Raise it again. Chai morning buns get their glaze. Maple pecan pull aparts get theirs. Vanilla braids shine under vanilla glaze. Scones with orange glaze. Cardamom buns rolled in cardamom sugar. Cookies salted at the last second because someone always forgets.
There is a rhythm to it, though I would not call it elegant.
Sometimes the crust betrays you. Even though there were no holes when I filled the pies, I checked twice, the juice seeps through the bottom crust anyway. Two pies look unsellable. I stand there staring at them longer than necessary (as if they might fix themselves). Eventually I cut into one of the sad looking cherry pies. No burnt flavor. The crust is not actually that bad. We can sell them. I feel oddly proud of that small mercy.
By then the others start arriving. The register person bags bread and counts money. We talk about nothing important. A high school student tells me she and her boyfriend were voted homecoming queen over the weekend. The space fills up with voices and flour dust. It is busy, but it does not feel lonely.
Around 9:00 I order a latte. Later, an iced brown sugar one because I am fading. I split and fill cakes with red raspberry jam. I snitch berries and mint from the kitchen (no one ever notices). I scribble notes in the fridge so tomorrows team knows what is what. Wrap and date crusts. Run to the freezer. Take inventory of fruits and fillings. Wonder what we will make next week.
Behind all of this is the less romantic part. Marketing. PR. Community relations. Customer service. Bread eating. Food science and operations. Bookkeeping. Legal paperwork. Lease negotiations on Market Street in downtown Charlottesville. We hope to open doors late this fall, if the lawyers ever agree. There is always something happening beyond the flour on your elbows.
And then there are stories like Nikki B., owner of D Delicious Delicacies in Florida. She started baking to make extra dough after her hours were cut back at work. Joined The Entrepreneur Experience and The Entrepreneur Community. Nearly TRIPLED her business. Wrote Create Your Own Magic. Offers a FREE service to add positivity to your day. It sounds glossy when you say it like that. It probably did not feel glossy at the time.
By 11AM the eight hour shift can technically be over, and you are tired in a very specific way. Not sleepy. Just used. Feet aching from concrete floors. Shoulders remembering every tray you lifted. I sometimes take a 45 minute nap when I get home. I am never sure it helps. Then I make a kale and berry smoothie. 1/2 banana. Frozen berries. Vega Vanilla Almond. Kale leaves. Milk. OJ. Water. It tastes fine. Slightly iron aftertaste I pretend not to notice.
Early to bread, early to rise sounds charming. It is not always charming. It is repetitive. It is humbling. It is showing up when the oven is not ready and the crust leaks anyway. It is feeding the starter and remembering to feed yourself too. It is learning that plans help, but they are not guarantees.
By 3:20 I am fishing stale bread out of the bin and setting aside tangy banana bread for the pigs. I hand off my apron. Grab a bag of leftover wheat rolls from the help yourself stack. Clock out. Nearly eleven hours after I started.
When I get home, the day already feels slightly distant. Like it happened to someone else.
I was up in the dark. Mixed sponge and dough. Shaped more loaves than I can count. Talked about books and hiking and family drama. Burned nothing critical. Salvaged two pies. Fed the sourdough. Fed the business. Let the mistakes stay where they belonged instead of pretending they did not happen.
That is usually enough.
Tis the truth.


Leave a Reply