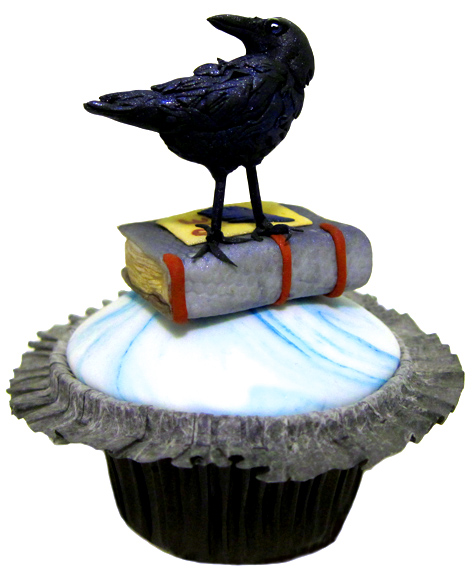
Year of the Rooster cupcake
 year of the rooster cupcake
Join me on Facebook
After the Monkey and before the Dog, every twelve years comes the Rooster.
Year of the Rooster .... 1933, 1945, 1957, 1969, 1981, 1993, 2005, 2017, and 2029.
I find the Chinese horoscope so confusing! It is the year of the rooster, the fire rooster or the female fire chicken. The chicken puzzles me, a chook is not a rooster. I decided to go with the Rooster like the ones you see as Chinese prints adorning restaurants and my Dad's nursing home was rather fond of them too.
If your in Melbourne the Chinese New Year festival runs to the 12th of February at Crown Casino, lots of fun and celebratory goings on around town.
Making a Rooster....
 I made a simple shape from a 50% white modelling chocolate, 50% fondant. Toothpicks mark the leg holes.
 I cut feather shapes from orange fondant for around the neck and marked a centre line. Marked the body with crescent shapes.
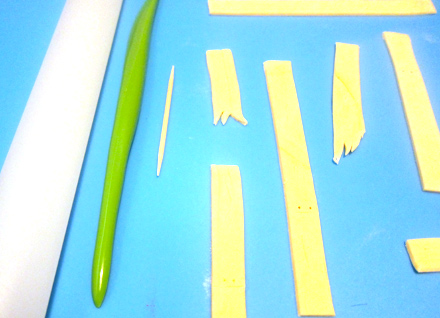
 Black fondant was rolled super thin (add some cmc if necessary) and cut into longer feather shapes. The shapes are then shredded along the edges.
 The pieces were attached to the body with a light touch of water. Here I am starting to attach the comb and playing with placement of tail feathers.
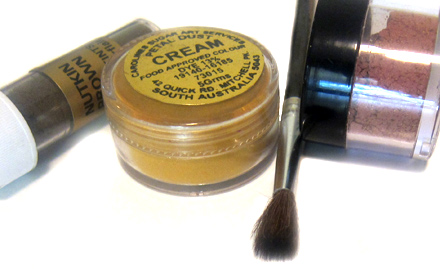
 Gold leaf was applied to cupcake with a brush small brush, lifting on small pieces and laying them on pre dampened surface.
 The finished dry rooster was shaded in petal lustre dusts, gold, red and blue. Attached to the cupcake with toothpick legs for easy removal.
Happy Chinese, Lunar, Spring Festival time :)
 You might also like Chinese chicken wings
 Or back to year of the Dragon
 The Lone Baker