Navigation
SEARCH
This form does not yet contain any fields.

    Entries in cupcakes (51)

    Wednesday
    May132015

    Yoghurt Cheese, suspended Tim Tams and more

    Raspberry Tim Tam cupcake with biscuit/cookie pieces suspended in cake batter. 

    1. Yoghurt Cheese used in cheesecake to replace sour cream 2.Smeared to accompany Indian spicy potato curry puffs 3. Rolled into balls and drizzled with flavoured olive oil to pair with breads 4. Yoghurt cheese left to drain overnight is firm enough to cut. 

    Answering your emails today: some are from ummm, months ago... I swear I'm much faster answering questions on Facebook

    Eve wrote March 31st.. "where do you get your cupcake papers from I like the one where you have the raven on there"  

    Answer: Hi Eve, the cupcake papers in mention are an older style, unfortunately they have been discontinued by Wilton some time ago. 

    Karen wrote April 9th.. "Can I replace sour cream with yogurt cheese in cheesecake recipes" and "do I just strain it and does it matter what type of yogurt?"

    Answer: Yes Karen you can replace sour cream with yoghurt cheese in cheesecakes, cake batters, dips etc. Yes, you just strain bought or homemade yoghurt.

    The way I do it is using the little box thingy (also known as Cuisipro Donvier Yogurt Cheese Maker ) it's plastic box with a stainless steel mesh insert.

    You can also use food grade muslin double or triple folded, put the yogurt into the muslin lift the whole lot into a strainer suspended over a bowl, cover loosely and refrigerate 2 hours to overnight depending how thick you want your cheese. The muslin needs to be washed, sterilised in boiling water and throughly dried before storage.

    I do it this way, spoon yoghurt (plain Greek yoghurt in this case) into box, top with lid and refrigerate 2 hours to overnight. 

    Here you can see how the yoghurt has shrunk down forming the yoghurt cheese. In the bottom of the container is the liquid whey which you can pop in a smoothie, use in baking or even feed it to your dogs. 

    About two to three hours for the consistency needed to *replace sour cream and over night to make balls and for yoghurt cheese that can be sliced. Yoghurt cheese can be used in plethora of sweet and savoury applications. 

    Muslin is better for homemade, very thin yoghurt or large quantities of yoghurt, the box is convenient and easy to clean for shop bought thicker/Greek yoghurt, full fat or light, suits smaller quantities 3 cups of yoghurt will yield 1 cup of yoghurt cheese when drained overnight.  

    To salt or not to salt: some people salt their yoghurt before straining. I prefer to leave the yoghurt plain and salt/season or sweeten the finished cheese.

    *even though you may have thick yoghurt to start with, a short drain to rid some the whey will give you a better substitute to sour cream than using yoghurt with no draining. 

    Kim Cu`c wrote April 3rd.. "I am new baker and want strawberry oreos to not melt away" Kim supplied a photo of her cupcakes where the oreo pieces dissolved and sunk during baking time. 

    Answer:  Goodness, Kim Cu' c you were way to hard onself in your mail, your cupcakes looked awesome!! It's a tiny baking error that we all made at one time, easy to fix :) I've used an Australian chocolate cream biscuit the Tim Tam to demonstrate "cookie suspension". 

    Break your cream filled cookie/biscuit into a small bowl and pop into freezer whilst you make your cake batter.

    Remove cookies from freezer add a teaspoon or two of flour and toss your cookie/biscuit pieces in that. Alternatively toss in sifted cocoa if you are making chocolate cake. 

    Fold the floured, chilled cookie/biscuit pieces through the cake batter and bake as per usual. 

    The flour stops the sinking and pieces will be evenly distributed, the chilling keeps the filling relatively in place for a confetti like finish. 

    The Steamer: General answer to all that have asked about the "steamer" I use on cakes... I don't know if I have worded the post incorrectly for some countries? I call it a "clothes/clothing steamer", it was what you would steam business shirts, suits, wedding dress or your curtains with. I'm happy to recommend books to a yoghurt cheese box but I cannot recommend an electric appliance I have never used in another country, sorry :( Original post that has caused the "what is it" confusion here

    My steamer came from K-Mart in Australia.

    Cuisipro Donvier Yogurt Cheese Maker from Kitchenware suppliers and Amazon of course Cuisipro Donvier Yogurt Cheese Maker

    Happy Baking :) 

    Make a Matcha cupcake 

    Friday
    Mar202015

    Come on get Happy Partridge Family cupcakes

                                                  come on get happy partridge family cupcakes

    Join me on Facebook 

    Ear worm: An earworm, sometimes known as a brainworm, is a catchy piece of music that continually repeats through a person's mind after it is no longer playing  wikipedia 

    Isn't it the worst thing (ok not the worst thing, but come with me here) when a song or jingle gets stuck in your head. 

    I saw a bright yellow fluffy Easter chick in a half shell at the supermarket, that made me think of The Partridge Family opening credits, which led me to singing in my head 'C'mon get Happy' for the rest of the day. I didn't know all the lyrics so it was "Hello world dah duh dah GET HAPPY" :D  

    Having a 70's theme party? Or perhaps you mum still has her David Cassidy posters and you want to make her some partridges...   

    fondant coloured with blue, yellow and red

    Trivia; the artwork on the partridge family bus was inspired by the work of Piet Mondrian a dutch artist 1872-1944 

    Start with brightly colouring your fondant, I've used Americolor gel pastes today: electric blue, yellow, pink, purple, red red for the fondant and bright white for the toothpicks I used for the legs. A black food marker was used for the eyes. 

    My partridges shaped from white fondant are "chubby" because I thought it was cuter. 

    I started with this shape and pulled the top over to one side. Insert half a white food colour painted toothpick for each leg on the small partridges. 

    toothpicks painted with white food colour... make sure people know there is toothpicks in these cakes

    Roll out your pre coloured fondant, cut into tear drop shapes (for the large bird I used a round cutter and trimmed to shape). Dampen the back of your partridges and apply coloured fondant shapes. Draw eyes on with a black food marker. Insert the birds into prepared cakes. Roll a small piece of white fondant into a snake shape, cut small pieces off to make birds feet. Apply feet by slightly dampening ends and pressing on base of legs, use a spare tooth pick to secure the feet in place.  

    All done except for song 'C'mon get Happy'  

    and Happy Baking :)  

    Chocolate Hot Cross buns anyone? Recipe here

    Planting an Easter garden you will need quick chocoalte soil 

    Tuesday
    Oct302012

    The Walking Gingerbread Men (Zombie Apocalypse Cupcake)

    The Walking Gingerbread Men (Zombie Apocalypse Cupcake)

    Join me on Facebook

    Zombies, Zombies, Zombies; I've read 'World War Z: An Oral History of the Zombie War', I've run from the zombies with the 'Zombies, Run!' app and can't stop watching 'The Walking Dead' on cable (can you?).

    And I'll tell you now... not since grade three when I was chosen last for the tunnel ball team have I been more disappointed to learn that everyone I know is not taking me with them if a zombie apocalypse strikes.... well, that's not including the few that said "you could be useful as bait". 

    Darn that fibromyalgia, just because I can be a bit slow and limpy... I bet I speed up and eat (their) brains when I'm a ZOMBIE! 

    Back to 'The Walking Dead' (not a neat segue, but I'm distressed!!), where there is so few humans left I'd be watching out for those gingerbread men this Christmas!!! 

    Happy Halloween :) 

    Oh, and if you want to make these toppers you will need, a gingerbread man mini cutter, some gingerbread coloured fondant or modelling chocolate, a black food marker, a little white fondant.... plus frosted or fondant covered cupcakes and I added a few fresh gingerbread "crumbs". 

    Friday
    Oct122012

    New release Cake, Cookie and Baking Books

    Yes, it's that time of year for a sneak peak at the new and upcoming baking book releases.

    Join me on Facebook

    Starting with a book that is not strictly "baking", but you know it will include baking as we are talking about much anticipated first book by the brilliant blogger Deb Perelman, yes it's the Smitten Kitchen cookbook. The 336 page book has over 100 mostly new recipes, (with some of your favourites in there too) and hundreds of colour photos.

    Oh my goodness don't know Deb's work, then rush over to her blog  ...hang on a sec, stay around and read my blog post first :P 

    UK or Australian, our release date is next year. Can't wait? Amazon (US) has the book for preorder now for a October 30 release date  The Smitten Kitchen Cookbook 

    This next book makes me smile just thinging about it. Bakerella the queen of cake pops, has a holiday book coming out October 17 aptly named 'Cake Pops Holidays' this title contains more than 40 holiday mini treats. How cute are those polar bears on the cover!! Watch Bakerella herself intro Cake Pops Holidays...

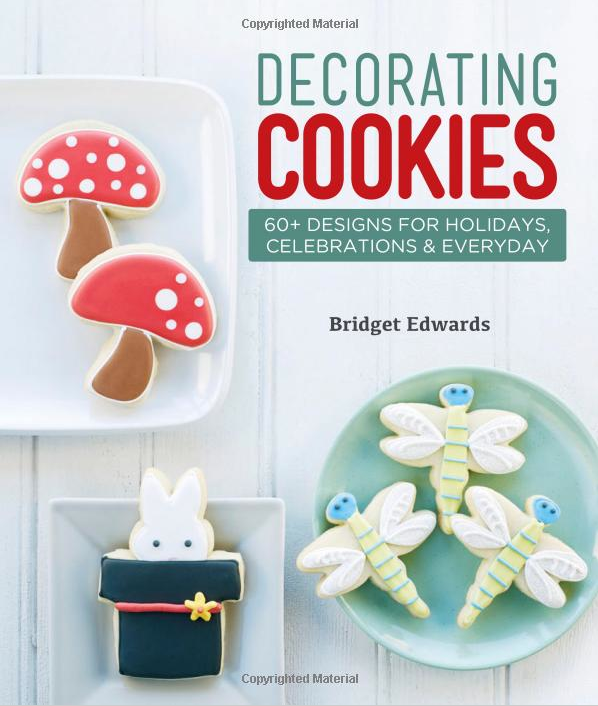
    'Decorating Cookies 60+ designs for holidays, celebrations and everyday' was released this week. Not only do you get the expertise of author/blogger Bridget Edwards of Bake at 350the book also includes guest appearances by five guest-star baker-bloggers each share a special decorating technique: Amanda Rettke of i am baker, Marian Poirer of Sweetopia, Gail Dosik of One Tough Cookie, Meaghan Mountford of The Decorated Cookie, and Callye Alvarado of The Sweet Adventures of Sugarbelle. A must have book for the cookie inclined. 

    Jeanne Sauvage of Art of Gluten-Free Baking  is releasing her book 'Gluten-free Baking for the Holidays' this month. The 168 page book makes for a perfect gift for gluten intolerant baker on your Christmas list, but I want it to whip up gluten-free holiday treats for friends. 

    Gluten-Free Baking for the Holidays: 60 Recipes for Traditional Festive Treats

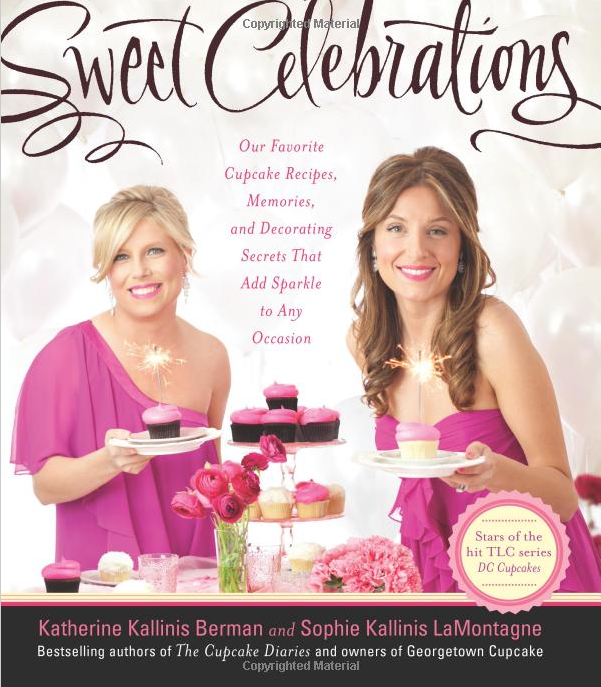
    Moving away from bloggers and onto celebrity cupcakey ladies with your favourite sister act from DC Cupcakes. Yes, Katherine and Sophie have a new book for the holiday season... would make a lovely Christmas gift for a fan or if you are unfamiliar with the girls there is a very good preview of this book on Amazon's 'look inside' feature, you can read the index, see samples of recipes and their signature frosting swirl.  Sweet Celebrations: Our Favorite Cupcake Recipes, Memories, and Decorating Secrets That Add Sparkle to Any Occasion


    Didn't think I needed another Peggy Porschen book and then she goes and writes one where the emphasis is more on afternoon tea. There is a chapter on sweet treats, one on cupcakes and many more delicious sounding baked goods. *Hint, hint loved ones... I want this book! This book has already been released in the UK market and is well reviewed on UK Amazon Due for release in the US November 29th... note the different cover pic for the US market.


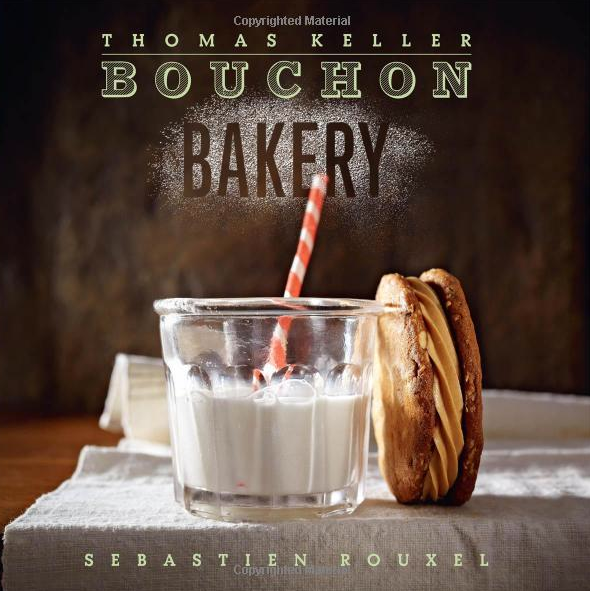
    Adore. Adore Thomas Keller. From the 'French Laundry Cookbook' to 'Ad Hoc at Home', Thomas Keller is a rare combination of a fine chef and a fine writer. That's why the 'Bouchon Bakery' being released October 23rd is my one must have this year!


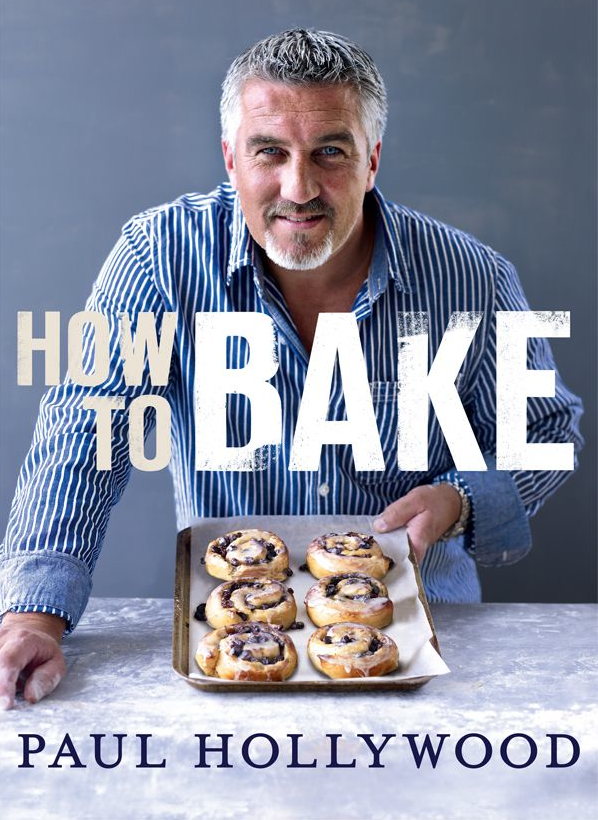
    Not from the UK? You may not know who Paul Hollywood is, unless you have caught the "The Great British Bake Off" on cable. This silver fox is strict, a touch arrogant, charming and one fabulous baker. This book is well reviewed and includes a good "look inside" feature on Amazon UK.

    Also available on Amazon US How to Bake  Watch Paul intro his book and make flatbread....

     I must admit I'm a bit of a sucker for single subject cookbooks and even though I have no idea who 'Miss Madeleine' is; the promise of these little tea cakes, plain ones, dipped ones, gluten-free ones, vegan ones and chocolate ones was too much for me and I have ordered a copy.  We Love Madeleines Amazon US

    Another single subject book in the 'Secrets of Eclairs'. I saw a friends copy of this book during the week, nice. Clear instructions on baking eclair shells, lots of tips, flavours, variations of fillings and toppings. Though, some ingredients such as liquid fondant may not be easily available in some places. This book would suit a more adventurous baker. Amazon UK.

    available from secondary sellers Amazon US Secrets of Eclairs

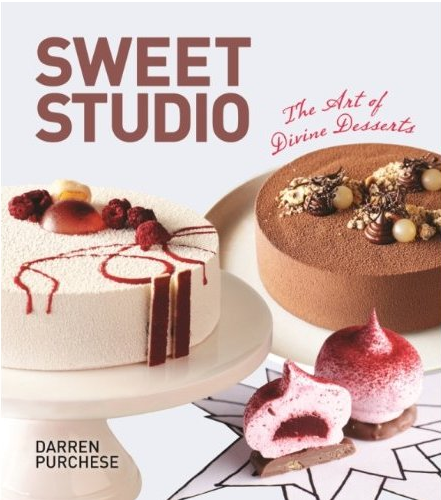
    An Australian books rounds out the list; the 'Sweet Studio' by Darren Purchese. Australians would know Darren from his appearance on MasterChef. Watch Darren and have a sneak peak at the gorgeous Chapel st Bakery.

    the book is available for preorder from Fishpond (AU) and Amazon US Sweet Studio

    Have I missed you favourite new release? Let me know in the comments section or find me on Facebook

    Happy Baking :)

    Sunday
    Sep092012

    The Raven and The Black Cat Cupcakes

                                                    The  Raven cupcake

    Open here I flung the shutter, when, with many a flirt and flutter,
    In there stepped a stately raven of the saintly days of yore.
    Not the least obeisance made he; not a minute stopped or stayed he;
    But, with mien of lord or lady, perched above my chamber door -
    Perched upon a bust of Pallas just above my chamber door -
    Perched, and sat, and nothing more.

    The Raven Edgar Allan Poe 1845

    Join me on Facebook

    Sorry, I've been missing for three months without explanation. I think "Annus Horribilis" sums it up. xx

    It was my step son Daniel who gave me his copy of Poe with a "read this again" order that has given me a much needed push to get up and going.  I'll be back full time September 24th... until then here is two cupcakes inspired by Edgar Allan Poe, a more traditional design and a naive/primitive design. 

    Want to make a raven? Here is how I make mine. 

    Using black fondant or modelling paste make the shape of the ravens body. With food colouring, colour a toothpick black and cut it in half, this will form the legs of the raven and secure the bird to the book.

    almost completed raven

    Add a beak, feathers and eyes to your raven. Insert toothpick halfs. Allow several hours to dry completely. 

    Fondant rolled onto the back of my baking mat was imprinted with this pattern for the book cover.

    The book is made from white fondant, make a book shaped brick of fondant, score edges to give the illusion of pages. To make the cover roll a piece of fondant (I used the back of baking making to add an imprinted pattern) and cut to fit your book. 

    for vintage feel to the book score sides unevenly for a well read look

    Dust the edges of your book with gold lustre dust. Dust the raven with dark blue or purple lustre dust. Dust the book cover with your colour of choice. Add decorations such as straps, book plate by colouring rolling and shaping small pieces of fondant. Insert the raven into the book and add four claws to make up each foot... three at the front and one rear "toe". 

                                 The Black Cat mini cupcake

    Pluto --this was the cat's name --was my favorite pet and playmate

     The Black Cat Edgar Allan Poe 1843

    Black cats remind me of childhood; black cat lollies, the black cat token on Cadbury Black Cat chocolates and reading The Black Cat by torchlight under the blankets.

    mum gave these Cadbury chocolate box tokens when I was little, they became my barbies "kittens".

    black cat lollies

    The black cat fondant figure is formed almost totally from oval shapes. Can you see them in the cat? 

    An oval is stood on it's end and elongated into the cats body. An oval on it's side sliighly pushed inwards makes up the cats head. Small ovals shaped to form the eyes. Ovals are attached to the top of the head and pinched upwards for the ears. The nose is an oval pulled downwards. The legs and feet are made up of two varying sized ovals. 

    The whiskers and tail aren't ovals, but rather rolled black modelling paste. 

    A steamed finish gives it shine.

    Happy baking :) I'll see you all Septemeber 24th. Thank you for the support and I WILL be catching up with all those questions I have missed. 

    you may be interested in steamed finish for your cupcakes

    or getting an early start for Halloween with "Boo Cupcakes"

    Sunday
    May272012

    Little Bo Peep Cupcake - Steaming Fondant

                           little Bo Peep cupcake with steamed fondant finish

    Join me on Facebook

    Been watching 'Cake Boss'? Always wanted to try steaming your fondant but worried your flowers will droop, your bows flop and your bits fall off? It's easier than you think, trays of fondanted cupcakes to your giant tiered creation literally take seconds to steam to that shiny finish you have always desired.

    A quick look at steaming today...

    my portable steamer for cakes... and my clothes when the fibromyalgia prevents me from ironing!

    Firstly, the steamer unit; we are talking "clothing steamers" here, the type you would use to get the wrinkles out of a business shirt or your work jacket. Clothes steamers are either freestanding (like the ones Buddy uses on Cake Boss) or portable like the one I use.

    I use a small portable steamer unit.

    Make sure your steamer head is clear from any blockage.

    All the steamers work in pretty much the same way; you put water in the tank and turn it on. Make sure your hose isn't tangled and your steamer head is clear from any blockage and you are ready to steam!! You will know it's ready to use when you see steam coming from the head.

    Steam: Not standing too close to your cake and using light sweeping movements, (similar to if you are spraying painting) move your steamer head over your fondanted cake. This only take seconds. You will now have a shiny cake.

    Troubleshoot: 

    You don't want to melt your cake so don't linger on any one spot with the steamer... light sweeping movements only. As you can see on the quick demo cupcake I made, even the finest modelling paste pieces like the bow and crook won't collapse and your lashes/eyes and bit and bobs won't fall off when light steaming has taken place.

    Avoid any risk of water spotting by making sure your hose is not kinked, a kinked hose will lead to a build up of steam and water droplets that will stain your cake. Ditto with the steaming head; blockages lead to water droplets. 

    Practice!! Practice steaming on dummy fondanted cupcakes/cake if it's your first time, it's the best way to get  to know your particular steamer and will save you any heartbreak down the track. 

    Colors intensify/change with steaming. If you are matching a clients fabric sample for example you will need to check the steamed colour change. 

    I've used the cute little boiled lollies on the demo Little Bo Peep Cupcake today to remind you of what the surface of your steamed cake will feel like after steaming; a little bit sticky/tacky. Your cake will fingerprint easily, dust etc will attach to the surface, something to keep in mind if you will be transporting your cake. 

    Isomalt gems, sugar work, boiled lollies and candies are not meant to be steamed, but if your steaming at the venue, the cake is about to be devoured then of course you can steam.

    That about covers it, steamed fondant finishes can look fabulous whether it's shiny, shiny, primary colours or a gentle sheen on ivory.

    Have fun and happy steaming :) 

    Friday
    May112012

    Isomalt sugar drizzled decorations

    pink drizzle isomalt decoration tops a mini fondant covered cupcake

    Join me on Facebook

    With a zillion (ok, not quite... but a lot!!) of dessert and cake decorating possibilities "isomalt drizzles" are quick and super easy to make when using precooked isomalt sticks. 

    I used CakePlay's clear isomalt sticks in all today's pieces. The sticks are available in a range of colours, but I prefer colouring the clear isomalt myself. 

    tools and black isomalt drizzles 

    The only tools you will need are: a spoon, a pair of scissors (oil the blades), a non stick baking mat and a small pyrex or equivalent microwave safe glass jug. 

    If you want to shape your pieces, silicone moulds or any food safe heat proof surface like a tin can, the back of a muffin tin etc can be used... though do oil the surface first, isomalt is mighty sticky! 

    Pieces of sticks are melted in a microwave safe container, a small pyrex jug is ideal. From there you can add a few drops of food colouring and flavouring if desired, move your spoon gently through the melted isomalt to incorporate colour. Concentrated gel paste colour work best, as you don't want to add to much moisture to the isomalt.

    Gently lift your spoon up and down in the melted isomalt until it thickens slightly and it looks like this....

    try red isomalt drizzles for all your romantic occassions

    Start drizzling!! Drizzle directly onto a non stick baking mat for flat pieces. Drizzle over your oiled mould of choice for shaped pieces or if using silicone you can drizzle directly on the surface. Shaped drizzles hold their shape and you can create baskets or cages with the same method.

    Scissors with oiled blades are used for cutting any errant threads of isomalt and can also be used for trimming/cutting the finished pieces into shapes if desired.


    Japanese Forest Cupcake; offset piping and green tea flavoured black sesame isomalt drizzle to complete the organic look. 

    Solid colour density is achieved by adding a drop or two of white food colouring simultaneously with your colour of choice. For the Japanese forest cupcake I made a slurry of green tea powder and water to add with a drop of white food colouring. Without the addition of "white" the colour is a murky/clear green. 

    If your isomalt hardens before you have finished your drizzles, reheat in 5 second increments in the microwave. Some food colouring shades alter on reheating, for that reason I prefer to work in small multiple batches. 

    To attach isomalt to fondant covered cakes, simply dip the base of your finished drizzle into melted isomalt and attach to your cake... isomalt will set almost instantly giving you a securely attached topper. 

    Isomalt or sugar work pieces are susceptible to moisture and are best used within a few hours. If storage is must, you can try and store the toppers single file in an airtight container with silica sachets... be warned in humid weather you still run the risk of the pieces becoming cloudy.

    Whether you are topping a cupcake or creating a serving basket for you your sorbet, hope you have fun creating isomalt drizzles.

    Happy Baking :)

     *isomalt and sugar and extremely hot when melted, please take extra care when working with either. Remove pets and young children from the room and have a bowl of iced water handy in case of burns. 

    *troubleshoot... "My spoon is in the jug and isomalt has set so I can't microwave"... pop your jug into a bowl, pour boiling water around the jug until isomalt has softened enough to lift out your spoon. 

    *keep your pieces small, thin and easily edible... you don't want broken crowns/dental work spoiling the moment.

    * isomalt sticks are available from cake decorating stores, in Australia I got mine from baking pleasures

       around $15 in Oz or $10 in US for 12 sticks. Also available from Amazon in bulk amounts or single packets 


    You might also be interested in toffee springs

    or perhaps flowers made from Starburst lollies for Mothers Day here


    Sunday
    Nov272011

    Jingle Bells cupcake pick

                                          jingle bells cupcake picks

              Jingle bells, jingle bells,

    Jingle all the way.

    Oh! what fun it is to ride

    In a one-horse open sleigh.

    Jingle bells, jingle bells,

    Jingle all the way

     Jingle Bells; written by James Lord Pierpont,  first published in 1857 as a Thanksgiving song.

    I've officially start my Christmas baking this week :) Usually I start *cough *splutter... Septemberish (though there was one June when I made puddings) but with the landscaping business running this year the schedule is a little tight.

    Yes, I am one of those annoying "organised" people and the presents are wrapped and ready to go. Though, I still like a handful of emergency quick things just in case and cupcake picks fit the bill.

    I do love a cupcake pick and I love SilverCrow Creations a online store full of all sorts of odd assortments and sundries like the "jingle bell bottle caps" I used today :)

    The *caps are pins that you can wear, (scoff now but after three of those cranberry cocktails and you'll be wearing light up reindeer ears!!) and double as a Christmas keepsake. 

    Whether you decide on a message bottle cap or another Christmas pin that takes you fancy, attach to a toothpick with a little ball of fondant. Let dry, dust or paint over the fondant piece with edible colour and voilà you have yourself a cupcake pick!! 

    Happy Baking :)

    *search "jingle bells" on SilverCrow Creations to find the bottle caps

    You might also be interested in Tia Maria mini pudding cupcakes

    Monday
    Oct242011

    Blossom Cupcake Toppers

                                 sour cherry cupcake with blossom toppers

    It's raining, it's pouring... it must be Spring in Melbourne!!

    Today we are making blossom toppers, a little bit fiddly but easy to make. You can go for a natural look or try a more Asian approach with a glossy black finish. 

    You'll need:

    black modelling paste/or black fondant with CMC added

    white modelling paste/or white fondant with CMC added

    leaf flower glaze

    lustre dusts 

    Roll out small "snake" shapes from the black modelling paste (I've used brown modelling paste in the demo because it was easier to see the steps). With a small pair of sharp scissors cut nicks into the snake shapes, move the shapes to replicate branch shapes. Allow to dry. 

    branch shapes drying

    Once dry paint on leaf/flower glaze with a small brush, allow to dry and repeat. You may need to repeat this step several times until you have a high gloss finish. Allow to dry.

    glazed branches drying

    To make a blossom, roll six small balls of white fondant. Five of the balls will become petals, the sixth the centre of the blossom. Squash a ball lightly with your finger and in forward pulling motion to form a petal. Once you have your petals made, join together by squeezing together the narrow ends with dampened fingers. Add the centre. Repeat until you have desired amount of flowers. Create buds with small balls of modelling paste. Allow to dry. 

    squash a ball lightly in a forward motion to create petals

    Once dry dust the blossoms with lustre dusts of choice, attach the to branches with a small of amount of dampened black modelling paste. Allow to dry before using to top your frosted cupcakes.

    For those who ask about where do I find "inspiration", it really is all around you... today's toppers were inspired by my kitchen tissue box.

    Happy Baking :)

    You might also be interested in Green Tea White Chocolate Cupcakesor go savoury with Bacon and Egg Noodle Omelette 

    Thursday
    Oct062011

    Donna Hay Packet Mix Reviews

                                       donna hay packet mix macarons

    Find me on Facebook

    Donna Hay has a range of cake mixes available in Australia,  today we are looking at the chocolate cupcakes mix and the almond macaron mix. One is a nigh on perfect example of a great packet mix, the other.... well, the other is photographed above!! 

    Bit nervous about making macarons and thought you might give a packet mix a try?? This part of the story is sub titled "Mark makes macarons" because my non-cooking hubbie Mark thought he would in fact give it a try!

    Mark Makes Macarons

    Donna Hay Macaron mix

    We bought a pack of the Donna Hay Almond Macaron Mix for $7.99 at our local Woolworths supermarket. 

    Inside the box you will find, the almond mixture, an egg mixture and a sachet of dark chocolate pieces. You only need water for the macaron itself and 2 tablespoons of cream for the filling.

    Mark was looking confident when he set about pre heating the oven, lining the baking tray and still confident at the whipping the egg white mixture and sifting over the almond mixture; it's at this point it started to go awry with "gently fold through".

    The egg mixture after the 4 minutes beating on high is very stiff.

    When Mark did "gently fold through" the almond mixture into the egg mixture he ended up with billowy clouds of raw almondy meringue; when Mark "dropped" one tablespoon at a time as per the instructions this is what you end up with...

    After baking, Mark turned temperental chef and didn't want to fill his oversized cracked macarons with the chocolate ganache filling (which was set firm by this stage). Instead I warmed the ganache and I drizzled it over the macarons, topped with berries and a scoop of ice-cream. Slightly placated Mark was still grumbling "told you I can't cook" far into the night. Mark didn't make a mistake, he followed the instructions as many novice macaron bakers would. 

    Too much fuss for a packet mix?? There is a .pdf that I downloaded from Donna Hay's website, because this packet mix comes with alternative step by step instructions. 

    Step Four on box says to "Drop 1 tablespoon of mixture at a time onto baking trays"... this changes in the .pdf to Step Five where you are dropping in a "circular motion". The filling is made at the end of the process rather that the beginning like on the box.

    Neither way results in an attractive (normal?) macaron, you'll have to pipe the macaron mix for that. Break down the meringue a bit by firmly folding, until the mixture drops off your spoon looking "lava" like... then you will have a greater chance of getting the "foot"on your macarons.

    You really should be aiming for this.... here almond macarons I made last week (from scratch) are ready to go in the oven. 

    how piped macaron mix should look on trays

    Donna Hay Chocolate Cupcake packet mix

    Donna Hay Chocolate Cupcakes packet mix $7.99 Woolworths Supermarket


    In the box... the cake mix, frosting mix and plain dark brown cupcake cases.

    Quick, easy and as close to home made as you can get from a packet.... just add butter, eggs and milk. The Donna Hay Chocolate cupcakes baked perfectly, frosting was good and everyone that tasted these loved them.

    My step sons Mum made these too... same result, great cupcakes with a home made taste. 

    Donna Hay Macaron and Cupcake mixes available in Australia from Woolworths supermarkets and online at Donna Hay   and for Donna Hay's step by step instructions on how to pack packet mix macarons download the .pdf here.

    You might also be interested in TAKE 5... five packet brownie recipes tested including Donna Hay Molten Chocolate Brownies. 

    warm Donna Hay Molten Chocolate Brownie