Navigation
SEARCH
This form does not yet contain any fields.

    Entries in fondant (32)

    Saturday
    Sep142013

    Frankenstein's Monsters Cupcake

                                 Frankenstein's Monsters Cupcake; topper made from modelling chocolate and fondant

    “I ought to be thy Adam, but I am rather the fallen angel...” Mary Shelley

    Frankenstein; or, The Modern Prometheus is a novel written by Mary Shelley about eccentric scientist Victor Frankenstein, who creates a grotesque creature in an unorthodox scientific experiment. Wikipedia

    Join me on Facebook 

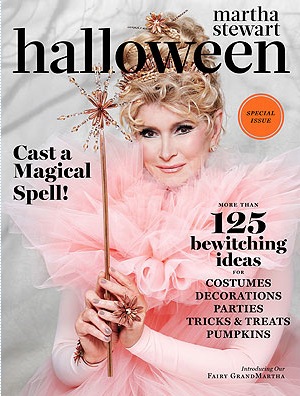
    Goodness, I'm late, I'm late, I'm always running late but instead of making a white rabbit/Alice in Wonderland cupcake I had a slight panic moment when I saw Martha Stewart's Halloween issue is out already... it must be time to work out this years Halloween baking theme. Shall it be classic monsters? Yet, I've never done Hitchcock before.

    Mad scientists appeal to me. I think I can make something with a bowl of green goo (green coloured peanut butter turned into powder perhaps?) or pop rocks/space candy, I love pop rocks, I could fill test-tubes with those and give them out to sprinkle of top of frosted cupcakes or bake them into the cases of chocolate chilli tarts.

    Hmmm, what to do? What will you do? 


    Also out now the first edition of Taste.com.au magazine. Definitely worth a look, with  Zumbo, Manu and Matt Preston writing stories/recipes plus a plethora of other aussie food journalists. Paper copy from Woolies, digital copy from itunes. 

    I'm off now to read Martha Stewarts Halloween :) Happy Baking. 

    Saturday
    Jul062013

    Dragon Egg Cupcake 

                                                dragon egg cupcake 

    Join me on Facebook

    “Well, I don’t have any pet dragons – maybe they would come in handy from time to time– nobody has given me any dragon eggs and since she had to walk into fire in order to hatch them I am not sure I particularly want that bit of it.”           

    Prime Minster of Australia Julia Gillard 

    Guardian UK May 27th 2013 political editor Lenore Taylor discussing HBO's Game of Thrones with Prime Minster Glilard.

    Dang, maybe Prime Minster Julia Gillard should have risked that walk into fire because one month later on the June 27th the morning newspaper read... 

    Ok, it's an emotive headline... but hey Australia was having it's own "Game of Thrones" moment when Julia Gillard was replaced by Kevin Rudd who had been replaced by Julia Gillard three years earlier.

    Confused? here is a mini Australian leader explanation before we get onto the cupcake...

    Ok, it works like this a Prime Minister has a decline in his or her personal ratings, and a perceived loss of support amongst the MPs in their own party. Sometimes you might be directly challenged by an MP who thinks they can be a better leader and they have the numbers..  and at other times like with Prime Minster Gillard you are so sure of the support of your MP's you make the challenge to squash any rumors. But oh dear, then there is a spill, MP's "cross" and all of sudden you aren't Prime Minster anymore. Kevin Rudd is the new Prime Minister of Australia. 

    For the cupcake today I wanted a melted/worn... but pretty (ok, that last bit isn't too Game of Thronesish).

    I started with a simple fondant egg shape, narrowing a little more at the top to allow for layers of fondant scales.

    The scales are tiny triangles of fondant. Attach the scales with water (that is as in "dampen backs slightly" you don't want wet fondant), starting around the centre and working up and then down if you want to the whole egg. I gently pressed down on the scales with a downward movement to go with the melting/worn theme today.

    Using silicone cog moulds, I moulded fondant cogs and stretched and squeezed them lightly into "worn like" pieces. I attached the cogs using water around the edges of a red fondant covered cupcakes. Let everything dry at this point because once dry you are going get a out a small *paint brush and your metallic food paints and get painting. 

    For the wings cut some wing shapes from modelling paste. The wings must be rolled out as thinly as possible as to not add excess weight to your eggs. 

    Wing with base coat of metallic dust. Please forgive food coloured hand.

     Now for the fun part, paint your cupcake to your hearts desire. I used a small artists brush I dabbed various Americolor airbrush sheen colours on the top of the cakes. The cogs were painted with copper and bronze food paint from the same range. The dragons egg was swiped in downwards motion with blue and green sheens. For the wings I used petal dusts in jade, slate and white shimmer and blend, blend, blend until you happy with the result. Lastly a light dusting of jade dust on top of egg and white shimmer on the front. 

    Cut slits in each side of your eggs, flick out a few scales as your dragon is breaking out. Insert the wings that have a little cake glue applied on wide end. Prop your eggs to support the wings drying in position, this can take a few hours to overnight depending on the temperature where you are. 

    So, coming to close now and if you still wondering "where in the hell is Australia?" or "what is this thing called HBO's Game of Thrones?"... tune in later in next week for pulled sugar work or if you are a fan of the Iron Throne check back on the weekend for some Game of Thrones baking. 

    Happy Baking :)

    You might also be interested in Bubble Wrap Chocolate 

    or how about a candied beetroot topper?

    Saturday
    Nov172012

    Albert Einstein 'think!' Cupcake

    albert einstein 'think!' cupcake

    Join me on Facebook

    "Imagination is more important than knowledge. For knowledge is limited to all we now know and understand, while imagination embraces the entire world, and all there ever will be to know and understand."

    Albert Einstein

    Ahhhh, love Albert Einstein and he is the perfect cupcake topper for my single coffee mug gift. Try your hand at a making a figure topper of your favourite sportsman, actor, loved one or scientist by starting with photos.

    For Albert Einstein, I started with a Google image search and printed out a few for my inspiration board. 

    Then using pre made white fondant with a little CMC powder added, I coloured and rolled the balls I needed to make up the figure.

    Here are the balls for the hair, eyebrows and mustache plus the balls for the head, eyelids, eyes, ears and nose

    partially made Einstein, plastic wrap balls are are used to support drying pieces.

    From here I attach the pieces with a little water and with the aid of my inspiration photos start to build the figure. I used a toothpick to mark out his wrinkles and hair details. I made off centre clothing the same way.

    Black food marker was used to mark the hair, moustache and eyes.... and coloured petal dusts with the aid of a small artists brush were added for shading.

    That's about it... do give it a try with your own photos of choice as your inspiration. 

    Ohh, and trying to "think" of gift ideas? It is the time of year for the single "coffee mug" gift, my best friend Jacinta and I have fallen in love with UK designer Keith Brymer Jones Word range of bucket mugs, cups and bowls. Loads of different "words" are available in the range such as "love", "caffeine", "teatime" etc. 

    We got ours in Australia from Victoria's Basement and Peters of Kensington . Amazon UK has them too and Amazon US has a huge range..... Keith Brymer Jones Word Mugs and Bowls

    Happy Baking :)

    Tuesday
    Oct302012

    The Walking Gingerbread Men (Zombie Apocalypse Cupcake)

    The Walking Gingerbread Men (Zombie Apocalypse Cupcake)

    Join me on Facebook

    Zombies, Zombies, Zombies; I've read 'World War Z: An Oral History of the Zombie War', I've run from the zombies with the 'Zombies, Run!' app and can't stop watching 'The Walking Dead' on cable (can you?).

    And I'll tell you now... not since grade three when I was chosen last for the tunnel ball team have I been more disappointed to learn that everyone I know is not taking me with them if a zombie apocalypse strikes.... well, that's not including the few that said "you could be useful as bait". 

    Darn that fibromyalgia, just because I can be a bit slow and limpy... I bet I speed up and eat (their) brains when I'm a ZOMBIE! 

    Back to 'The Walking Dead' (not a neat segue, but I'm distressed!!), where there is so few humans left I'd be watching out for those gingerbread men this Christmas!!! 

    Happy Halloween :) 

    Oh, and if you want to make these toppers you will need, a gingerbread man mini cutter, some gingerbread coloured fondant or modelling chocolate, a black food marker, a little white fondant.... plus frosted or fondant covered cupcakes and I added a few fresh gingerbread "crumbs". 

    Thursday
    Sep272012

    Dan the Shrunken Head Halloween Cupcake

                     Dan the shrunken head halloween cupcake

    I've been drying chicken in the oven for dog treats this week, the pugs love the shrunken pieces... and yep, this is segue into today's shrunken head cupcake.

    Firstly, don't stress about your sculpting skills when you whip up shrunken heads of your hubby, boss or teenagers... you really just need to pick up a few identifiable features. 

    Here is Dan, my step son. I could have put his hair shape and beard on a ping pong ball and people would have still said "it's Daniel". Sooo, a bald head, eye glasses, big ears, red hair, curly hair or maybe a nose ring will make up the features of your shrunken head. 

    Dan's shrunken head started with this basic shape modelled from a 50/50 modelling paste/modelling chocolate combination.

    It's easy with modelling chocolate to smooth and blend joins (like the top of Dan's nose), the heat of your fingers will do it. The addition of modelling paste or fondant with CMC powder added will make sure your piece dries firmly, important if you are living in a warmer climate.  

    The bonus of making Halloween shrunken heads and zombies is that if a bit doesn't look right you just give it a squeeze or break a bit off, "it's shrunken". 

    Have fun.

    Happy Baking :) 

    Join me on Facebook 

    You might also be interested in an easy white modelling chocolate recipe

    Monday
    Sep242012

    Attack of the Swamp Zombie cupcake

                                attack of the swamp Zombie cupcake

    Join me on Facebook

    The dietician on talk back radio was saying "don't deny your chocolate cravings just buy a Freddo Frog instead of a whole block of chocolate"... first thing I thought... hope that includes cream frogs! 

    Some might consider 1950's sci fi and horror films schlock; I prefer to think of them as little gems, their black and white film reels disguised with bright and lurid poster art.

    1950's poster art

    Besides they are so much fun and a great inspiration for Halloween cupcakes. Today's cupcake relies on "a hand", it can be a zombie, a sea creature or perhaps an alien hand. Make your hands with fondant or modelling paste the night before you need them, insert a tooth pick or a piece of dry spaghetti amd the leave to dry. Next day pop them in your fondant, iced or frosted cupcakes and they are ready to hold your treat of choice.

    I used Cadbury Cream Freddo's, they come in Strawberry or Peppermint. 

    Just before serving I broke the Peppermint filled Freddo Frogs to allow for the right amount of Halloween goo. 

    Happy Baking :)

    Friday
    Sep212012

    Day Of The Dead Catrina Cupcake

    day of the dead catrina cupcake

    Join me on Facebook

    Day of the Dead (Spanish: Día de los Muertos) is a Mexican holiday celebrated throughout Mexico and around the world in other cultures. The holiday focuses on gatherings of family and friends to pray for and remember friends and family members who have died.

    wikipedia

    La Calavera Catrina ('The Elegant Skull') 1910 zinc etching by Mexican printmaker José Guadalupe Posada.

    Popularized by José Guadalupe Posada, Catrina is the skeleton of an upper class woman, and one of the most popular figures of the Day of the Dead celebrations, which occur during two days, November 1 and November 2.

    Ha, I love the day of the dead celebration; it's fun, macabre and makes for a fabulous themed event.

    Whether you want to make a Catrina or the simpler skull cupcake picks at the end of today's post, throw a day of the dead party this year!

    starting the skull

    Catrina starts with a basic white fondant skull shape. Features for the skull are indented and surrounds built up with modelling paste. You can see I've marked out where the mouth will be and a hole was added to the bottom for a toothpick. Once dry, lustre, petal dust and edible food marker added shadows and features to the piece. The hat itself is a round of thinly rolled modelling paste with a shell tool used to mark the edges. 

    Scruffy flowers were made with coloured modelling paste. Small pieces of each colour were rolled thinly and the edges were either pulled out with a small ball tool or cut into a fringe with a craft knife. From there they were rolled up and the excess pinched off the end to form a flower. 

    Finished flowers are very small and if you are thinking this all sounds a bit fiddly perhaps day of dead mini fondant toppers are what you are after. 

    Mini Day of the Dead fondant cupcake picks are super cute, easy enough for the kids to make and look fabulous topping a display of mini cupcakes. 

    Mini Day of the Dead fondant cupcake picks 

    basic white fondant skull shapes

    Form a basic skull shape from white fondant, use a toothpick to pierce a hole in the bottom of the skulls.

    Let your skull shapes dry for a few hours (or overnight) and then using edible food markers, edible glitter and lustre duster to decorate your pieces. Insert half toothpicks that have been coloured with food colouring into the skulls and top your mini cupcakes.

    Happy Baking :) 

    Looking for Catrina and Day of the Dead figures? SilverCrow has a range of traditional and not so traditional Day of the Dead pieces. Search 'Day of the Dead' once there.

    one of the many day of dead figures available from SilverCrow

    Or perhaps a Catrina pill/mint box?   

    you might also be interested in gothic horror cupcakes 

    Sunday
    Sep092012

    The Raven and The Black Cat Cupcakes

                                                    The  Raven cupcake

    Open here I flung the shutter, when, with many a flirt and flutter,
    In there stepped a stately raven of the saintly days of yore.
    Not the least obeisance made he; not a minute stopped or stayed he;
    But, with mien of lord or lady, perched above my chamber door -
    Perched upon a bust of Pallas just above my chamber door -
    Perched, and sat, and nothing more.

    The Raven Edgar Allan Poe 1845

    Join me on Facebook

    Sorry, I've been missing for three months without explanation. I think "Annus Horribilis" sums it up. xx

    It was my step son Daniel who gave me his copy of Poe with a "read this again" order that has given me a much needed push to get up and going.  I'll be back full time September 24th... until then here is two cupcakes inspired by Edgar Allan Poe, a more traditional design and a naive/primitive design. 

    Want to make a raven? Here is how I make mine. 

    Using black fondant or modelling paste make the shape of the ravens body. With food colouring, colour a toothpick black and cut it in half, this will form the legs of the raven and secure the bird to the book.

    almost completed raven

    Add a beak, feathers and eyes to your raven. Insert toothpick halfs. Allow several hours to dry completely. 

    Fondant rolled onto the back of my baking mat was imprinted with this pattern for the book cover.

    The book is made from white fondant, make a book shaped brick of fondant, score edges to give the illusion of pages. To make the cover roll a piece of fondant (I used the back of baking making to add an imprinted pattern) and cut to fit your book. 

    for vintage feel to the book score sides unevenly for a well read look

    Dust the edges of your book with gold lustre dust. Dust the raven with dark blue or purple lustre dust. Dust the book cover with your colour of choice. Add decorations such as straps, book plate by colouring rolling and shaping small pieces of fondant. Insert the raven into the book and add four claws to make up each foot... three at the front and one rear "toe". 

                                 The Black Cat mini cupcake

    Pluto --this was the cat's name --was my favorite pet and playmate

     The Black Cat Edgar Allan Poe 1843

    Black cats remind me of childhood; black cat lollies, the black cat token on Cadbury Black Cat chocolates and reading The Black Cat by torchlight under the blankets.

    mum gave these Cadbury chocolate box tokens when I was little, they became my barbies "kittens".

    black cat lollies

    The black cat fondant figure is formed almost totally from oval shapes. Can you see them in the cat? 

    An oval is stood on it's end and elongated into the cats body. An oval on it's side sliighly pushed inwards makes up the cats head. Small ovals shaped to form the eyes. Ovals are attached to the top of the head and pinched upwards for the ears. The nose is an oval pulled downwards. The legs and feet are made up of two varying sized ovals. 

    The whiskers and tail aren't ovals, but rather rolled black modelling paste. 

    A steamed finish gives it shine.

    Happy baking :) I'll see you all Septemeber 24th. Thank you for the support and I WILL be catching up with all those questions I have missed. 

    you may be interested in steamed finish for your cupcakes

    or getting an early start for Halloween with "Boo Cupcakes"

    Thursday
    May312012

    Fondant Masquerade Masks

                       green with envy fondant masquerade mask

    Join me on facebook... I'd love to see you there

    You are invited to the ball, the Masquerade ball... 

    Special post today on getting more use out of your silicone moulds. Hmmm, doesn't sound that "special" does it? But what you make will be!!

    Don't you love those cake decorating silicone moulds, press in a bit of fondant or modelling paste and hey presto you have a modelled shape in no time. But, but, but, what happens when you have used your mould a few times and you're bored with the shape? Does it end up in the draw with all those other moulds that you just "had to have"? Why don't you try extending the shape, you'll have the time saving aspect of using a mould combined with your own decorating ideas. 

    measuring a tiny 4.5 cm (less that two inches) across the  jewel mask uses the same mould as the green with envy mask in cake one.

    The masquerade masks on cake one and two today are make with the same mould. Cake three adds a mask to the mask mould and cake four gets it's pizzazz from a side extension. All cakes displayed in fondant covered mini cupcakes today.

    For the gold and diamond mask I've added a "mask onto the mask"

    Pretty in pink mask has a simple side extension added.

    Extensions to your masks can as simple as rolling a thin snake of fondant, from there you twist, twirl and roll to create trims and ribbon.

    Create extension pieces by matching the base with mask depth, thinning out from there as required. I use small pieces of plastic wrap to create shapes in the fondant before and after they have been attached to figures. When adding fondant feathers and the like, make sure they are rolled as thinly as possible as you don't want to add too much weight to your pieces.

    Use a tootpick/cocktail stick to create twirls.

    I used Americolour food spray paint sheen colours undiluted to paint the masks. Try mixing two colours together for a unique finish. A small brush like the type used to paint toy models is ideal for painting trims and details.

     first of two coats on mask, orange food pen circles eyes before painting to change colour of painted finish.

    All bits and bobs attached with water with the exception of the isomalt gems I attached those with a dab of melted isomalt. Some of the fondant I marbled by twisting several colours of fondant together, I like how that adds a textured element to the feathers. Americolor gel paste was used to colour fondant. Ummm, what else... oh, ok if you want to put your masks on toothpicks make sure you make a hole with toothpick in the unmoulded piece before it hardens.

    Have fun getting more from moulds and happy baking :)

    Stockists: Full face mask moulds from Cakes Around Town (Australia) Masquerade Masks mould from Baking Pleasures (Australia) and Windsor Cake Crafts (UK)

    Baking Pleasures has the airbrush sheen colours in Australia (*note we are paying a lot more than the US price)

    Amazon (US)  

    Want more fondant? How about Eric the Valentine Emu

    or go gold with a fondant gold fish

    Sunday
    May272012

    Little Bo Peep Cupcake - Steaming Fondant

                           little Bo Peep cupcake with steamed fondant finish

    Join me on Facebook

    Been watching 'Cake Boss'? Always wanted to try steaming your fondant but worried your flowers will droop, your bows flop and your bits fall off? It's easier than you think, trays of fondanted cupcakes to your giant tiered creation literally take seconds to steam to that shiny finish you have always desired.

    A quick look at steaming today...

    my portable steamer for cakes... and my clothes when the fibromyalgia prevents me from ironing!

    Firstly, the steamer unit; we are talking "clothing steamers" here, the type you would use to get the wrinkles out of a business shirt or your work jacket. Clothes steamers are either freestanding (like the ones Buddy uses on Cake Boss) or portable like the one I use.

    I use a small portable steamer unit.

    Make sure your steamer head is clear from any blockage.

    All the steamers work in pretty much the same way; you put water in the tank and turn it on. Make sure your hose isn't tangled and your steamer head is clear from any blockage and you are ready to steam!! You will know it's ready to use when you see steam coming from the head.

    Steam: Not standing too close to your cake and using light sweeping movements, (similar to if you are spraying painting) move your steamer head over your fondanted cake. This only take seconds. You will now have a shiny cake.

    Troubleshoot: 

    You don't want to melt your cake so don't linger on any one spot with the steamer... light sweeping movements only. As you can see on the quick demo cupcake I made, even the finest modelling paste pieces like the bow and crook won't collapse and your lashes/eyes and bit and bobs won't fall off when light steaming has taken place.

    Avoid any risk of water spotting by making sure your hose is not kinked, a kinked hose will lead to a build up of steam and water droplets that will stain your cake. Ditto with the steaming head; blockages lead to water droplets. 

    Practice!! Practice steaming on dummy fondanted cupcakes/cake if it's your first time, it's the best way to get  to know your particular steamer and will save you any heartbreak down the track. 

    Colors intensify/change with steaming. If you are matching a clients fabric sample for example you will need to check the steamed colour change. 

    I've used the cute little boiled lollies on the demo Little Bo Peep Cupcake today to remind you of what the surface of your steamed cake will feel like after steaming; a little bit sticky/tacky. Your cake will fingerprint easily, dust etc will attach to the surface, something to keep in mind if you will be transporting your cake. 

    Isomalt gems, sugar work, boiled lollies and candies are not meant to be steamed, but if your steaming at the venue, the cake is about to be devoured then of course you can steam.

    That about covers it, steamed fondant finishes can look fabulous whether it's shiny, shiny, primary colours or a gentle sheen on ivory.

    Have fun and happy steaming :)