Navigation
SEARCH
This form does not yet contain any fields.

    Entries in "white chocolate" (4)

    Tuesday
    Nov272012

    Raspberry Custard Melting Moments recipe

                                        raspberry custard melting moments 

    Join me on Facebook

    Melting moments biscuits (cookies) are popular in Australian cafes and loved by home bakers.

    Yum, melting moments today; the soft textured shortbreads sandwiched with a sweet filling are perfect to serve with a cup of tea or favourite brewed beverage (I mean coffee, not beer... but hey I'm not one to judge). 

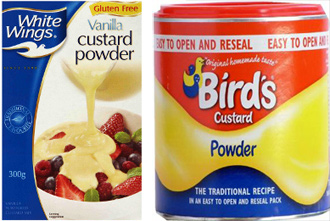
    popular brands of custard powder

    Now I've used 'custard powder' as part of the flour component of the recipe, it gives the biscuits a golden glow and a slight custard flavour. Custard powder is a commercial product that Aussies and Brits have been raised with, you can replace with an equal amount of cornflour if desired.

    Mine have a white chocolate raspberry ganache filling, but they can also be filled with butter cream or even a simple icing. 

    Raspberry Custard Melting Moments

    adapted from Donna Hay's 'modern classics book 2'

    Preheat oven to 160C (320F)

    line two baking trays with non stick paper

    makes 36 biscuits (18 sandwiched)

    ingredients

    175g unsalted butter, cubed and softened 

    1/4 cup pure icing sugar (confectioners sugar)

    1 tsp pure vanilla extract/essence 

    1 cup plain flour, (all purpose) sifted

    1/4 cup custard powder sifted 

    pinch of salt

    filling

    90 ml (3 fluid oz) pouring cream

    2 tablespoons of raspberry puree (squashed fresh or frozen raspberries pushed through a sieve)

    2 tablespoons of homemade or best quality raspberry jam

    1 piece of lemon zest (use a potato peeler)

    180 grams (6.34 oz) white eating chocolate finely chopped 

    method

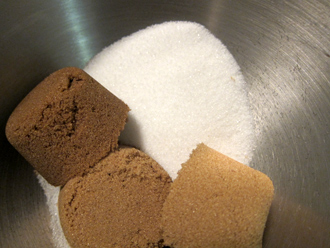
    Place the cubed softened butter, icing sugar and vanilla in the bowl of electric mixer and beat on medium high speed until light and fluffy. 

    what light and fluffy looks like

    With a spatula or metal spoon stir through the sifted flour, custard powder and salt. You're just stirring until the ingredients are just combined, excess stirring with cause the gluten to develop and toughen the resulting cookies.

    Ok, if your mixture is too soft to roll into balls pop the whole bowl in the fridge for 20-30 minutes to firm up enough to roll teaspoons of the mixture into balls.

    Divide the balls between lined trays. Use a fork to press gently on top of each ball to make a indented pattern.

    Bake biscuits 15 to 17 minutes until lightly golden. 

    Set aside to cool.

    Make the filling by heating the cream, raspberry puree, raspberry jam and lemon zest stirring gently to incorporate until the cream "just" comes to the boil. Remove from heat, remove the lemon zest and pour hot mixture over the white chocolate, stir until smooth. Allow to cool until thick enough to spread.

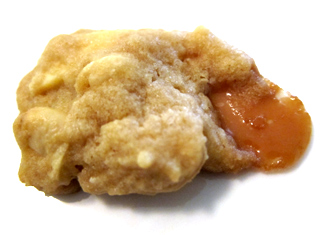
    pipe the filling like I have with raspberry or plop on a little like I have with the *vanilla nutmeg

    Spread or pipe filling onto 18 cookie halves and sandwich with another cookie.

    Melted moments benefit from being stored overnight before eating... if you can wait!!

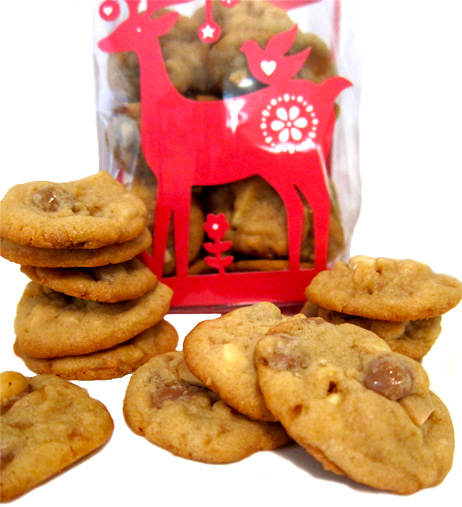
    Oh, I made up gift tins using small blank tins and printed labels on A4 paper. Clip art reindeer from Microsoft clip art.

    Goodness, this story is getting longer and longer I'll go before we hear the New Year countdown.

    Happy Baking :)

    *vanilla nutmeg filling; follow instructions for raspberry filling omitting the jam, raspberry puree and lemon. Once melted add one teaspoon of pure vanilla extract. Allow to cool until thick enough to spread. Grate fresh nutmeg on filling before sandwiching cookie.


    You might also be interested in making you own raspberry jam

    Got leftover custard powder, why not give 'Mum's vanilla slices' a try?

    Thursday
    Oct112012

    Caramel Cashew White Chocolate Cookies

    caramel cashew white chocolate cookies

    Join me on Facebook

    Mini cookies with a big caramel flavour today :) 

    I love the Christmas season; minimalists decide there is no such thing as too much tinsel, elegant women don flashing ruldolph pins (there might be Christmas cocktails involved in this), ditto with baking where your famous 85% chocolate fondant will be replaced with more than one can of sweetened condensed milk in some Christmassy treat.

    For me, I don't usually shop the commerical lollies isle... but at Christmas if it can be crushed, melted or thrown in whole it's included. 

    Today I utilised hard butter candies (Werther's Original) for their unmistakable caramel flavour and Nestle caramel bits, which are new to the Australian market. Oh, plus white chocolate and cashews "just because". 

    Nestle caramel bits and Werther's Original butter candies

    Caramel Cashew White Chocolate Mini Cookies 

    makes 4 to 5 dozen, plenty to pack up for Christmas gift giving

    Ingredients
    1 cup of Nestle caramel bits (caramel choc chips)
    1 cup white eating chocolate chopped into small chunks
    2 Werther's Original 50gram (1.75oz) rolls of butter candy  *ground to a fine powder
    1 cup dry roasted unsalted cashew nuts, roughly chopped
    2 cups plain flour (all purpose)
    1 tsp salt
    1 tsp baking powder
    250g well-softened unsalted butter (1 cup)
    2/3 cup light brown sugar
    1/4 cup dark brown sugar
    1/2 cup granulated white sugar
    1 tsp pure vanilla extract or essence
    2 tbsp water
    1 egg
    *I thought it would nice to include "bits" of candy, but as you can see from batch one... the candy melted/popped. Batch two; I ground the candies to a powder in the food processor to get the result I wanted. 


     Method

    Preheat the oven to 180C (360F).

    Sift together the flour, salt and baking powder into a bowl.·

    In a mixer, cream the butter and the three types of sugar. Add the vanilla extract, water and egg. Beat together until just incorporated.

    Beat in the flour mixture until just combined.

    Stir in the crushed/powdered candies, chocolate chunks, caramel bits, cashews. Drop small teaspoons of the mixture, well spaced, on to non-stick baking parchment.


    Three types of sugar used, dark brown, light brown and granulated white, you can replace dark with light if you can't find any at your local store.

    Bake for 6-8 minutes until golden around the edges. Cool on tray for 5 minutes, then transfer to a cooling rack to cool completely.

    Happy Baking :) 

    You might also be interested in brown sugar and making your own 

    Sunday
    Aug222010

    Bubble Wrap Chocolate Decorations for Cupcakes

                      assorted bubble wrap chocolate cupcake toppers


    Join me on Facebook or view more cupcakes in my Flickr gallery 

    POP!  POP!  POP! Is this you with a piece of bubble wrap? Stop your "popping" and start making bubble wrap chocolate decorations for your cupcakes. These super easy chocolate toppers are fun to make and I'm sure you have a secret stash of bubble wrap tucked away somewhere right?  

    All you need is a piece of clean bubble wrap and melted tempered chocolate.

    Place your bubble wrap bubble side up on a baking mat or tray.

    Spread your melted chocolate over the bubble wrap.

    Allow the chocolate to set and peel off the bubble wrap & voilà you have bubble wrap chocolate. Your piece of bubble wrap can be used over & over again.

    Want curved pieces? Then lay the bubble wrap with the wet chocolate side upwards over a rolling pin or small bowl, allow chocolate to set and peel away bubble wrap.

    Want coloured chocolate? The see "colouring chocolate"

    You can also cut your chocolate into shapes or shards; peel away bubble wrap from the chocolate when it is at the "just set" stage and before the chocolate is fully hardened. Use a sharp or serrated knife to cut the chocolate bubble pieces into shape. Or just break pieces off for abstract shapes.

    Make holes in your bubble chocolate by using a heated skewer or tip of a small knife to melt out the middle part of the chocolate bubbles. If you create very thin bubble sheets of chocolate you can pop out the centres with a piping tip etc without having to use heat.

    Bubble wrap chocolate has a variety of applications, all the way from making "coral" for sea scenes or bee hives to the most elegant cupcake decorations. 

    So why are you still reading this? Go on, hunt for that piece of bubble wrap and give chocolate bubble wrap a try. 

    Happy Baking :) 

    You might also be interested in;


    3D Twirly Swirly Chocolate Decorations  

    Or make a goldfish...

    and more chocolate with two ingredient Chocolate Soil 

    Saturday
    Jan162010

    Caramel Cheesecake Ice-cream Sandwich

    Caramel Cheesecake Ice-Cream sandwiched between white chocolate and macadamia cookies.
    43cel (109F); probably not the ideal day to bake cookies & churn ice-cream, but hey, I like to live dangerously!
    Poor churn and freezer struggled with the heat and we were all like little kids with ice-cream dripping down our arms as we ate them ;)
    I used canned caramel (Mark & Daniel do have a "thing" for it) in the ice-cream, but by all means you can swap it for any thick caramel dairy based sauce.
    Ingredients
    1 cup milk
    1 cup thickened cream
    1 1/2 teaspoons pure vanilla essence/extract
    125 grams  (4.4ounces) Philadelphia cream cheese, room temperature
    3 large egg yolks
    2/3 cup (130 grams)  white sugar
    1 can Nestle top 'n fill (Dulce de Leche)

    Method
    Open caramel can and remove 1/3 of the caramel to a small bowl, set aside. In a small saucepan, over medium-high heat, bring the milk, remaining 2/3 of the can of canned caramel & cream to the boil.  Remove from heat. 
    Using heat proof bowl in a stand mixer or a hand mixer beat the cream cheese, egg yolks & sugar for 2-3 minutes until light and fluffy.
    Gradually pour the milk mixture into the whipped mixture, make sure you keep mixing so the eggs don't end up scrambled. 
    Place the bowl over a saucepan of simmering water and, stir constantly with a wooden spoon, cook until the custard thickens enough that it coats the back of a spoon. 
    Immediately remove the custard from the heat and continue to stir the custard for a few minutes so it does not overcook.  At this point stir in the vanilla extract.  Cover and let cool to room temperature and then refrigerate the custard until it is completely cold.
    Transfer the cold custard to your ice cream machine and process according to the manufacturer's instructions. Whilst it is processing stir your reserved canned caramel until smooth. Once the ice-cream has churned fold/swirl reserved caramel. Store in a covered container in the freezer until ready to fill the sandwiches.
    White Chocolate and Macadamia Cookies
    Makes 8 (10cm/4in) cookies for 4 large ice-cream sandwiches
    2 cookie trays lined with non-stick baking paper

    Ingredients
    1/2 cup unsalted butter softened
    1/4 cup sugar
    1/3 cup packed brown sugar
    1 large egg, room temperature
    1 tsp vanilla essence/extract
    1 cup flour
    1/4 tsp bi-carb (baking soda)
    1/4 tsp salt
    heaped 1/4 cup of chopped white eating chocolate
    heaped 1/4 cup of chopped raw macadamia nuts
    Method
    Beat the butters & sugar in the bowl of an electric mixer on medium until smooth, add egg & vanilla, beat until combined.
    In a medium bowl sift together flour, baking soda & salt.
    Stir the dry ingredients into the creamed butter mixture, then mix in white chocolate & nuts.
    Pre-heat oven to 175c (350F). 
    Use an *ice-cream scoop to scoop 4 balls per tray, flatten slightly with the palm of your hand. Chill the trays in freezer for 15 minutes.
    Bake the cookies for 15-17 minutes, turning tray once during baking. Cool on cooling rack.
    Once cool, sandwich caramel cheesecake ice-cream between 2 cookies, repeat until all four sandwiches are complete. Wrap in plastic wrap & store in the freezer.
    *No ice-cream scoop or can't fit trays in your freezer?? 
    Alternatively you can after mixing in the nuts and chocolate form the dough into a disc, flatten, wrap with plastic wrap and refrigerate for one hour. Divide dough into 8 portions, roll into balls, place on trays, flatten slightly with the palm of your hand and proceed with baking in a pre-heated oven.
    cookie adapted from David Lebovitz The Perfect Scoop