Navigation
SEARCH
This form does not yet contain any fields.

    Entries by The Lone Baker (408)

    Sunday
    Feb012015

    Brûlée crusted Fig cupcake 

    Brûlée crusted Fig cupcake 

    Join me on Facebook

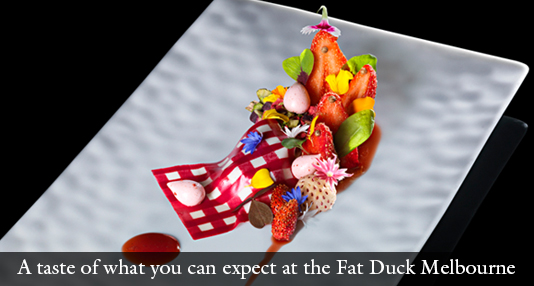
    Fresh fruit brulee crust ... yummm!

    Not too exciting if you are located in the UK but for Australian's "Yay" a range of Billingtons Sugar is available from Woolworths (at least in Victoria). The range includes the much coveted muscovado and golden caster sugar. 

    Now you can bake cake, desserts and the like from your Nigella, Jamie, Mary Berry and Paul Hollywood books without substituting ingredients. Plus the golden caster sugar makes for a fabulous brûlée crust when sprinkled on cut fresh fruit and given a quick torch. 

    Sprinkling cut fruit with *golden caster sugar and "torching" makes for a quick dessert cupcake topper.

    Whether from a kitchenware store or the hardware shop, mini blow torches make quick work of melting sugar into a caramel crust.

    Very ripe fruits only hold the brûlée for a few minutes before they start to dissolve into a lovely caramelly drizzle... perfect topper for dessert cupcakes, cheesecake or even a pavlova. My stepson (when he was old enough to wield a torch) loved making brûlée crusted banana slices to serve with vanilla ice-cream. Brûlée fruit is wickedly good on cornflakes, your porridge or morning yoghurt. 

    Today I used fresh figs, but halves of small ripe plums, or apricots, wedges of fresh peach, banana slices, orange segments and the like make a fab quick dessert. Cupcake bases that work well include almond sponge, vanilla sponge or butter cake, spiced and nut flour cakes. Ummm, something creamy for the topping is good, whipped cream, cream fraiche, a yoghurt whipped cream combo or perhaps your favourite butter cream. 

    Have your cupcakes ready and just before serving lay you pieces of fruit cut side up on a baking sheet. Sprinkle with golden caster sugar, liberally (but don't go crazy!!). Light your torch, pass the flame over the sugared fruit pieces (almost like spray painting, even sweeps) holding the tip of your torch 7-8 cm (around 3 inches) away from the sugar. You sugar will start to bubble and caramelise. All done,  just wait a few minutes before handling, sugar drips burn! Enjoy. 

    Happy Baking :)

    * can't get golden caster sugar? raw or white caster sugar work well or just plain white sugar in a pinch.  

    Ready to stretch your sugar skills? How about a toffee dipped hazelnuts or banana chips how to...

    Want to know more about brown sugar? Updated chart here 

    Thursday
    Jan292015

    Only a Time Lord knows what season it is cupcake

    'Only a Time Lord knows what season it is' Doctor Who cupcake

    Join me on Facebook

    You haven't even got time to put away your Christmas hat and it's time for Easter, well that's according to Australias major retailers. Hot Cross Buns and Easter Eggs have been on sale since January 5th. Easter Sunday is April 5th, Easter now runs a quarter of the year???

    Waiting in the queue at the supermarket... on the right of me a clearance rack of candy canes, on the left of me freshly baked hot cross buns, not forgetting the racks of foil wrapped chocolate easter eggs and the gaudy (or romantic... but it's the supermarket queue and romance isn't in the air) Valentines day cards.  

    But I did love Peter Capaldi in his first season as the Doctor in BBC's Doctor Who. So today we have a Time Lord figure. He started when I was practicing figure modelling and ended up being a center display cupcake for a Doctor Who cookie platter. 

    "Practice" it's boring I know, but it's how you get better. 

    I started with a print out of Peter Capaldi photos as the Doctor.

    Here is an earlier model of Peter Capaldi when I was toying with the idea of full caricature. The day was warm and he was still very soft and his hair is not attached as I was checking height.  I chickened out on the over blown features and went for a partial caricature... even then he had an eye removed and replaced after it looked, umm well I think the technical term would be "squiffy":) 

    You have to be fast!!! When working with fondant you have to be fast, drying time is in minutes for modelling. I used a 3 parts fondant to one part modelling chocolate to give me another 5 to 10 minutes to finish face. 

    Green: the green fondant here shows you the basic "eggish" shape most heads start with. I get ready with all the other pieces, such a nose, ears, eyebrows etc. You will have a series of wedges, beans, ovals and snake shapes. Then you start putting together and sculpting your head. I apply pieces with a small damp brush then use modelling tools and fingers to shape. You can give yourself a few more minutes by keeping pieces covered in glad wrap.

    If you don't use modelling chocolate mixed with fondant you might find yourself with the dreaded "elephant skin" as the fondant icing dries. 

    I use Bakels white fondant almost exclusively, colour with gel paste. CMC powder was mixed in the black and red fondant to firm.  

    Have fun, happy baking and do give modelling a figure a try :) 

    Proving I'm a bit of a sucker for a huge topper ... make  Eric the Valentine Emu

    or try a 'Love Caramel Cupcake' 

    Tuesday
    Oct282014

    Halloween Cake Lace Butterflies

                                   metallic cake lace butterflies 

    Join me on Facebook

    Can butterflies be creepy? I thought so when I was saying to a friend I was planning on making butterflies for Halloween, they disagreed but hey, I was determined to get more use out my gorgeous but expensive Claire Bowman silicone butterfly mat.

    Claire Bowman making cake lace butterflies

    As seen in the video, butterflies made the Claire Bowman way usually have a *first layer of pre made metallic icing and after baking a second layer of white cake lace icing. The second layer is to prevent brittleness, but since I haven't had a problem with the butterflies being brittle I just used one layer of silver.

    I baked the mat/butterflies for 5 minutes at 60 cel (140 F) . Leave to cool for a few minutes, check a butterfly by lifting a corner... they should peel off easily. If your butterfly still seems to soft, return to oven for a few more minutes.

    Once baked, I placed my butterflies on the back of an egg carton covered with plastic wrap to add shape.

    When fully set, a soft brush was used to dust on cake decorating black shimmer dust. The finished butterflies reminded me of vintage marcasite brooches. Attach the butterflies to cocktail and dessert glasses with a *tiny dab of cake glue and of course the butterflies make the perfect toppers for your Halloween cupcakes, chocolate truffles and cookies too.

     *for use on the glasses the single layer cake lace worked perfectly, staying firm and in shape all day. If you need to manipulate the butterflies further then I would recommended following Claire Bowman's instructions. 

    *make sure you only use a dot of cake glue if the butterflies become wet they will dissolve. 

    Happy Baking :)  

    You might also be interested in an attack of the swamp zombie cupcake

    or perhaps Poe is more to you liking with The Raven and Black Cat cupcakes

    Monday
    Oct202014

    Heston's Triple Cooked Chips

                                     heston's triple cooked chips with their crisp glass like finish

    Join me on Facebook

    Heston Blumenthal is popping up in my home state of Melbourne, well at least his world renowned UK restaurant 'The Fat Duck' is. For sixth months from February 15th 2015 the 'The Fat Duck' will be at Crown Casino. With only 16,000 seats available those hoping get a table must enter an online ballot. The ballot is open until midnight October 26th, if your successful break open your piggy bank to pay $525.00 per person without drinks. 

    Dang, I want to experience four plus hours and 12 - 15 magical courses but I might have to settle for Heston's triple cooked chips.

    Watch Heston himself make his chips, this video stops at final fry.

    Heston's Triple Cooked Chips

    Ingredients

    1 kg (2.2lb) of potatoes ...  (use the best frying potato in your area)

    Grapeseed oil for deep frying 

    salt

    chips cut not too big or too small ... shhh, I had a ruler out the first time I made them. 

    Method

    Put the cut chips into a bowl under running water for 5 minutes to wash the starch off. Ok, being on water restrictions a lot here, I caught as much water as I could and transferred it to the garden. 

    The weird step; Place 2 litres (8 cups) of cold tap water in a large saucepan and add the potatoes. Place the pan over a medium heat and simmer until the chips are almost falling apart (approximately 20–30 minutes, depending on the potato).

    Carefully, no really "carefully", remove the cooked chips with a slotted spoon and place them on a cooling rack to dry out. Then place the rack in the freezer for at least 1 hour to remove more moisture.

    Heat a deep-fat fryer or a deep pan no more than half filled with oil (to a depth of around 10 cm - 4 inches) to 130ºC (266F). Fry the chips in small batches until a light crust forms (approximately 5 minutes), remove from the oil and drain on paper towel.

    Put the potatoes on a cooling rack and place in the freezer for at least 1 hour. You can do this ahead and store the chips in fridge for up to three days. 

    Heat the oil in the deep-fat fryer or deep pan to 180ºC (356F) and fry the chips until golden (approximately 7 minutes). Drain and sprinkle with salt.

    I served the chips wrapped in food colouring printed newspaper, for a fun nostalgic presentation. 

    The best chips we have ever had... the most work for a chip... longest time investment for a chip... but oh baby it's a great chip! 

    Haven't entered the ballot yet and want to try for a booking ... head on over to The Fat Duck/Crown Melbourne.

    Happy Baking :) 

    You might also be interested in Nutella Dust

    Thursday
    Oct162014

    Half a Grasshopper Pie

                                                   Half a Grasshopper Pie

    Join me on Facebook. 

    Grasshopper Cocktail: The drink reputedly originated at Tujague's in the French Quarter New Orleans. The cocktail contains equal amounts of creme de menthe and white creme de cacao with added cream and shaken with ice.

    You start with the thought "I'm going to make Nigella Lawson's Grasshopper pie", that was until you realise you don't have and can't get some of the ingredients.... which brings us to today's recipe a "half a grasshopper pie".

    I thought I did, I thought I did... have whie creme de cacao. I didn't. We don't have Bourbon biscuits here but I'm Australian so dark chocolate Tims Tams it was. 

    Tim Tams: chocolate coated and chocolate cream filled biscuits (cookies) popular in Australia, use the equivalent in you country i.e. chocolate coated oreos. 

    We also don't have the mini white marshmallows Nigella uses here so I thought white soft eating marshmallows will do. Three supermarkets later I cannot buy white marshmallows, I can buy fruit swirled, chocolate dipped, pink and white mixed but no "white". 

    Yep, this is why I found myself separating pink from white marshmallows. I've since found out Aldi in Australia has white eating marshmallows... dang I should have asked my all knowing friend Jacinta first! 

    Half a Grasshopper Pie recipe

    1 loose bottomed 25x5 cm (10x2 inch) fluted tart tin

    300g grams (10.5oz) of chocolate coated cream biscuits (approx one and half packs of dark chocolate Tim Tams) 

    50g (1.75oz) of dark chocolate (I used Lindt 70%)

    50g (1.75oz) softened butter

    200g (7oz) grams soft white eating marshmallows (cut in half or quarters depending on size)

    2tsp of pure vanilla extract/essence

    80ml (2.7 fluid ozs) green creme de methe 

    125ml (4.22 fluid ozs) milk

    375ml (12.7 fluid ozs) thickened cream

    few drops of green food colouring

    *optional vanilla whipped cream, fresh mint and chocolate curls to serve


    oiled scissor blades make short work of cutting marshmallows 

    Process the chocolate biscuits (cookies) with the chocolate in a food processor until it's a rough crumb, add the butter and pulse until it just comes together. 

    Base processing finished and ready to press into shell. 

    Using the back of a spoon or your hands press the crumbs evenly around the base and sides of fluted tart tin. Make sure you press firmly, particularly around the edges coming up the sides. Refrigerate the base. 

    Put the cut marshmallows with the milk in a small saucepan, *over low heat. Once the milk starts to foam around the edges, remove from heat and stir marshmallows to completely melt in. Pour into a heat proof bowl, stir in the creme de menthe, vanilla and green food colouring if using. Set aside to cool. 

    Whisk the cream until soft peak stage (it will hold it's shape but drop gently off a spoon), add cooled marshmallow mixture. Whisk until combined but not over beaten. 

    Pour mixture into chilled crust. Spread lightly to fill shell evenly, create a few swirls or smoother finish... whatever you prefer.

    Refrigerate pie a minimum of four hours, use a plastic dome lid or aluminium foil to create a dome over the pie. You don't want the surface to be touched.

    When ready to serve either top with crushed chocolate biscuits (cookies) or as I did with a dollop of vanilla white cream, chocolate curls and a fresh mint leaf. 

    * Trouble shooting: gentle, gentle heat melting marshmallows if the mixture boils the marshmallows don't reset. 

    * a delicate texture similar to a Sara Lee Bavarian dessert, this pie needs to be refrigerated... it will collapse if left in a warm place. 

    Was the pie worth it? Absolutely!!  Happy Baking :) 

    You might also be interested in Ode to Bounty Bar cupcakes   

    Tuesday
    Oct142014

    50 Shades of Grey cupcake

    50 Shades of Grey cupcake

    Join me on Facebook... still the fastest way to have your questions answered! 

    Another Monday at the nursing home, By the Light of the Silvery Moon tinkles in the main rooms piano sing-a-long session, yet a short distance away rap in the way of Kanye West Bound 2 is blaring from one of the residents rooms. It's a 50 shades of Grey cupcake idea in the making! 

    I've been gone for almost a year, during that time my Dad has gone into a nursing home with dementia and my health has deteriorated, leading to time split between doctors, hospitals and the nursing home. It's baking and cooking that have kept me going throughout and I'm so excited to be back!! I've learnt lots of new techniques to share with you, and of course I'll have to do a Halloween cupcake or two in the next week.


    Definitely aiming for ummm "slightly" more detailed tutorials than this... but it's first day back and I'm out the swing, or is that the loop? Oh you know what I mean. The elderly lady is a "marked head" figure, roll a ball of fondant and mark out eyes, nose, mouth with a toothpick, piping tip or cake tool. This type of head is quick and useful, it can be a man, woman, baby even a dog.  

    I'm so looking forward to getting back into all things bakerrrrrryish.  

    Happy Baking :) 

    You might also be interested in Hippy Dippy using a clay gun to make hair, wool, grass etc. 

    Tuesday
    Nov052013

    Chocolate Soil 


    crystallised chocolate soil 

    Join me on Facebook or view my Flickr Gallery

    A two ingredient chocolate soil, I'll give you all the dirt today (ok couldn't resist) on how make it with the least amount of cleaning up.  

    With chocolate soil you can add crunch and texture to a plated dessert, make pot plant cupcakes, set up a garden scene for your cake or perhaps just sprinkle on your favourite ice-cream. 

    Flavour it up; you can use a flavoured dark chocolate i.e. blueberry, orange, mint etc for flavoured soil or add your own flavour by stirring in cinnamon, ginger, chilli flakes, a drop or two of peppermint oil or whatever takes your fancy. 

    We are aren't going to use a *candy thermometer, we are going to do this by eye... a photo will act as your guide. 

    Here we go...

    Chocolate Soil 

    Ingredients

    100g (3.5OZ) Caster Sugar

    75g (2.6OZ) Dark Chocolate roughly chopped (even if you don't usually like 70% dark chocolate, I would recommend using it here because your are adding sugar to counteract the bitterness)

    Tools.... a wire whisk and a baking tray lined with non stick paper ready for you to tip your completed soil on. 

    Method

    On you stove top in a small to medium saucepan add the caster sugar, gently pour in 2 tablespoons of cold water. We are being gentle so we don't splash sugar crystals on the side of the pan.

    Turn on your heat to high and you are going to just let it do it's thing without stirring, the sugar will dissolve and bubble and boil until you see "golden brown edges". 

    the center of the boiling sugar is still clear, the edges have changed to golden brown. 

    have your roughly chopped chocolate ready to go

    Immediately remove saucepan from the heat and all at once whisk in the chocolate, along with any flavouring if using. Don't forget to whisk around the edges. Whisk until all the chocolate is coated, this doesn't take long ... a couple of minutes.

    it starts to look like "soil" almost instantly 

    Yep, you're done, it's finished and ready to poured onto your non stick paper prepared baking tray to cool.

    finished chocolate soil

    Once cool, store in an airtight container for up to a week, or freeze up to a month.

    *I've adapted this recipe from Heston Blumenthal's chocolate soil... halved the sugar and made it a simpler soil. His recipe has many more elements and is part of his wickedly delicious tiramisu recipe. Check out Hestons tiramisu on SBS food

    Clean up tips: Remember how we cleaned up our sugar work saucepans? It's the same today, fill your saucepan with water, bring to the boil, empty the water out and wash as per usual. Clean your whisk the same way, boiling water will remove any stuck on crystallised chocolate.

    *really want to, need to, use a candy thermometer... 135 cel or 275 F. 

    Happy Baking :) 

    You might also like to make fast bubble sugar decorations/toppers.

    Make quick and easy faux gingerbread mushrooms

    You've made the soil now make the dust... Nutella dust 

    a change from chocolate? Make a fondant gold fish! 

    Friday
    Nov012013

    Heston Mince Pies with Pine Sugar review

                   pack of six Heston mince pies with pine sugar

    Heston Blumenthal, is an English celebrity chef and owner of The Fat Duck, a three-Michelin-starred restaurant in the UK. Heston has written many cookery books, appeared in many TV cookery shows including regular appearances on MasterChef Australia. 'Heston' is a ready made range of food produced for Waitrose an upmarket range of British supermarkets .

    Join me on Facebook

    Oh, I missed out on these pies last Christmas so I was excited to see them in the local supermarket today. Straight home to open the pack and popped them into the oven to warm. Ahhh, tragic I know that I'm excited about fruit mince pies but I do love Heston Blumenthal, the theatre, the magic, the great food. 

    Lets start with the pastry on these little fruit mince pies, puff pastry replaces the regular short crust. Now being a lady (I am so!!), my first bite contained pastry, just pastry. It's not particularly buttery, it is umm, nice and "puffy" ;) Back to the "being a lady" your last bite is all pastry too. The kind of pie you need to have a drink with or provide cream/ice-cream to get it down.

    Hmmm, the side of the box promises fruit mince filling with 'the added ingredients of lemon curd, rose water and apple purée'.... the ingredient list includes citrus oils, juices and zest. This is sounds lovely and I want that fruit mince pie, what you actually get tastes pretty much like the filling of any good commercial fruit mince pies... I missed the citrus and the promised rose water.

    The pine sugar for sprinkling does deliver a "fun factor", when sprinkled on the oven warmed pies the aroma is "Christmas" and it provides a much needed flavour boost.  The sugar alone (ok I put it on a spoon and ate it which you aren't going to do) is heading towards loo cleaner... not that I have eaten loo cleaner but you know what I mean. 

    All in all, the pies are just ok, they look pretty and the sugar element is fun. 

    In Australia from Coles Supermarkets

    You might also be interested in fruit caviar 

    Or make some Nutella dust 

    Thursday
    Oct312013

    Happy Halloween 

                   the continuing adventure of the Gingerbread man

    Join me on Facebook 

    The Gingerbread man is still on the run from his first blog appearance Christmas 2009.
    Caught up with him in Egypt in 2010.

    Lost him in 2011 but found him under attack by Zombies in 2012.

    This year I thought I'd cut him a break and let him cut himself a costume to do some Trick and Treating. 

    Happy Halloween :) 

    You might like to do some "gingerboy eating" with this chocolate truffle ginger cupcake recipe

    Tuesday
    Oct222013

    Catrin Day of the Dead Cupcake

    catrin day of the dead cupcake

    Join me on Facebook

    Day of the Dead (Spanish: Día de los Muertos) is a Mexican holiday celebrated throughout Mexico and around the world in other cultures. The holiday focuses on gatherings of family and friends to pray for and remember friends and family members who have died. November 2nd is the official date for Day of the Dead, it is celebrated between October 31st and November 2nd.

    In 2013 Day of the Dead celebrations begin November 1st and finish November 2nd. 

    I've made a Cartrin this year, because a lady needs a dance partner. 

    Made in the same way as the Catrina skull last year, you start with a white egg shaped piece of fondant or modelling paste.

    Roll small sausage shapes and add to the skull to build up features. Use your finger tips and modelling tools to blend and shape the skull. Use a toothpick to mark out cracks and scratches on the skull.

    Start the body with a torso shaped piece of fondant or puffed rice treat. If using puffed rice treat, cover with a base layer of fondant first. Cut a vest and apply with damp brush, I had imprinted the rolled fondant so I dusted with green lustre dust at this stage to bring out the pattern and add depth of colour. Small balls of fondant were marked with a toothpick and attached as the buttons.

    Make white collar for the shirt, attach. Proceed to make the jacket, again attaching with a brush barely dampened with water.

    Bow tie is made with two rectangles, the larger one is pinched in the middle and shaped. The smaller one is wrapped around the center of the large one.

    Make pocket handkerchiefs with small triangles, attach to jacket and then attach false pocket flap to the top.

    For the hat I used puffed rice treat to reduce the weight, I know he is a skeleton and all but I didn't want to squoosh his head. Squeeze and shape the puffed rice treat into a top hat, cover with fondant. Make a band and brim with fondant.

    For the buttonaire see Catrina Cupcake  

    Leave the pieces to dry, supported where necessary to keep the shapes. Once dry use dusts to shade the piece and insert either a strand of dry spaghetti or a small wooden through the whole piece and attach to your cupcake.

    Happy Baking :)  

    Amazon has a range of day of the dead figures... click on the Senorita to visit Amazon :) 

    You might also be interested in a recipe for quick and easy Chocolate Peanut Spiders for the kids and young at heart.

    Page 1 ... 5 6 7 8 9 ... 41 Next 10 Entries »